
No One Wanted This Hutch- Makeover with Beyond Paint
Disclosure: This blog contains affiliate links. I will receive a commission for items purchased through these links at no extra cost to you. I appreciate your support. Please read all labels and follow all manufacturer safety recommendations when working with paints, stains, and other equipment
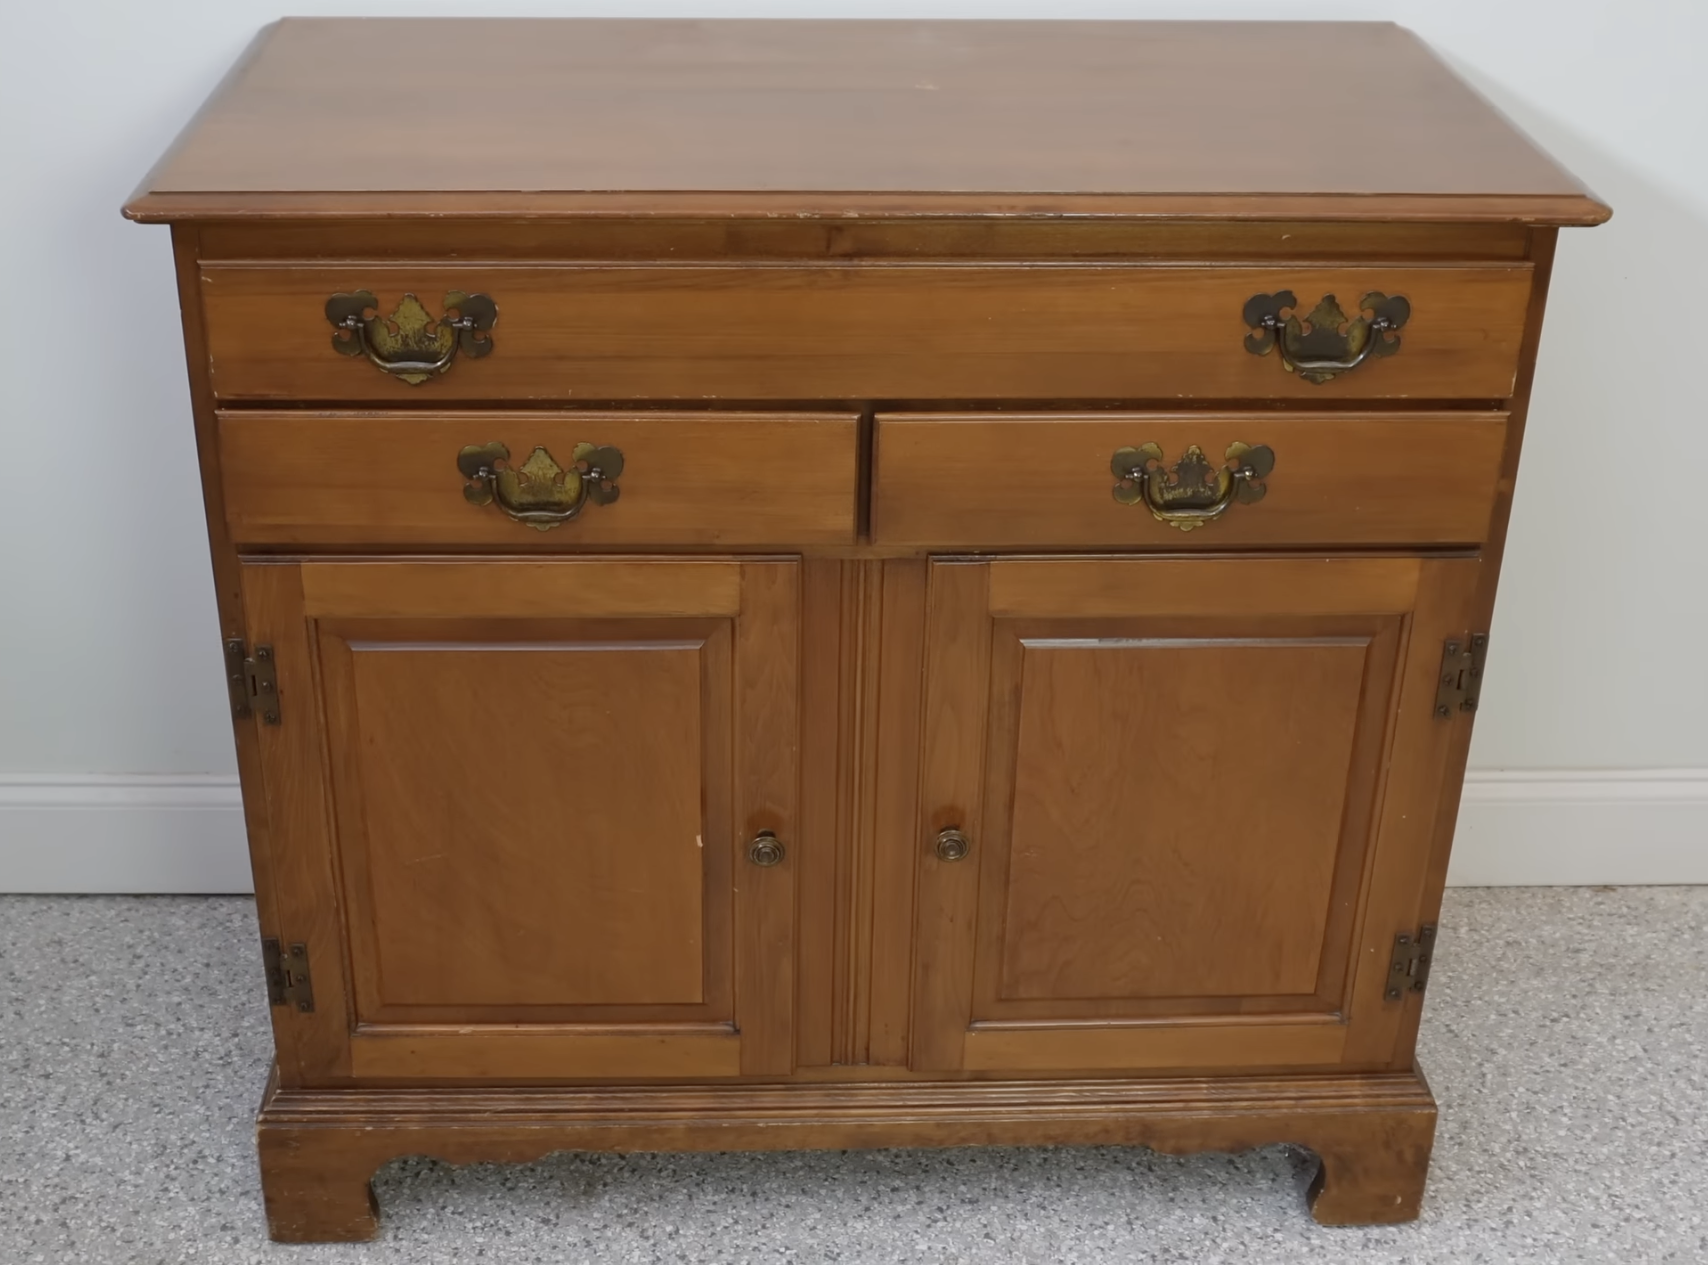
Today's furniture adventure took me to the thrift store, where I stumbled upon a dated hutch that nobody wanted. In fact- it had been sitting there so long they had it deeply discounted. I was able to purchase this piece for $40- which is a bargain in my area! I immediately noticed the potential of this dated piece and decided to turn it into a changing table for a nursery with the help of Beyond Paint.
Supplies
Beyond Paint Deep Blue ***Use code CHRISTINA for 20% off for a limited time ***
Plastic Wood Natural Wood Filler
Brainerd Brushed Brass Modern Orb
Brainerd Brushed Brass Square Pull
Getting Started
I've been a fan of Beyond Paint for about four years now and have completed multiple makeovers using their one step paint. This paint is a game-changer for furniture makeovers because it does NOT require you to sand, prime, or paint your furniture- it’s all built into the paint! Plus, it's easy to apply, low VOC, and cleans up effortlessly. These features make it perfect for beginners because you don’t need to purchase a bunch of different supplies to complete the makeover and it can be completed quickly.
Beyond Paint is now available at Lowe's! I headed over to my local Lowe’s store to pick up my supplies for this makeover- super convenient!
Before I got to painting, I started the most essential step of making over the hutch: prep work and cleaning. This step is vital and should never be skipped. A clean piece of furniture will allow the paint to adhere better and will help it to stand the test of time.
After taking off the old hardware, I cleaned this hutch thoroughly with my favorite degreaser (Simple Green) to remove dirt and grime. I followed up the cleaning by wiping the entire piece with clean water to make sure there was no residue left behind.


This hutch has some wear and tear so I filled in any nicks and dings with my DAP plastic wood filler and sanded everything smooth.


Using Beyond Paint means I don’t have to sand my piece, however- the top of this hutch had some significant scratches so I took my orbital sander to smooth those out.

I wanted to git rid of the scallops on the base of this hutch, so I got out my jig saw and cut some angles to modernize the style of this piece. Once I had made my cuts, I used my orbital sander again to smooth them out.


Painting with Beyond Paint
Now that the prep work was done, it was time to paint. I chose the Deep Blue color from Beyond Paint to add a bold statement to the hutch. I thought this was the perfect shade for a nursery, but also versatile enough that it could be used in other areas of a house as well. The only supplies you need to use Beyond Paint are their tool kit which includes a paint tray, chip brush, and a microfiber roller. Using my microfiber roller and chip brush, I applied the paint in smooth, even coats. The built-in sealer meant I didn't need to add a topcoat, making the process even easier.

The coverage with Beyond Paint is impressive. With just two coats, I was able to get beautiful even coverage on this piece.


This paint has a unique texture to it: when you pour it out of the can it looks like pudding, and when applied it looks like an orange peel texture. Don’t be fooled by this! Beyond Paint is self leveling and designed to fill in imperfections in the furniture.


When you apply Beyond Paint, it is important to apply the paint in details of your furniture using a stippling motion with your chip brush and then you can smooth it out using your roller.

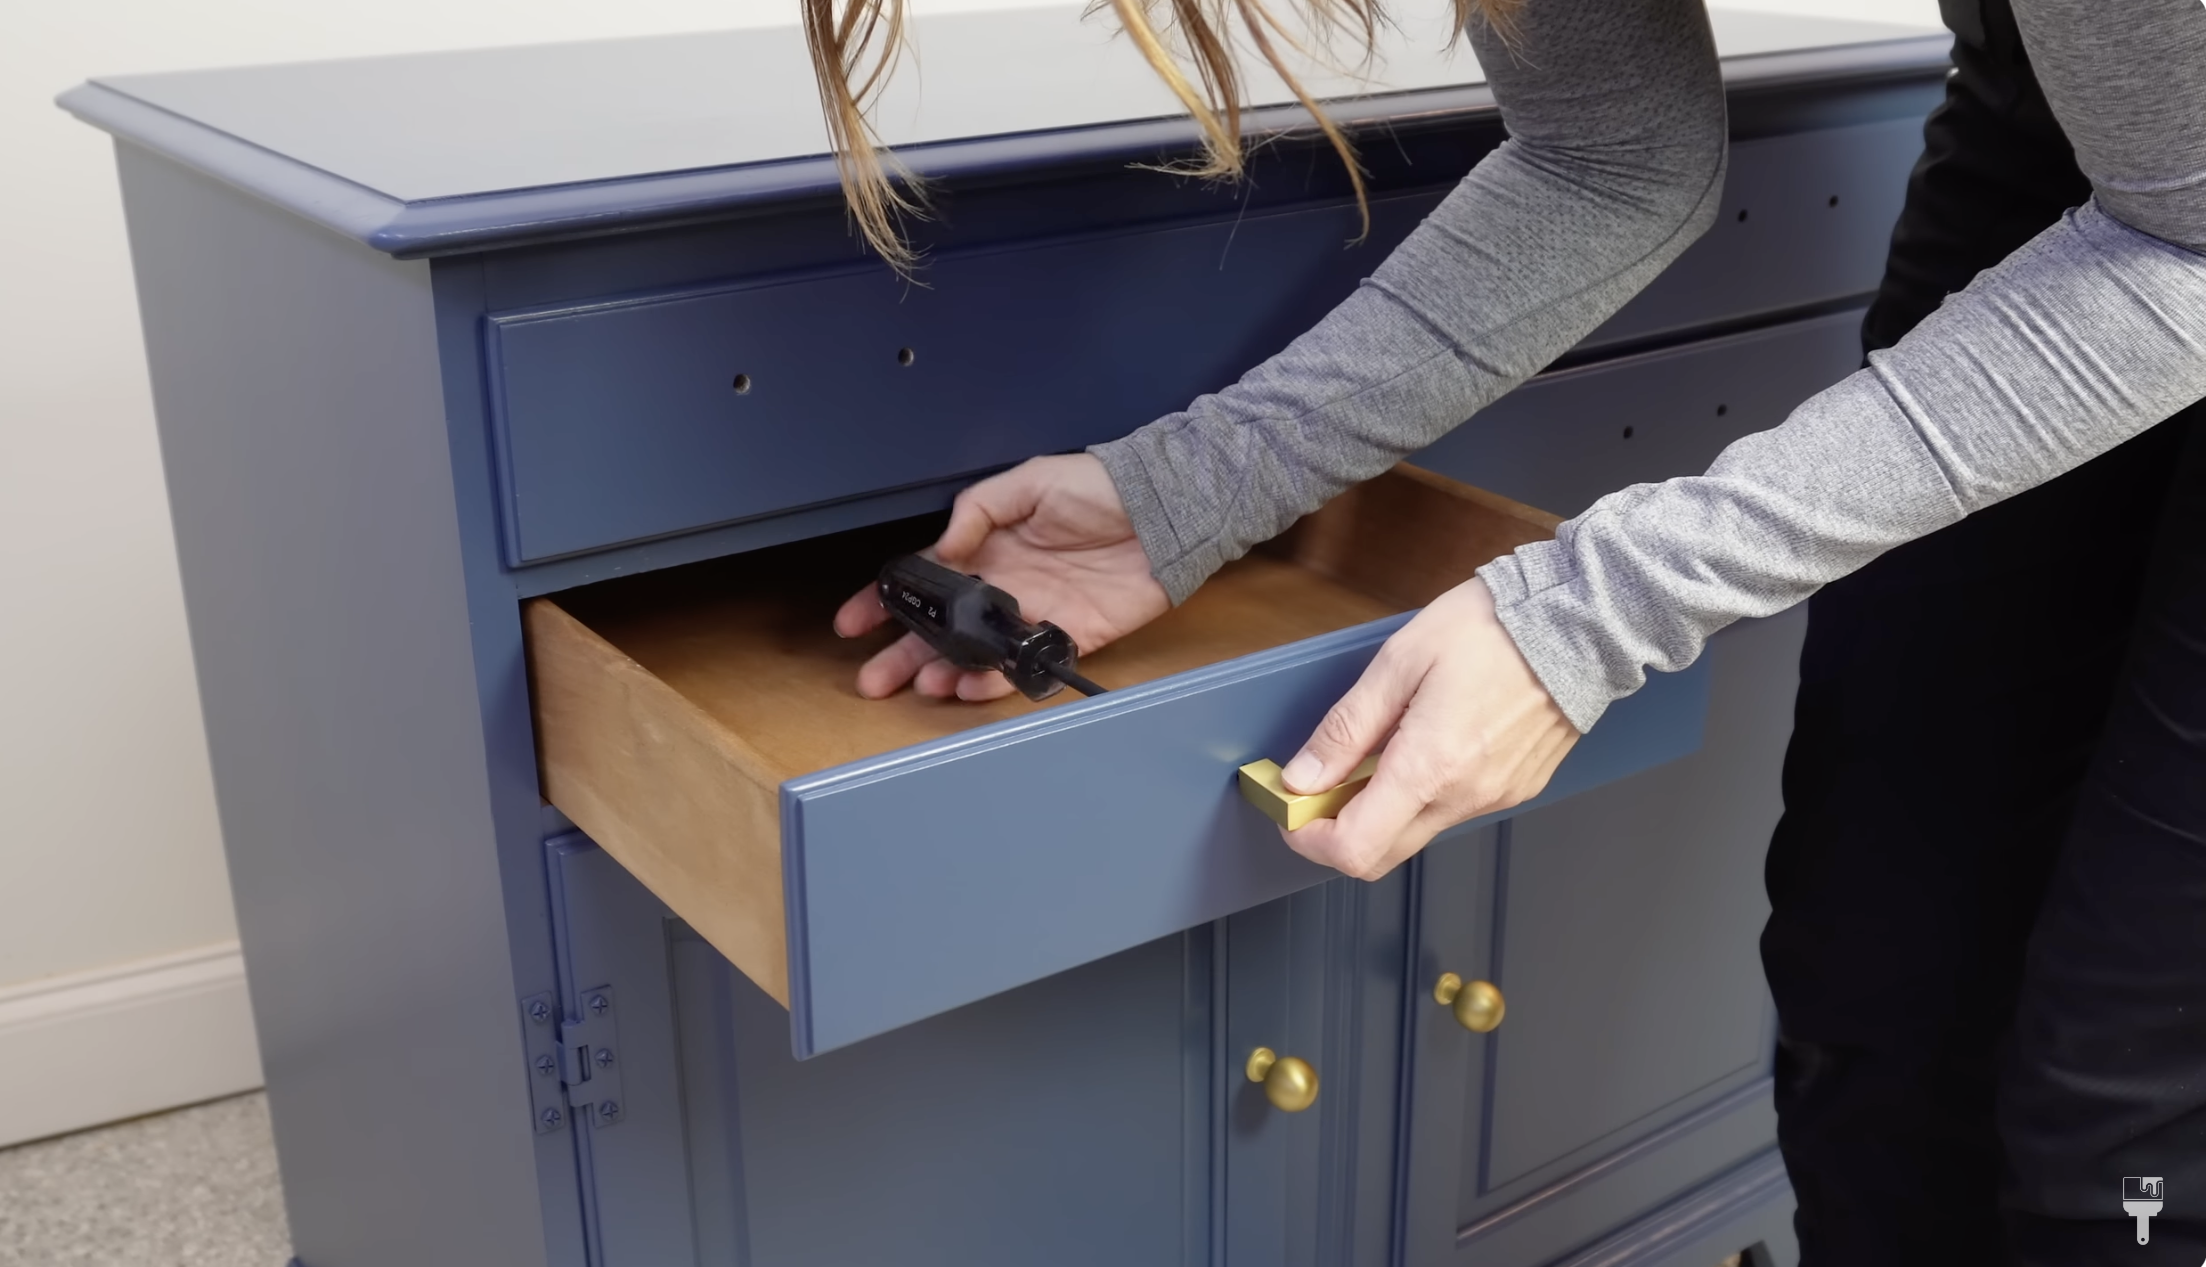
After two coats of paint and letting it dry overnight, the hutch was ready for its new hardware. I opted for brushed brass handles to complement the blue color. Then, I added stoppers to the drawers to prevent chipping when opening and closing.


Versatile Styling Options
The best part? This transformed hutch can be used in multiple ways. As a changing table for a nursery, an entryway showpiece, or even as a wine or coffee bar. I styled it in various settings using a fun AI feature on Instagram to showcase its versatility. I am so pleased with how this project turned out!


Final Thoughts
This DIY project proves that with a little creativity and the right tools, you can turn overlooked furniture into something special. Beyond Paint made the makeover a breeze, and I'm thrilled with the results. So next time you're at the thrift store, don't pass by that dated piece—see it as an opportunity for a fun DIY project!
Thanks to Beyond Paint for sponsoring this transformation. You can watch the full video tutorial on my YouTube Channel.
Stay tuned for more DIY adventures, and happy painting!