
Creating Custom Plank Wood Wall Art for Your Home
Never underestimate the power of scraps. I was able to create the most awesome custom wood wall art for my nursery for super cheap. It was time consuming but easy. You don't need to be handy or crafty to tackle this project.

Here is what you will need:
Wood planks (I used scraps I had from a previous project)
Some tools (saw or circular saw, hammer and nails or drill and screws)
Sand paper (I used my
)
Wood stain
Natural bristle brush
Scrap cloth
Acrylic or other decorative paint
Small detail paint brush
Computer and Printer
Pencil
Pencil Sharpener
Hooks and picture wire (if you plan on hanging your piece)

So, I enlisted my hubby to assist in the assembling of my board. He took the scraps from above and cut them in half with his circular saw. He trimmed up the edges so they would all be around them same length, but I wanted it to look pretty rustic so the edges don't line up perfectly. To attach the planks together he used three thin scraps on the back and hammered them into each plank. You could also use screws and a drill. Just make sure your screws or nails are short enough that they aren't going to pop through the front of your board.

Once it was assembled, my next step was to sand. Again, I was going for a rustic look so I lightly sanded with a medium grit sandpaper in 150. I wanted to keep all the dings, cuts and glue on the sides (remember I am using scrap wood) to give it some character. I used my
that you have heard me rave about before, but you can also use a little elbow grease and a plain piece of sandpaper. If you are a DIY maven like me, it is worth the $50 to invest in this sander. It makes projects so much easier. After sanding, make sure to wipe it down with a cloth to remove all the dust before staining.

This was my first time working with stain, and it was a lot less intimidating than I thought it would be. I watched a couple of YouTube videos from Minwax and jumped right in. For my first coat, I used
Minwax Interior Wood Stain in Special Walnut
. I simply followed the directions on the can by applying it with a natural bristle brush designed for applying stain, let it set for about 5 minutes and then wiped it down with a cloth to remove the excess stain. Here is what it looked like once I was finished.

After, I let this dry for six hours, I decided to do a second coat with
Minwax Interior Stain in Weathered Oak
to tone down the walnut color and give it a more aged, barn wood look. I applied this stain the same way as above but let it set for 20 minutes before I wiped it down with my cloth. I know you can't see a huge difference in these pics since they were taken in a shop room with no windows, but trust me the effect I achieved is worth this second step.

Since this will be hanging on a wall inside, I decided not to varnish it. Again, going for rustic here. I am applying a verse to my board for my
I have been working on, but you could literally put anything on here you want from a phrase to an image. Use your computer to create your art or sketch it out yourself. I just created mine in Pages on my Mac using one of my favorite fonts, American Typewriter.

Once you have your image all set flip it over and rub pencil over the area you will be tracing. Don't be shy. Really slap that lead on there.
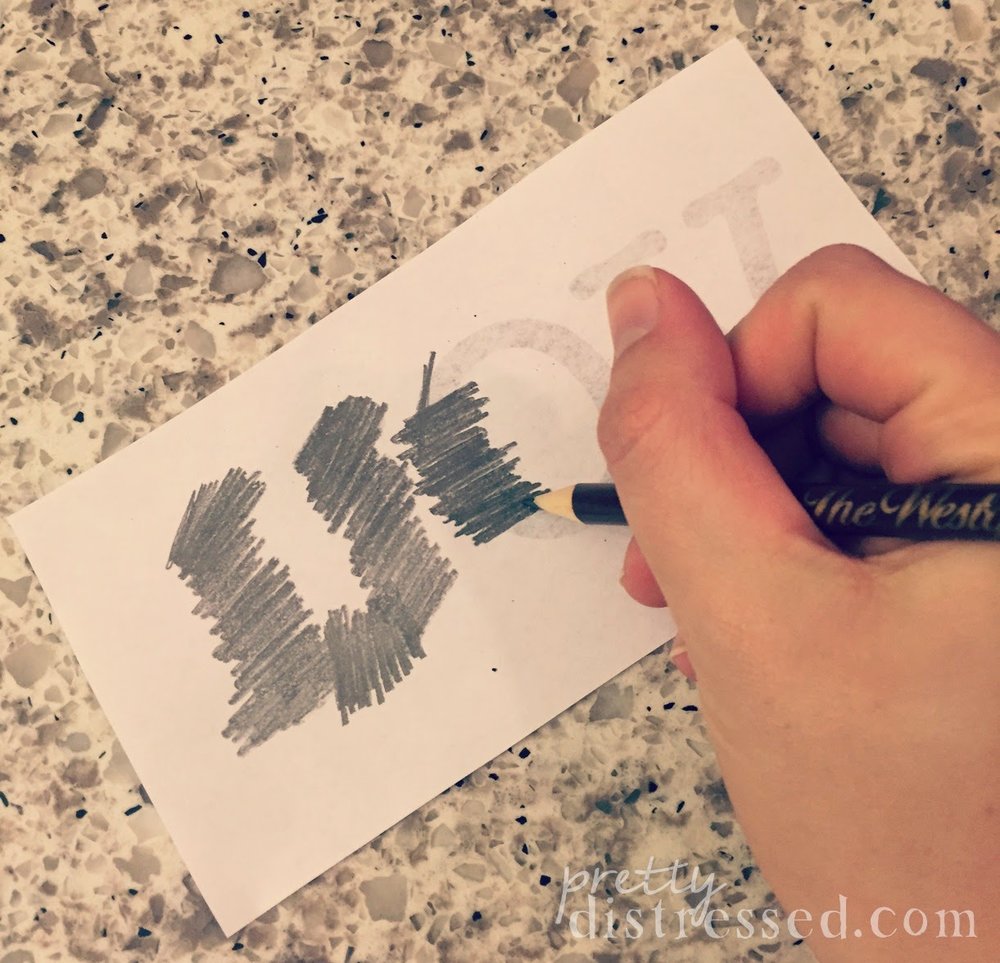
Next, place it back on your board with some tape and trace the outline. Again, use a heavy hand.

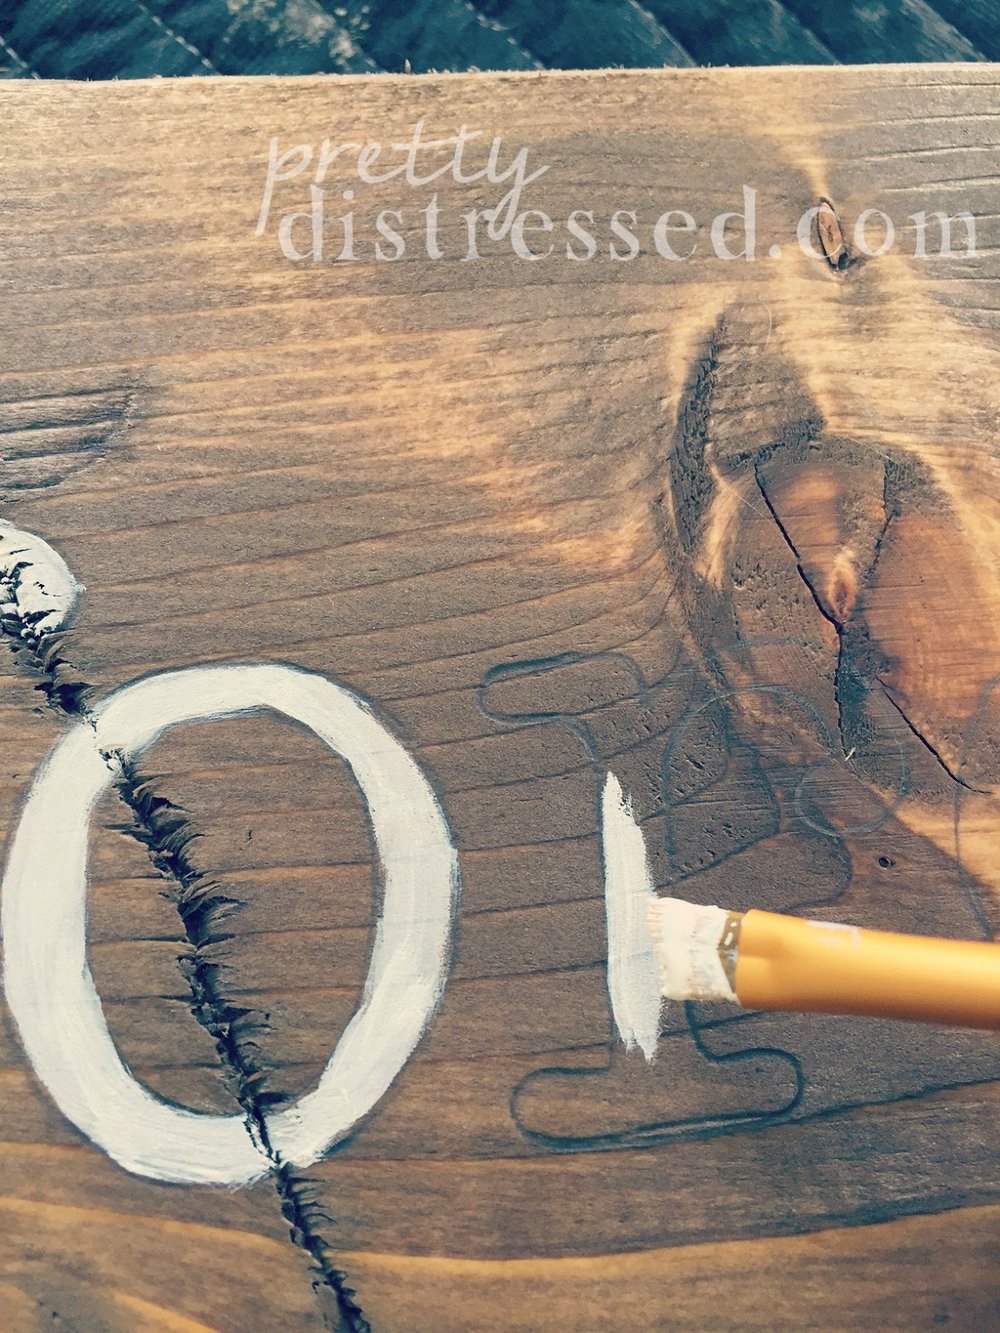
Look at this magic. Your image should now be visible on your board.

Now, you can fill it in anyway you want. I used a can of my
Americana Decor® Chalky Finish Paint
in Lace and Serene because I had it on hand, but you could any type of craft paint that works on wood.
I just love the finished product. I will be hanging this on the wall in my nursery, so I plan on attaching some hooks and picture wire to the back that I picked up at Hobby Lobby. But I think it looks great propped up on a dresser or shelf as well. Here is what I used on the back of mine.

Ook D Ring

Ook Hanging Wire (50lb. support)


I can't believe how inexpensive it was to create this custom wall art for my nursery. I had most of the items on hand, and the only thing I spent any real money on was the stain. Overall, I think I spent around $15 for my supplies. Stay tuned to see a pic of this project in its true home when I give you a tour of my nursery next week.

Disclaimer: This post contains affiliates links. I may receive a small commission from products you purchase after clicking on its associated link.