
DIY Distressed Sliding Barn Door
So sliding barn doors are everywhere these days. It used to be the case that if you wanted one you had to shell out some serious bucks. Even if you opted to make your own door, you still had to drop a lot of money on the hardware. Not anymore, there are actually a lot of affordable options for sliding hardware now and a lot of big box places even carry them in store. Lucky for me, this helped me get this idea off my Pinterest board and into our master!


I am blessed to have an ensuite bathroom in our master, and it is a decent size but it is fairly narrow. The door opened into the bathroom right up against the shower which made it very crowded. It was also difficult to keep the door open to keep an ear out for my kids anytime I was in the shower. And the door would always shut while I was trying to get ready at the sink. I first saw a project like this on I Hate my Bath on HGTV a couple of years ago. I knew it would clear up a lot of these problems and make our narrow bathroom seem much larger. After enough begging, my husband finally gave in and helped me build the door.
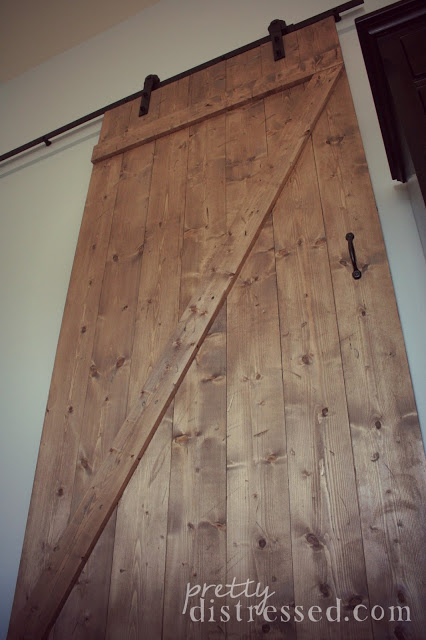
To build the door, my husband bought 1 in. x 6 in. x 8 ft. common board from Home Depot. A good thing to know is that the actual measurements of these boards is .75 in. x 5.5 in. for when you are measuring out how large you want your door. Ours is 77" x 38" or seven boards wide. My husband is a "figure it out as you go man." I showed him some images of what I wanted and he went to work. For those of you who need a little more help than that these plans from Brandi Sawyer at Nest of Bliss will help you build a door that looks just like ours.

I wanted the door to look old and distressed like a real barn door, so we took a hammer to it and roughed it up. My husband took the hand saw and made some cool marks with that as well. Don't think too much about it if you want to do the same thing. Be random and don't be afraid.
To achieve that aged wood look I mixed my own stain. I used Minwax Wood Stain in Classic Gray and Special Walnut. I used a 5:1 ratio to mix them respectively. If you want an aged look you need a lot of the gray. Mix your stain in a separate cup. Just add a small amount of Special Walnut at a time and test out the color on scrap board. The color darkens the more you let it set on the wood, so play around and find the perfect shade before you commit to staining the whole door. I didn't use a pre-stain to treat the door. When you are going for an aged wood look, I find it better that the finish is uneven. It makes it look more natural.

If you are not into building your own door, and you have some money to drop on a project like this. Check out some of these built, stained and ready to hang doors from Amazon.

Dogberry Collections Mod-Z Barn Door - $722

Dogberry Collections Country Vintage Door - $623

Dogberry Collections Modern Slab Door - $796
We bought the TCBunny Sliding Door Hardware Closet Set Antique Style in black from Amazon for under $100. We found the instructions that came with the door are not that helpful. My husband decided to screw a 2 in. x 4 in. board into the wall at each stud. I painted it the color of the wall before we screwed it in. Then my husband hung the sliding door hardware on there. It is very secure and could hold a really heavy door.

I got my rustic looking pull from Menard's for under $5, but here is an option you could order right from Amazon that is very similar.


I am so happy with my door. It cleared up the space issue in my bathroom, and it adds a lot of character to our pretty basic bedroom. Can you think of a room that could benefit from a sliding door in your house?
*This post contains affiliate links. Clicking on a link and purchasing an item may result in a commission for Pretty Distressed.