
Using Epoxy to Create a Faux Marble Top: Glam Desk Makeover
Disclosure: This blog contains affiliate links. I will receive a commission for items purchased through these links at no extra cost to you. I appreciate your support. Please read all labels and follow all manufacturer safety recommendations when working with paints, stains, and other equipment
Hey there, it's Christina from Pretty Distressed, and today I am thrilled to share with you an exciting furniture makeover project. In this video, I'm taking you on a journey as I transform a tired and well-loved desk into a stunning piece of home decor. My mission? To give this desk a fresh and fabulous marble-inspired makeover using epoxy resin. Buckle up, because this furniture transformation is about to blow your mind.

Before we dive into the nitty-gritty of the makeover, let me give you a little background. This desk has quite a history on my YouTube channel. I acquired it for a mere $40 on Facebook Marketplace, and it has already undergone two makeovers. However, my daughter's artistic endeavors have taken a toll on it, and she promised not to paint on it anymore if I gave it a makeover. Challenge accepted!
Supplies
Simple Green Lemon - https://amzn.to/3IezuPj
TotalBoat EPOXY WHITE MARBLE EFFECT COUNTERTOP KIT - https://www.totalboat.com/collections/epoxy-project-supplies/products/epoxy-white-marble-effect-countertop-kit?sca_ref=3887562.O2NCblnpIa&sca_source=youtubejune2023
TotalBoat Flexible spreaders - https://www.totalboat.com/products/flexible-spreader-set?sca_ref=3887562.O2NCblnpIa&sca_source=youtubejune2023
Zinsser Bullseye 123 - https://amzn.to/3N3pR7S
HGTV Home by Sherwin Williams Door & Trim Paint REDEND POINT HGSW9081
Wagner Flexio 3500 (Detail Finish Nozzle) - SIMILAR https://amzn.to/45UM8xe
Painter's Tape and Plastic - https://amzn.to/3NmexoF
Surf Prep 3" x 4" Electric Ray (Use Code PRETTYDISTRESSED10 for 10% off your order) - https://surfprepsanding.com/product/woodworking-sanding-systems/?aff=26
Step 1: Cleaning and Prep


The first order of business was tackling the desk's sorry state. Years of use and artistic exploration had left their mark, so I turned to my trusty cleaning sidekick, Simple Green. Diluting it to a one-to-one ratio with water, I cleaned away layers of paint, dirt, and grime. The lemon-scented version not only cleaned like a champ but also smelled divine. Afterward, I rinsed the desk with clean water, leaving it squeaky clean and ready for the next steps.
Step 2: Scuff Sanding and Priming


With the desk now clean, I started on the prep work. I used my sander to give the entire surface a scuff sanding with 220-grit sandpaper, creating a perfect canvas for what was to come. To ensure the best results for my pink and marble transformation, I applied a white water-based primer to provide a solid base for adhesion. This step also helps with the epoxy application later on.

Step 3: Painting
It was finally time to bring in some color! I opted for a trendy shade called "Ravishing Coral" for the desk's new look. Using a fine detail nozzle on my sprayer, I applied this vibrant color with ease. The paint, a trim and door enamel, would provide a durable semi-gloss finish that required no topcoat, making it perfect for my daughter's desk.

Step 4: Epoxy Magic
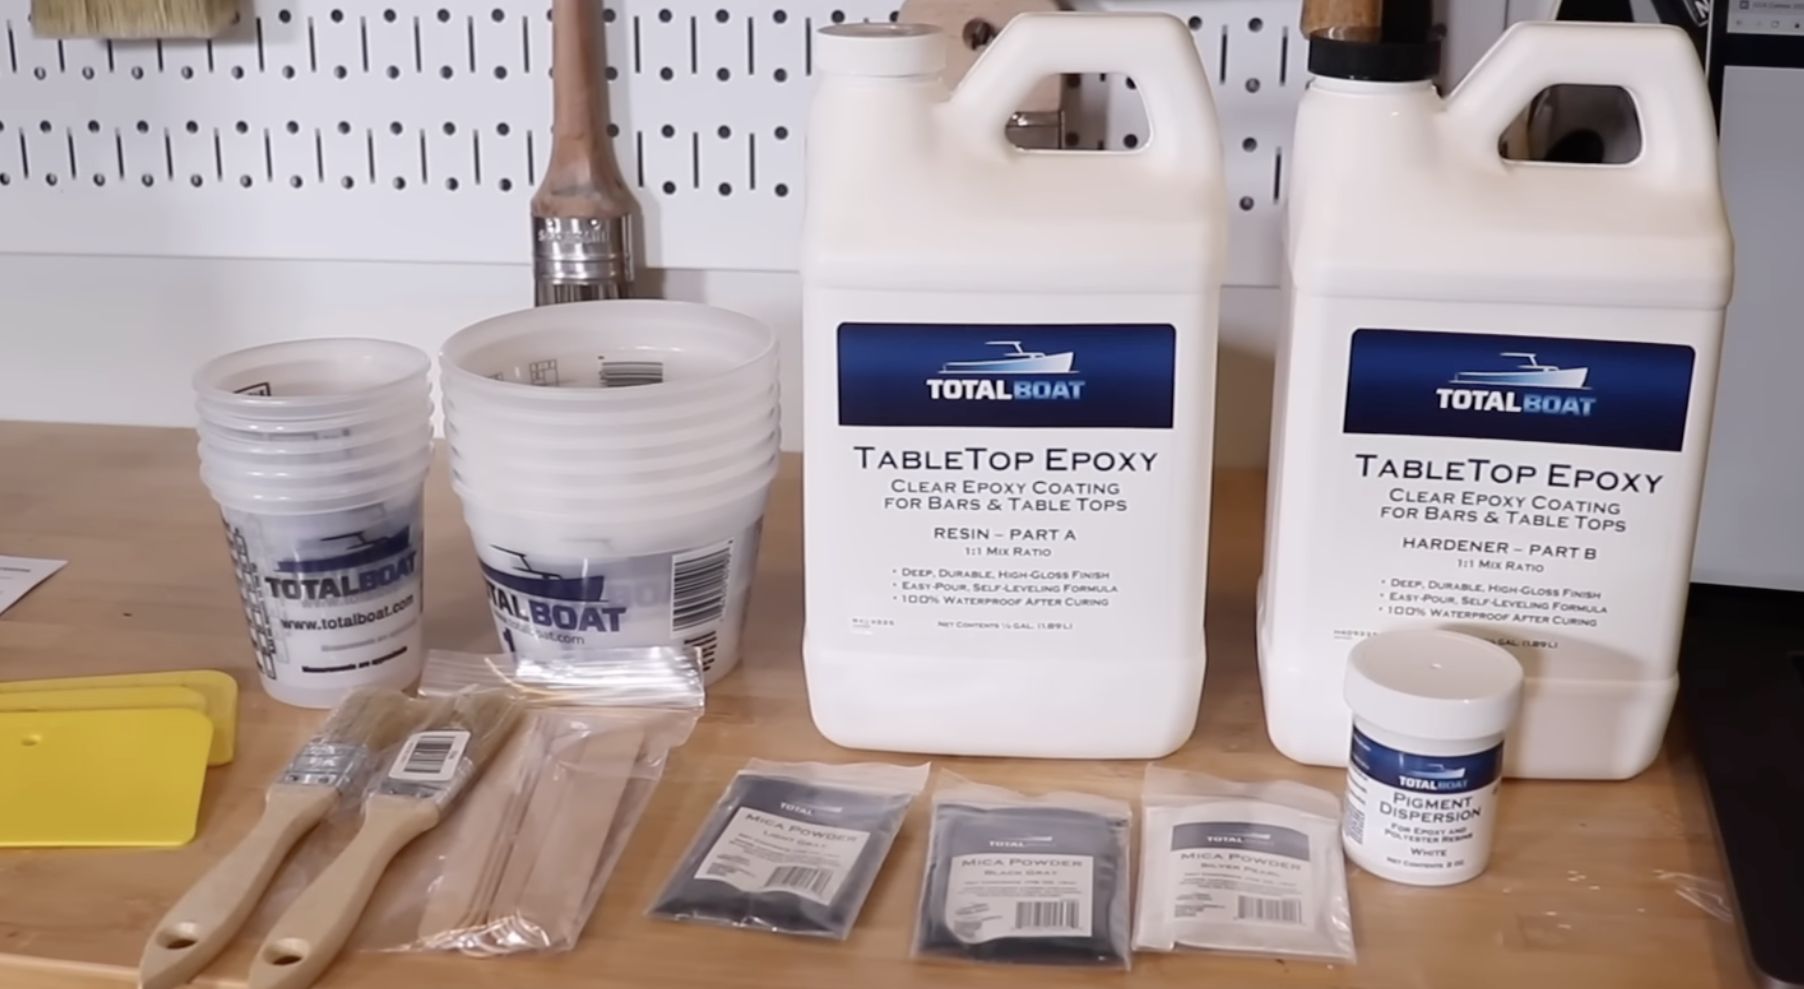
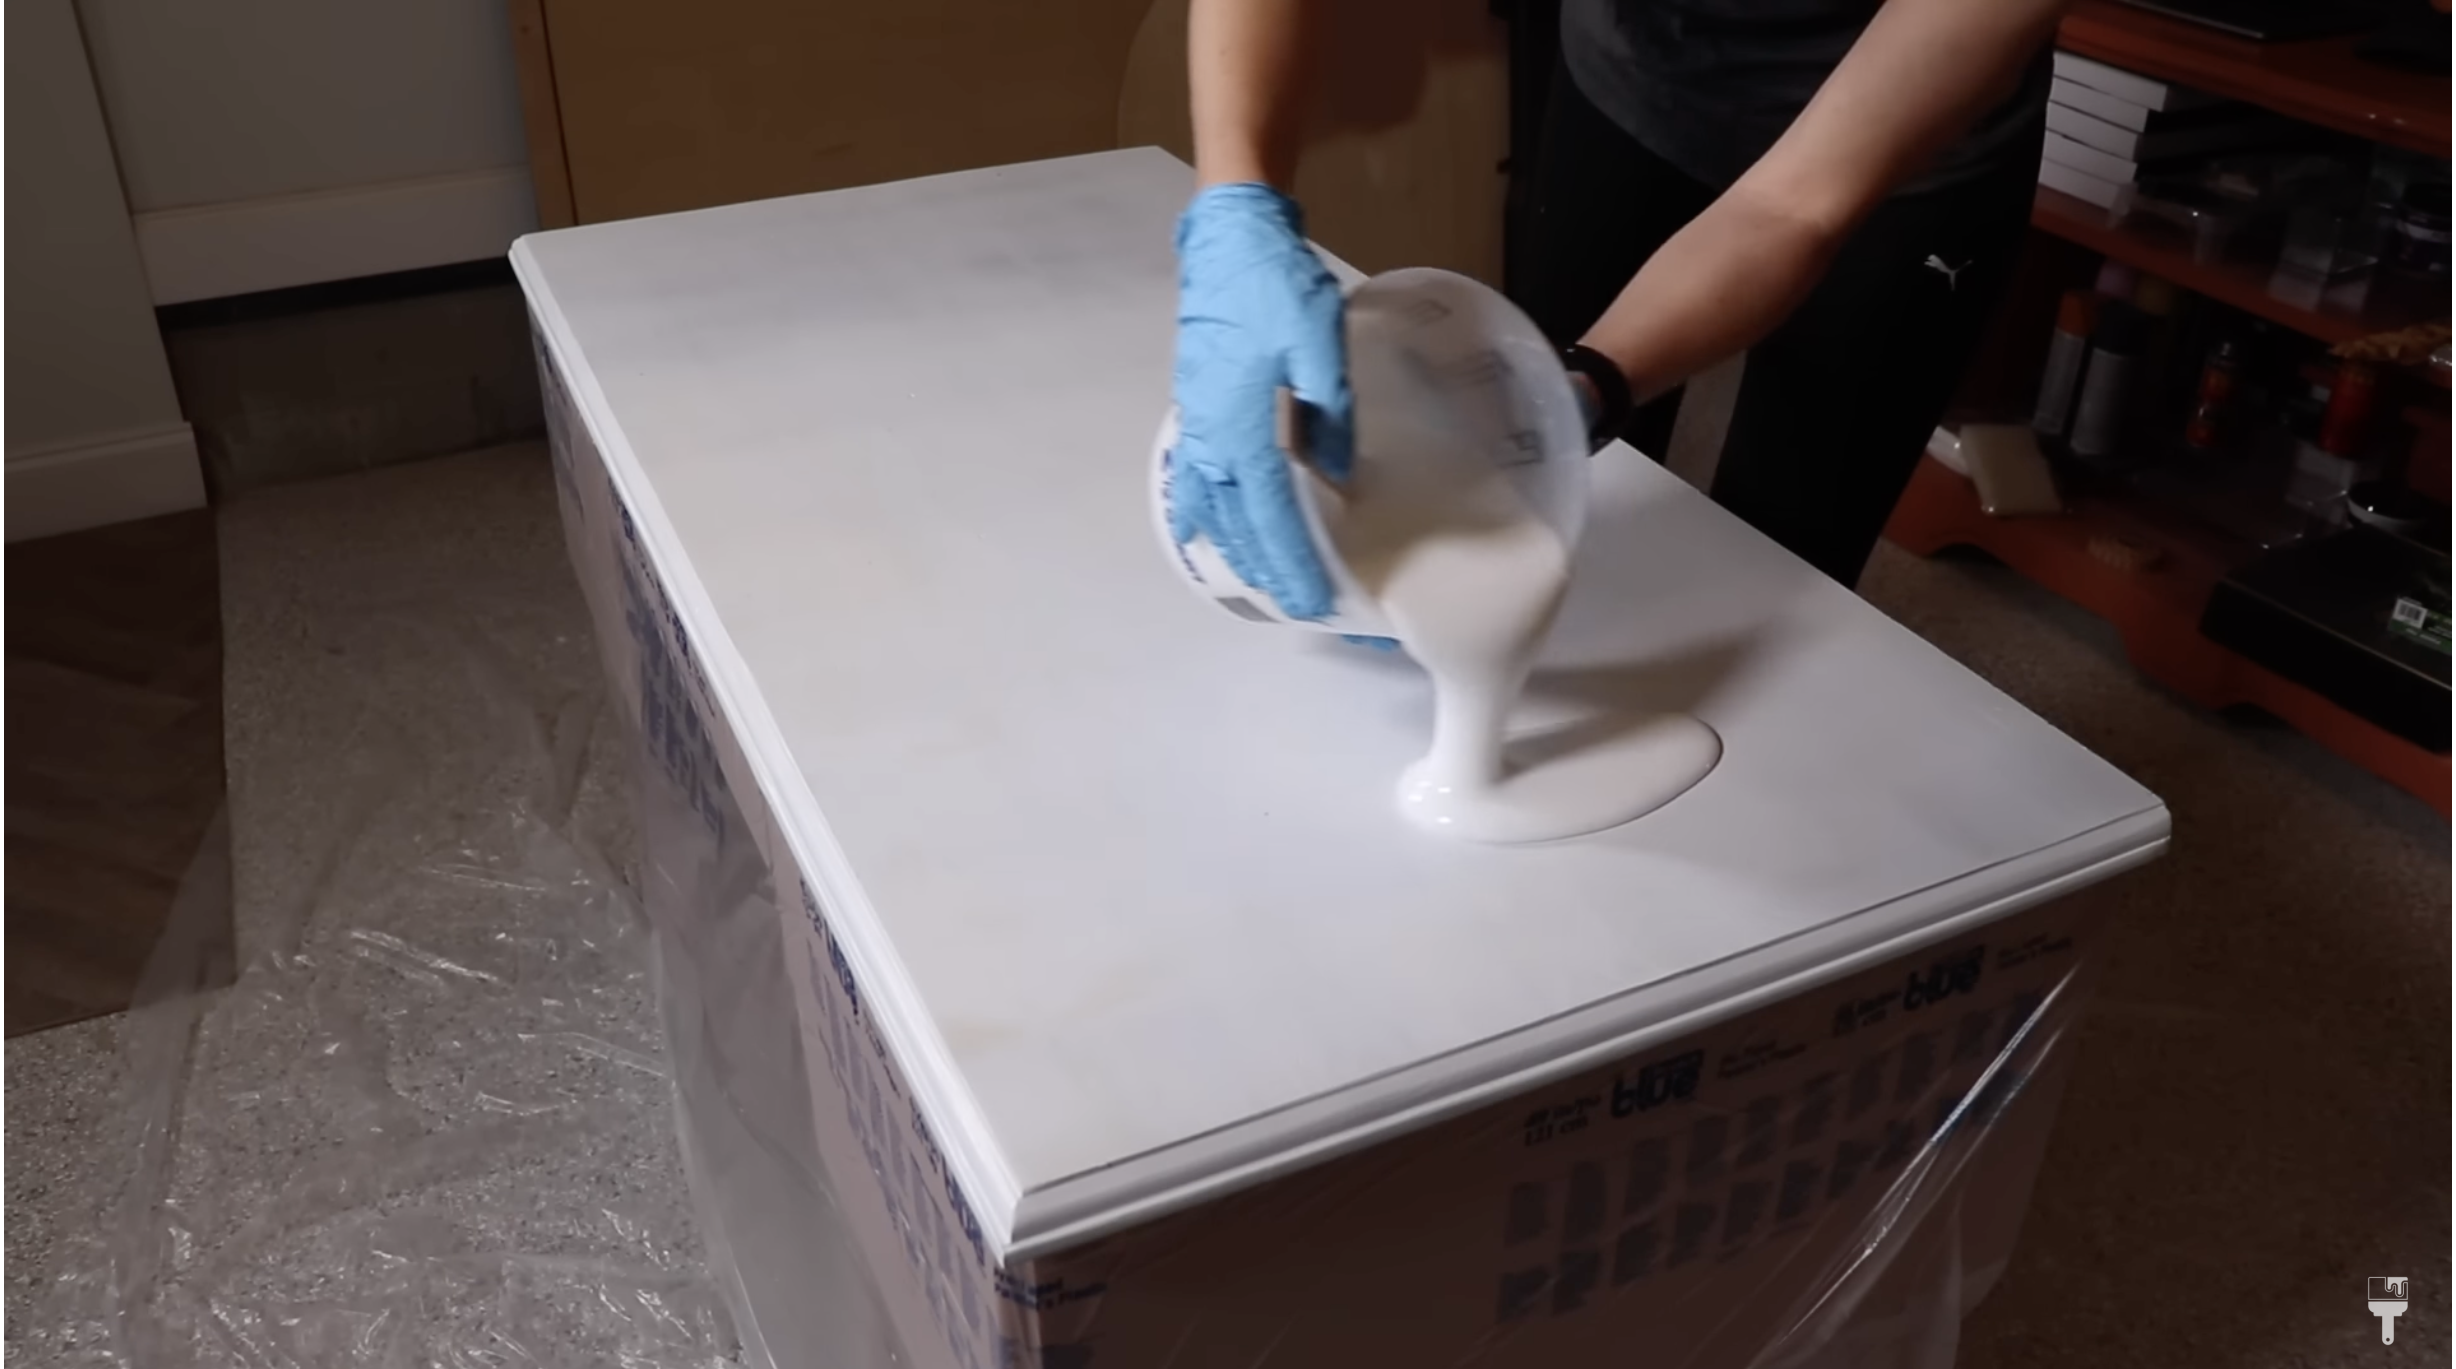
Now, the real magic was about to happen – the epoxy marble transformation. I used the TotalBoat epoxy White Marble Effect Countertop Kit, which came complete with everything I needed, including pigments, epoxy, mixing cups, and spreaders. The first coat, known as the "seal coat," helps seal the surface and prepare it for the marbling process. It's essential for ensuring a successful epoxy finish.
Step 5: The Marble Effect
Creating the marble effect is where the fun began. I mixed pigments into my epoxy to achieve the desired marble look. Using light gray, black, and clear epoxy, I meticulously applied veins of color onto the surface. The key is to use a light touch, ensuring the veins look natural and organic. The heat gun helped pop any air bubbles and blend the colors seamlessly.


Oops! A Little Mishap
I admit, I encountered a hiccup during my first attempt at marbling. Due to a delay in filming and some overuse of the heat gun, the epoxy set before I could finish. But remember, mistakes are part of the creative process. I didn't give up; instead, I sanded the surface, wiped it clean, and started the process from the beginning.
After a fresh start and some lessons learned, I successfully applied the marbling effect, creating beautiful, realistic-looking veins in the epoxy. This time, I worked quickly and efficiently, ensuring the epoxy remained workable throughout the process.
Step 7: Final Touches
Once the epoxy was set and dry, I removed any drips and uneven spots, leaving a flawless surface. Some minor touch-up painting was required to fix areas where the paint had lifted due to the heat gun. Then, it was time to reassemble the desk, using the same hardware as before.


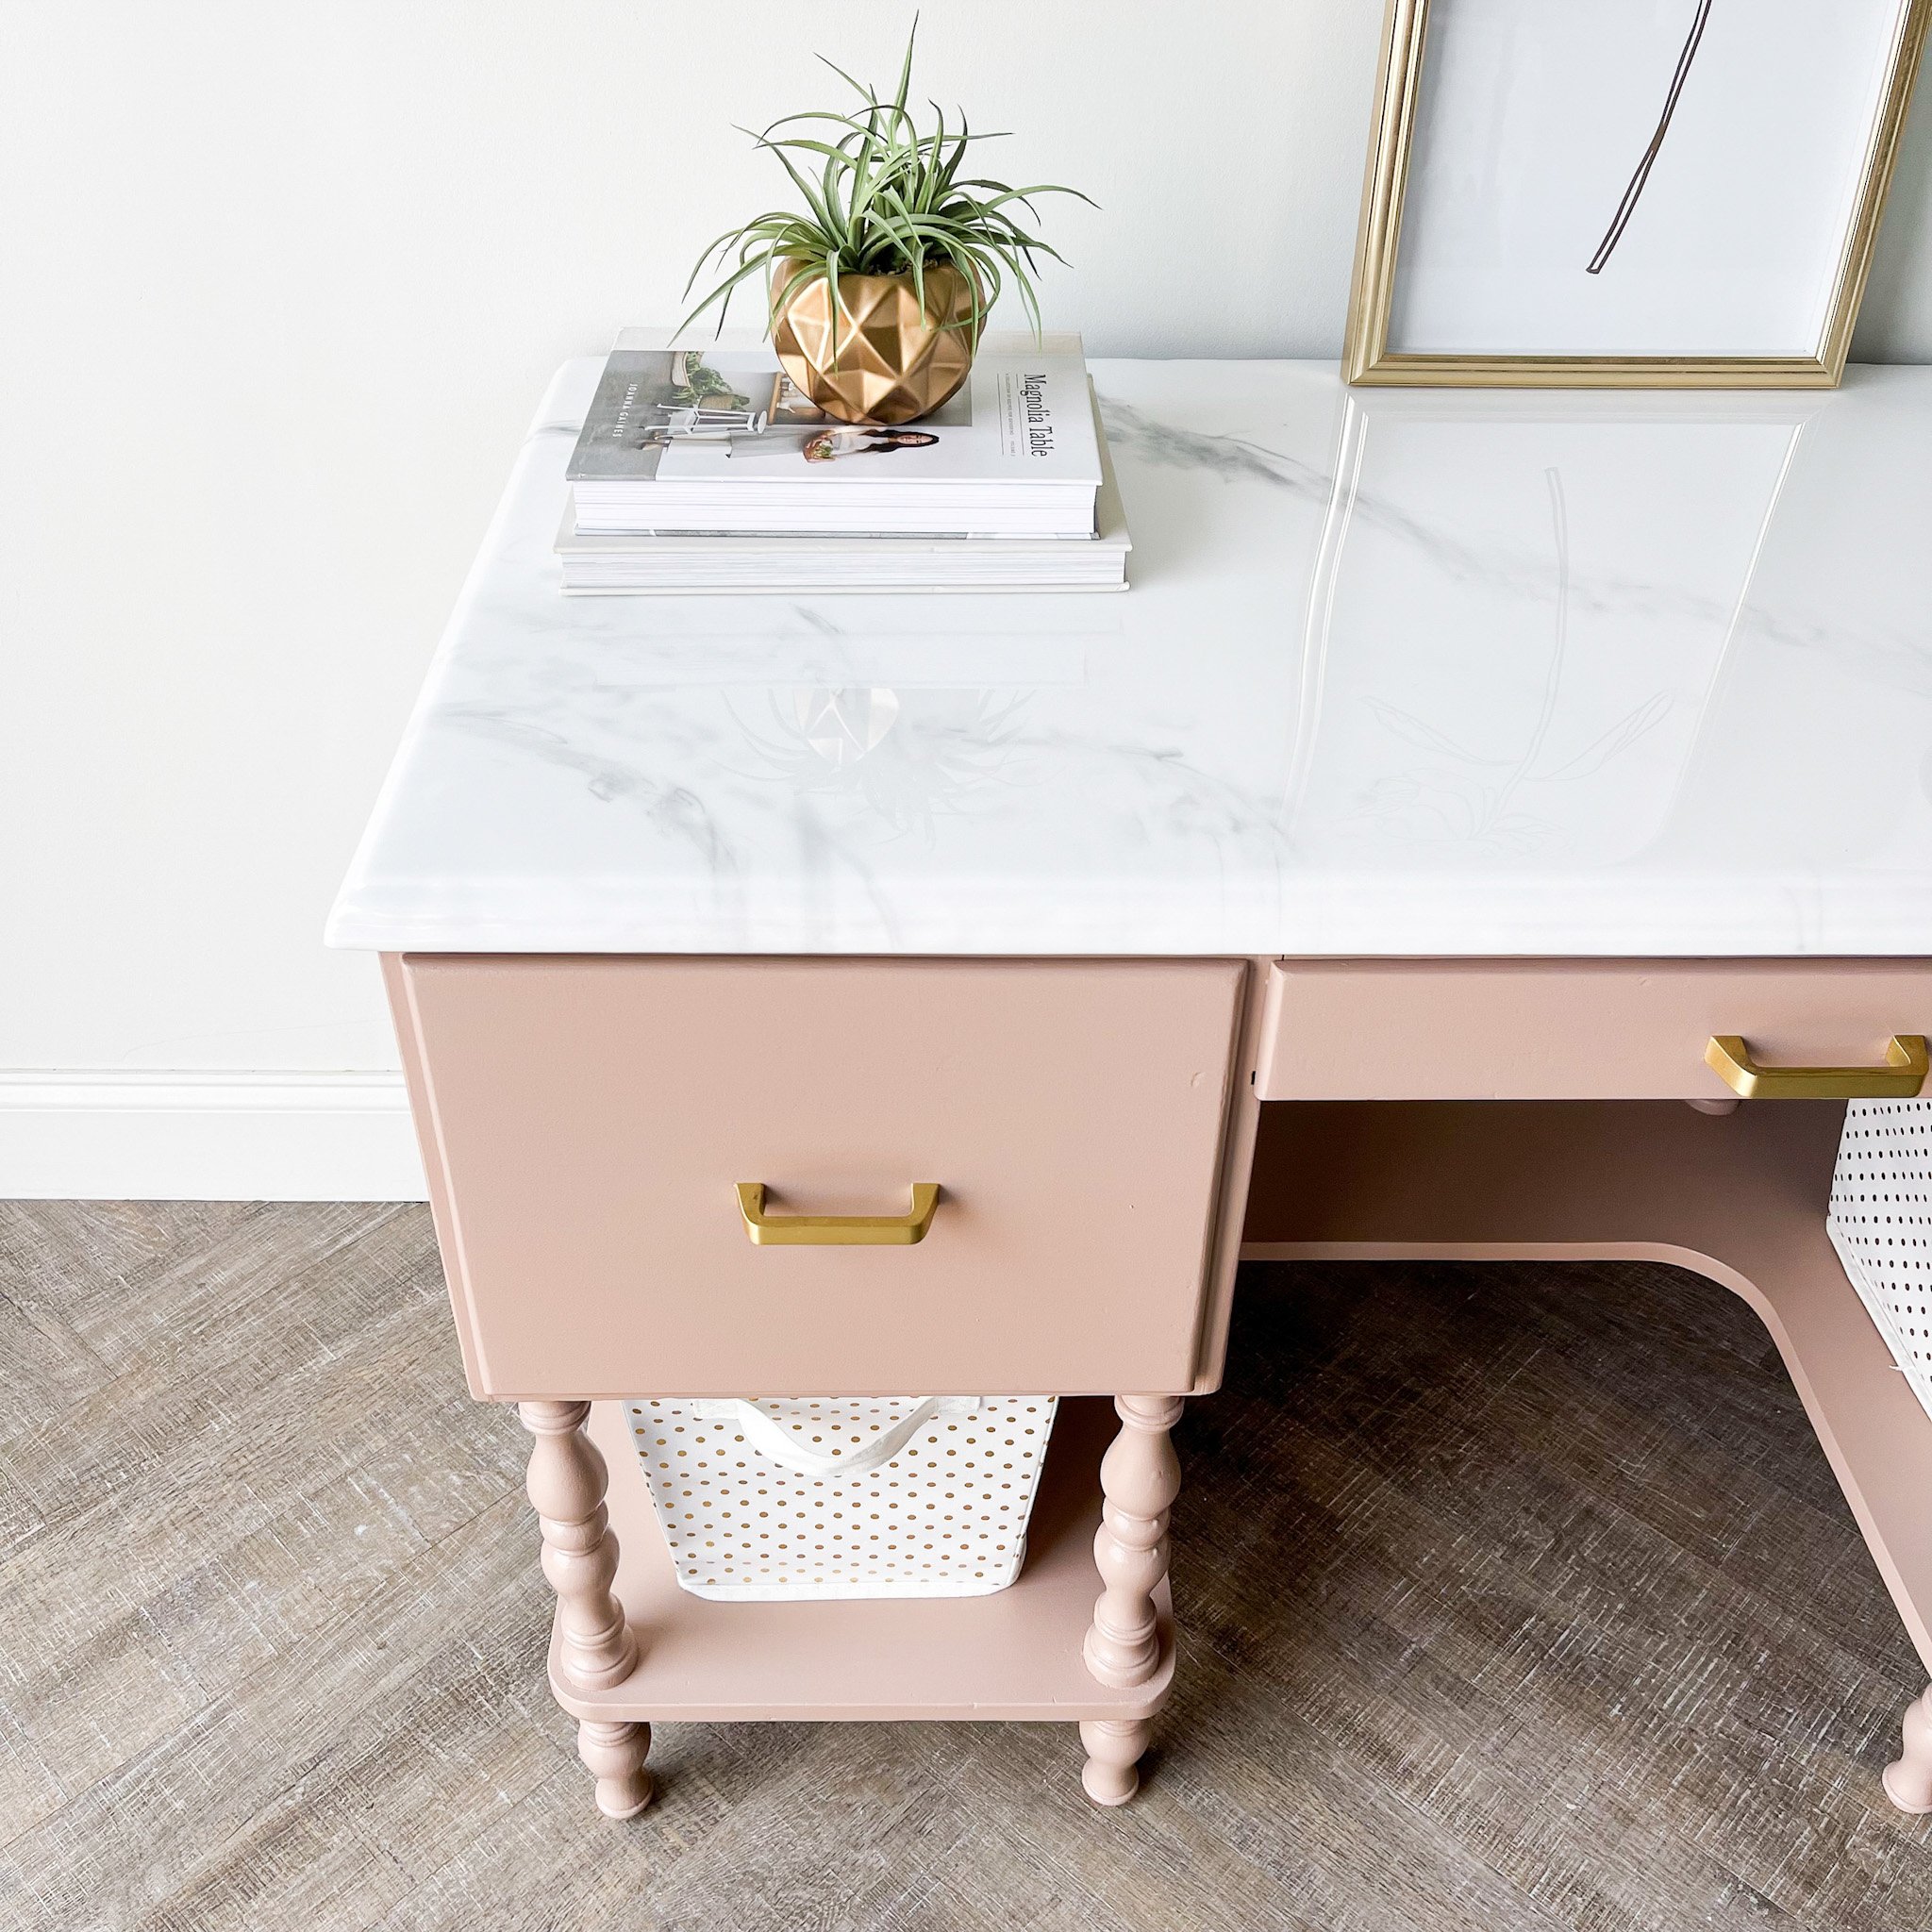
The Big Reveal
And now, the moment you've been waiting for – the big reveal! The transformation is nothing short of amazing. The once-drab desk now boasts a stunning marble-inspired top that is not only beautiful but also highly durable. The modernized pink color gives it a touch of sophistication, and I couldn't be happier with the result.

This epoxy marble desk makeover journey has been filled with ups and downs, but it's a testament to the power of patience, perseverance, and creativity. If you ever embark on a similar project, remember that mistakes are opportunities to learn and grow. With determination, you can turn almost anything into a work of art.

Thank you for joining me on this furniture makeover adventure. I hope it has inspired you to tackle your own creative projects and transform everyday pieces into something extraordinary. If you would like to watch the full video tutorial on YouTube you can find that here.
Until next time, happy painting!