Belles and Whistles Stencils: Boho Makeover
Disclosure: This blog contains affiliate links. I will receive a commission for items purchased through these links at no extra cost to you. I appreciate your support. Please read all labels and follow all manufacturer safety recommendations when working with paints, stains, and other equipment.
One of my favorite things to do is to makeover a makeover. ;) About a year ago I collaborated with @furnitureflippingteacher as we challenged ourselves to do a makeover in 24 hours. You can check out that 24 Hour Furniture Makeover over on my YouTube™ channel. I want to finally get round to selling this piece, but I feel like it needs something else! I think some Belles and Whistles Transfers might do the trick!
I’ll be upgrading this dresser to a boho look by using some stencils from the Dixie Belle Belles and Whistles line.
First, let’s take a look at what we’re starting with.

Belles and Whistles Boho Makeover Materials
Belles And Whistles Stencil Mudcloth
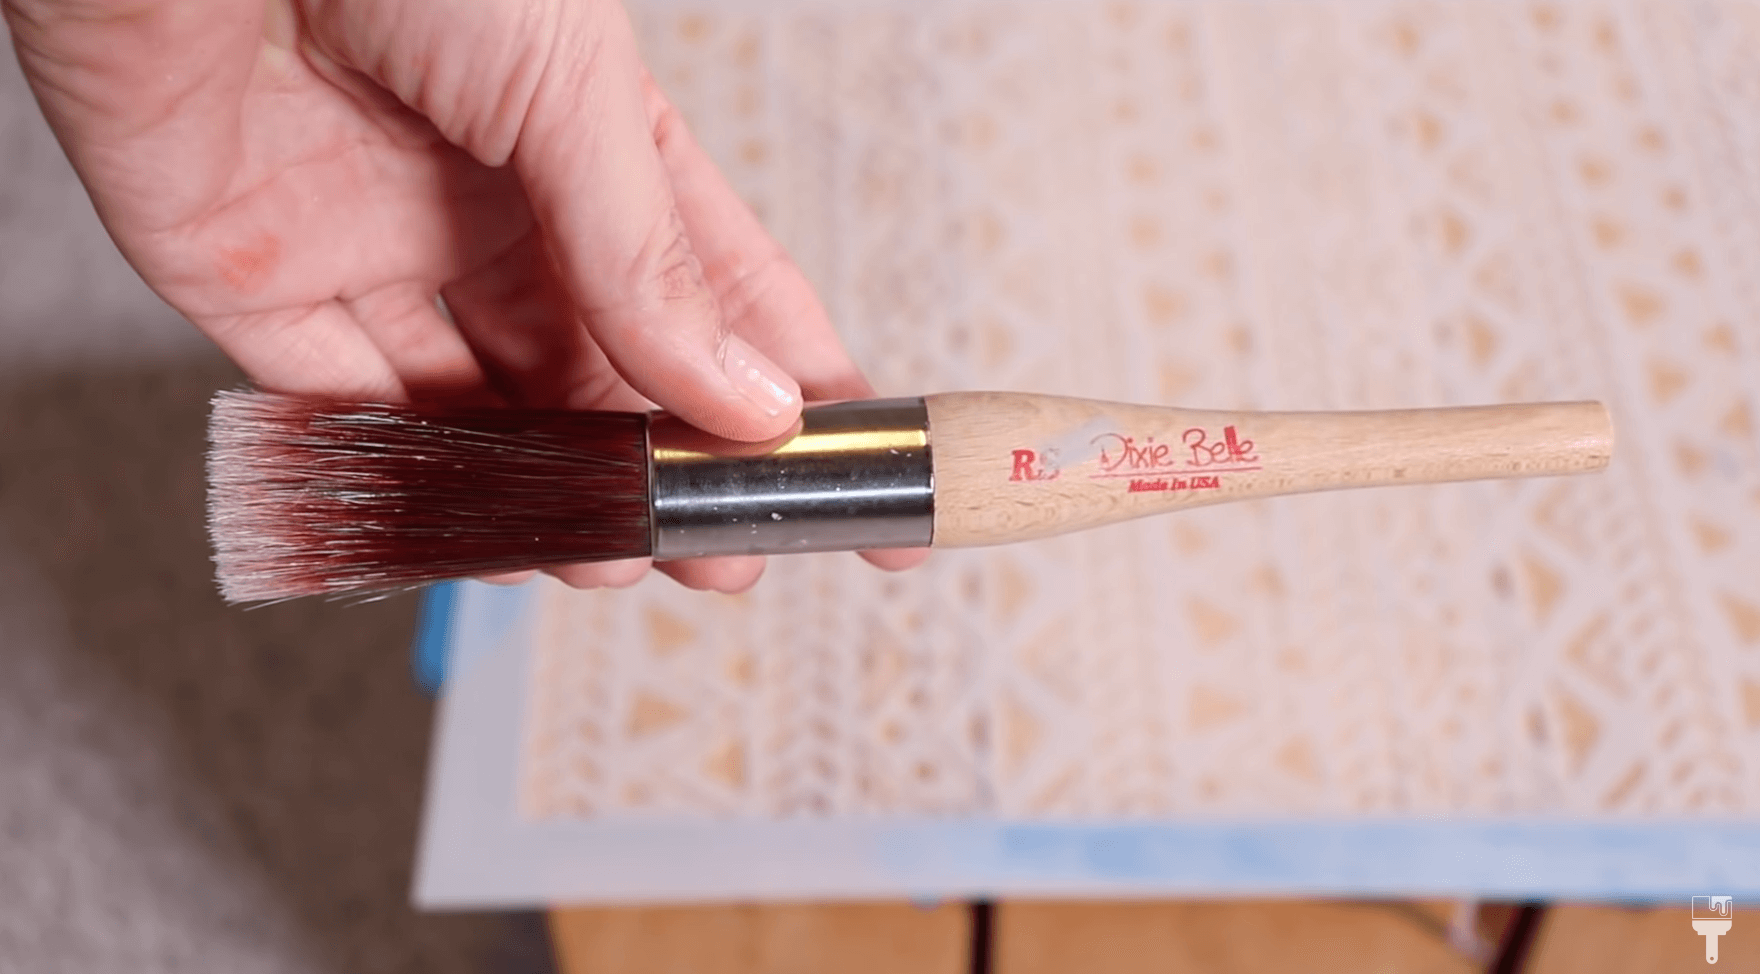
Dixie Belle Round Synthetic Brush
Dixie Belle Belles and Whistles Transfers and Stencils

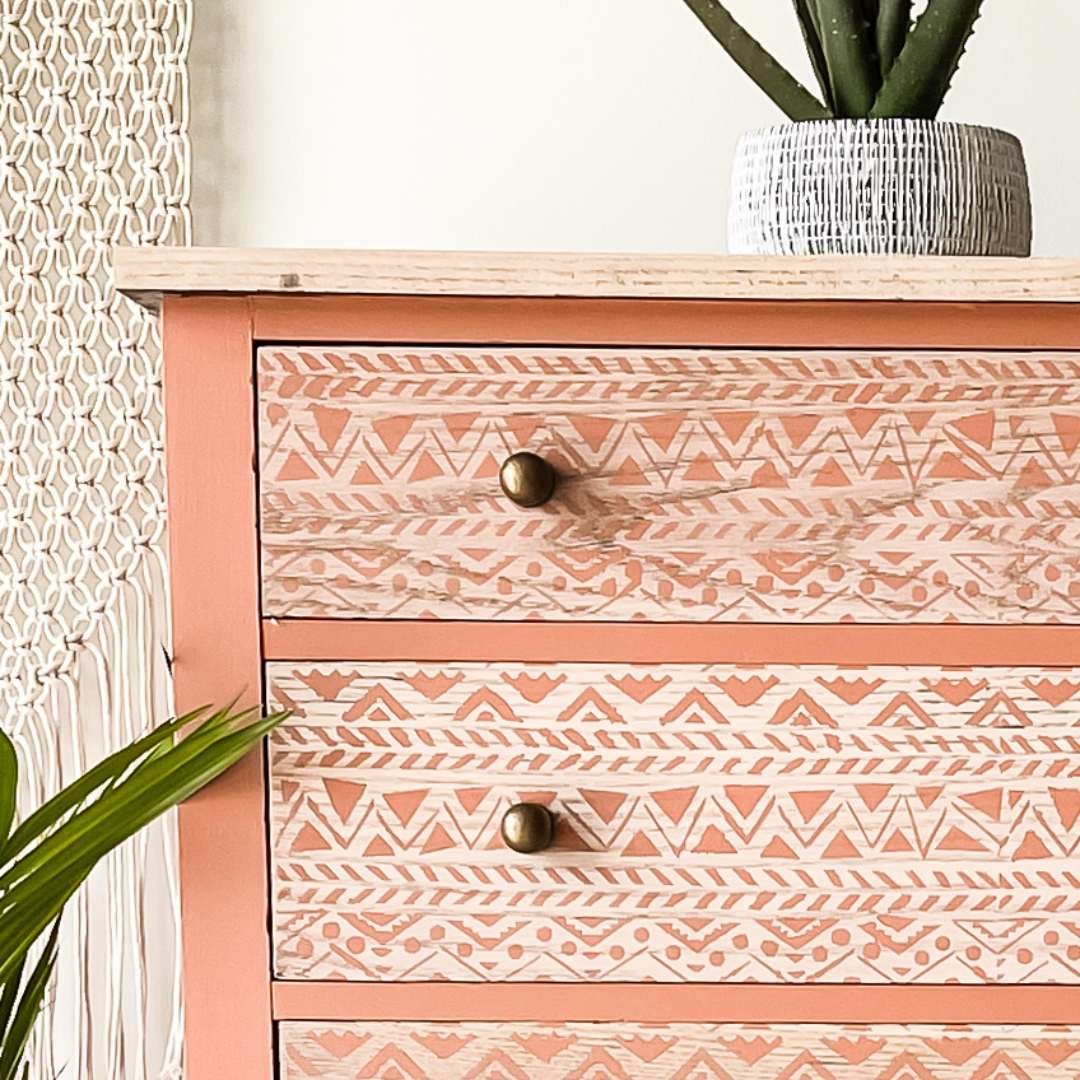
I decided that what this dresser needed was a little bit more drama, so I decided to use the Dixie Belle’s Belles and Whistles line. I actually asked my audience to help me pick between a few different stencils and transfers from the line … you all weren’t much help. LOL. It was pretty even with the votes so I ended up going with a mylar stencil called Mud Cloth.
I love the geometric shape of this stencil and think it’s really going to give this piece a fun boho look.
If you’re looking to add some embellishments to your furniture, they have transfers, mylar stencils, and silk screen stencils.
Stencil on Drawers
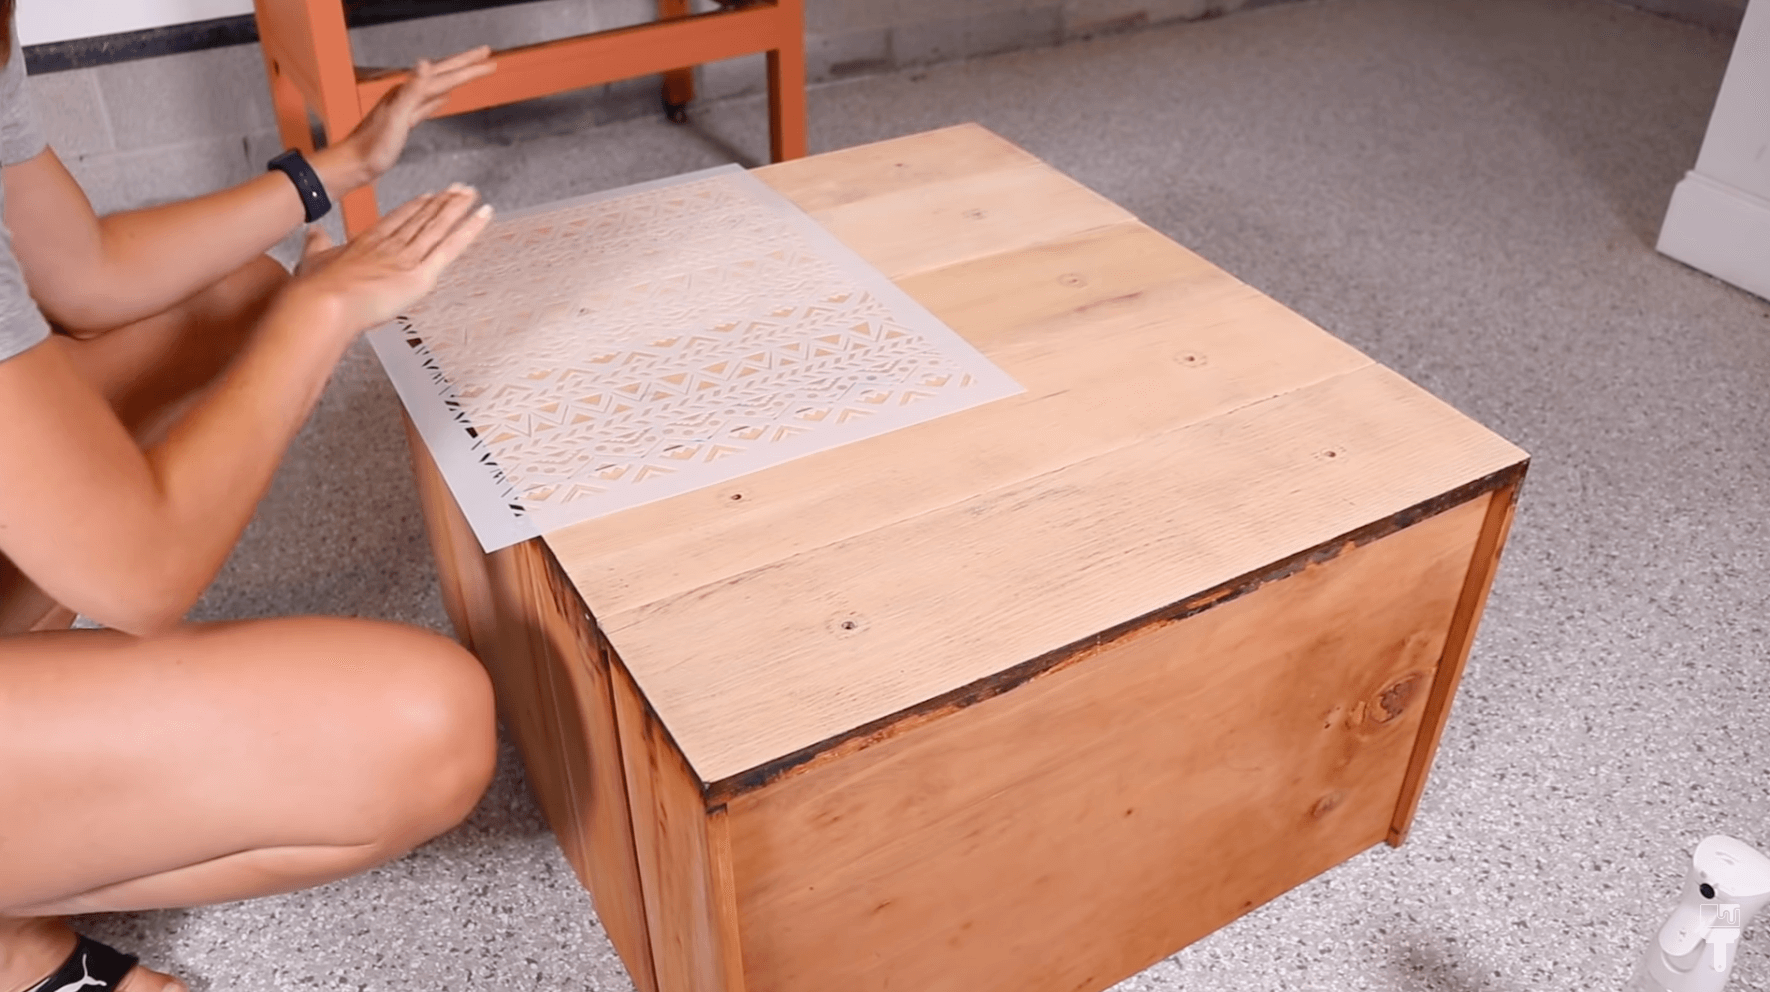
This project was pretty simple and the large size of the stencil made it even easier. I removed the drawers and lined them all up together in order to keep a cohesive pattern.
I got the stencil where I wanted it and used painter’s tape to keep it in place.
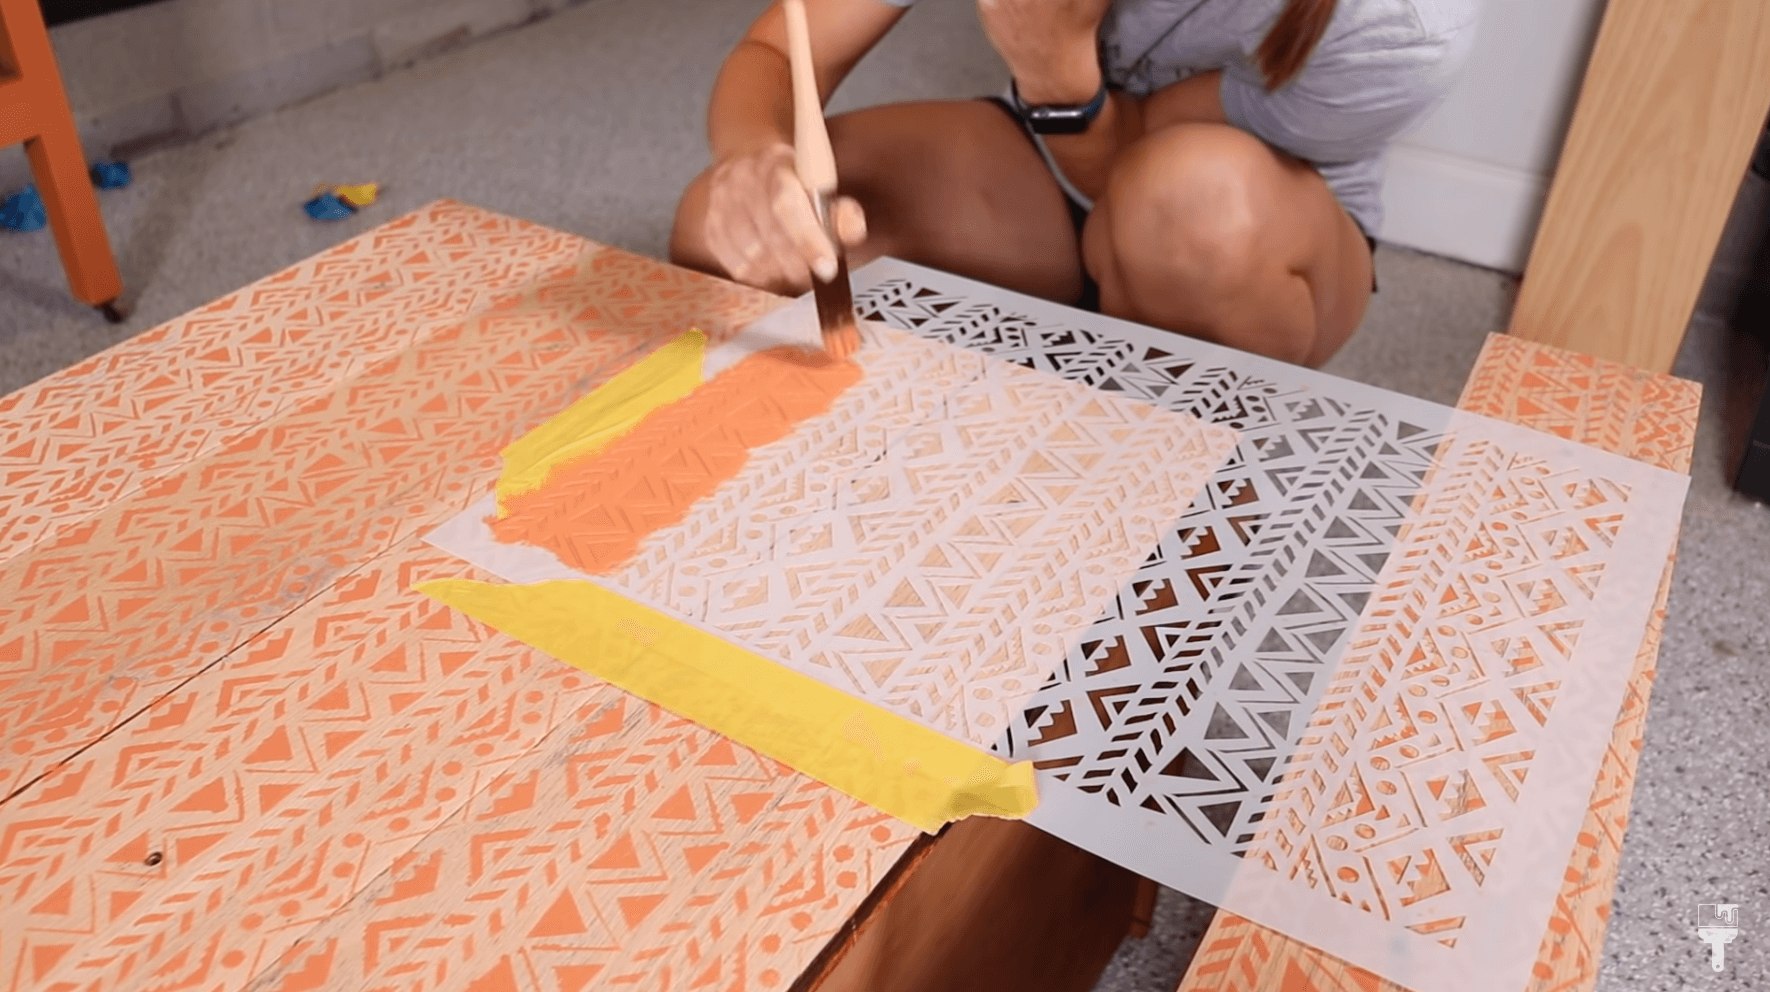
I wanted this to be a monochromatic look, so I grabbed the same paint I used for the frame of the dresser which was my Terracotta. And when I do stencil on furniture, I like to use a stippling motion, so I decided to use my small round brush.
If you don’t want to have too much texture you can water down the paint a bit. I actually wanted to have a textured look, so I didn’t water my paint down at all.
And last tip when it comes to using the Belles and Whistles stencils is to make sure you don’t overload your paintbrush so that it doesn’t bleed under the stencil.
Clean Stencil in Between Applications

The longest part of this project was actually waiting for the paint to dry with each application. Since the stencil and painter’s tape will likely overlap when lining it up with the first application, you’ll need to make sure that the paint dries.
While you wait, it’s a good idea to clean your stencil in between the applications. Cleaning is super simple. I just wiped back all of the paint and used a scrubby sponge in my utility sink.
After you clean the stencil and the paint is dry, simply line the patterns up and repeat the process.
Seal with Topcoat
After my paint dried it was time to seal the drawers. I used my Dixie Belle Clear Coat in Flat. To apply the topcoat, I used my blue sponge applicator because it’s so easy to use on flat surfaces.

To prep your sponge for application, it’s a great idea to dampen it with a spray bottle. Pour your Clear Coat onto a paper plate, dip the sponge, and wipe back the excess.
When you apply it, use long strokes and overlap by about 30%. And voila!
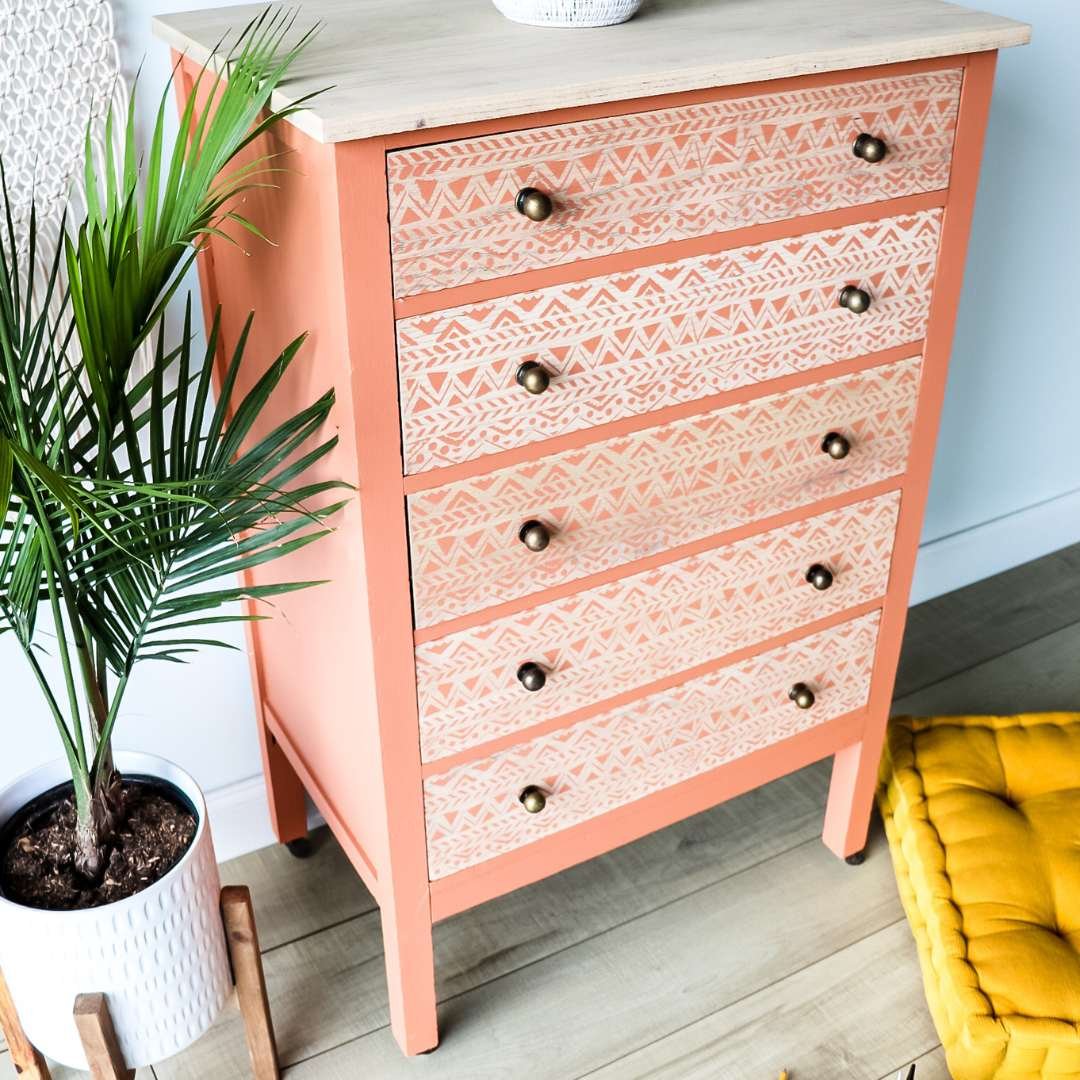
Install New Hardware
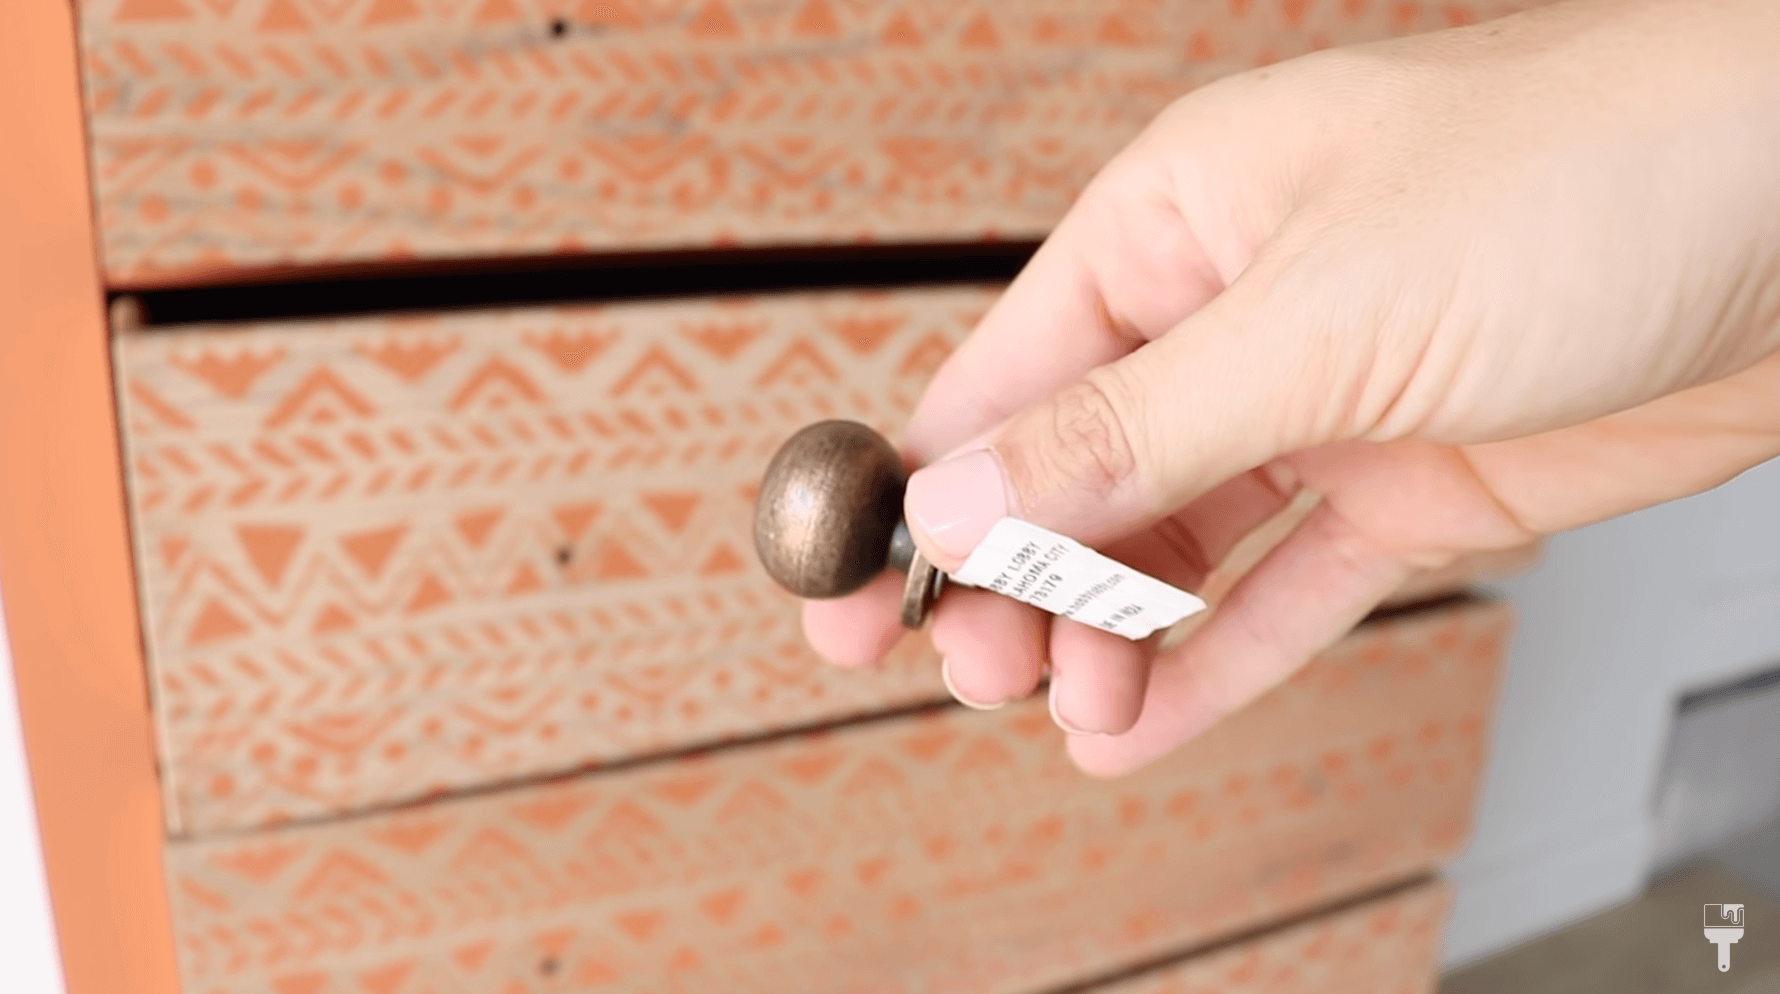
When I originally made this piece over, I was very torn about the hardware. It turns out that it’s not my favorite, so I’m taking this opportunity to switch those out. I got some gold brass knobs from Hobby Lobby that were much more fitting, and they were 50% off, so that was a big win!
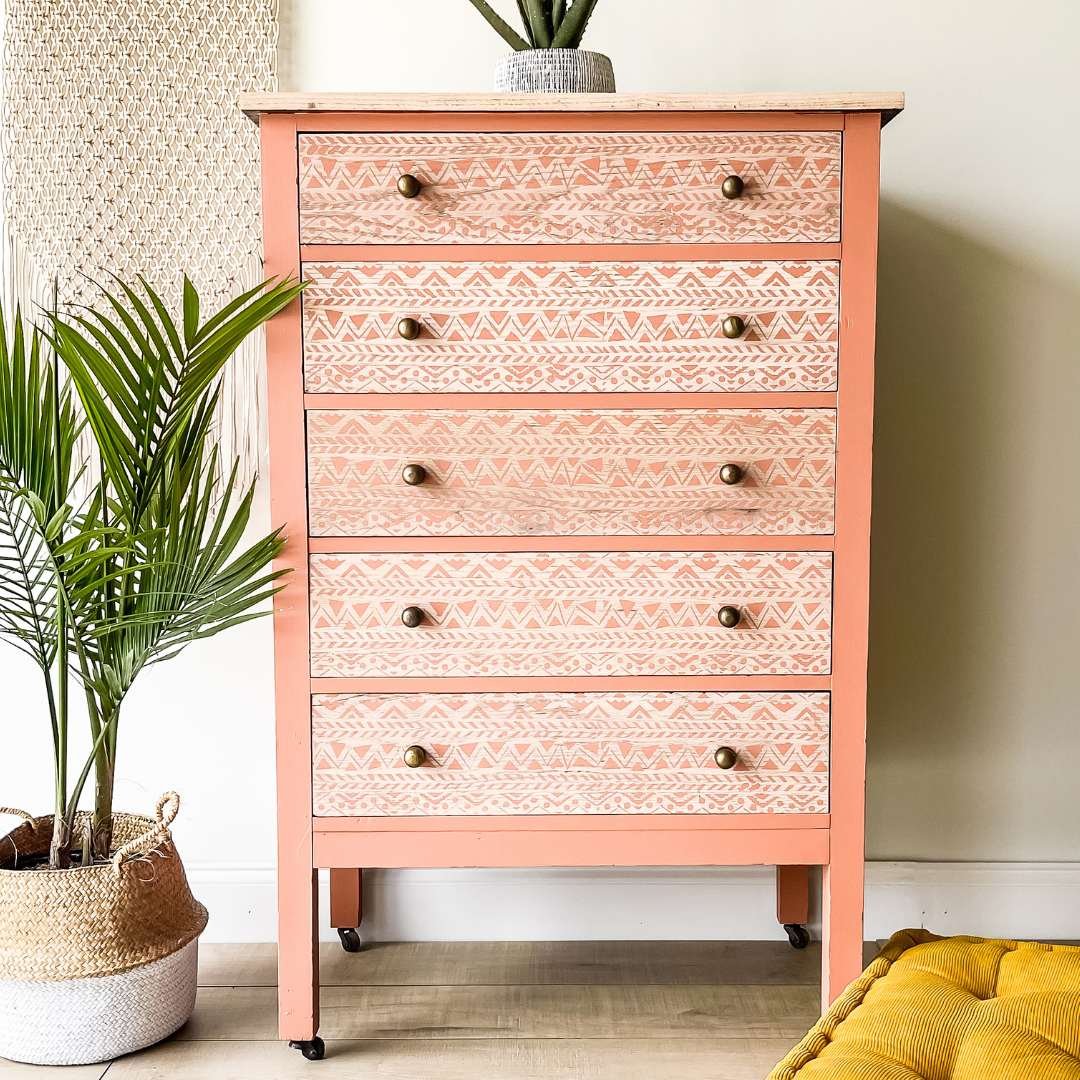
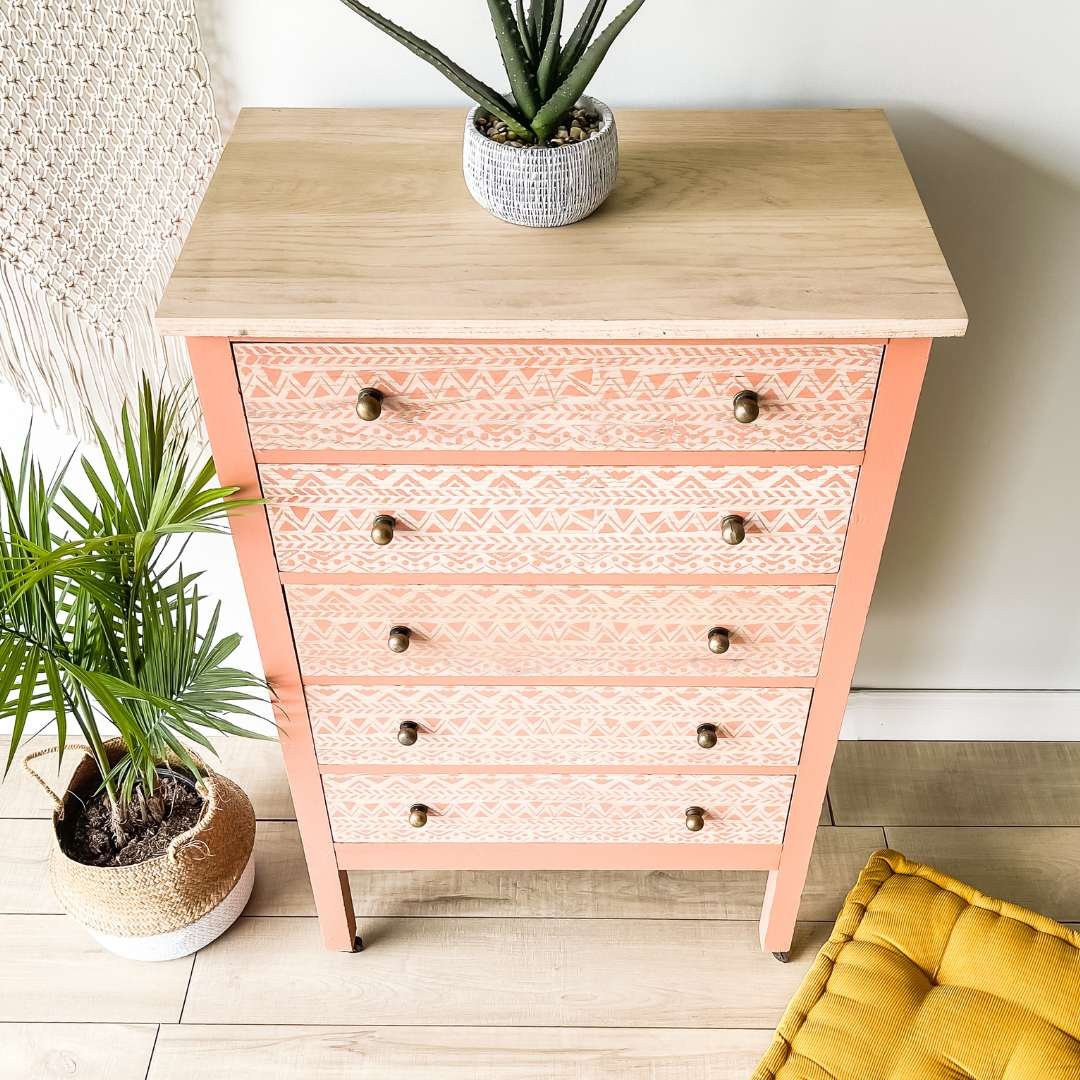
Belles and Whistles Transfer Boho Makeover Reveal
Well, this was a quick makeover because we were just giving it a bit of an upgrade. I’m super happy with the outcome, and I’m glad I went with the Belles and Whistles stencil to accomplish this boho look.
Take a look at the finished dresser that I’m finally ready to sell! And don’t forget to check out the step by step tutorial and even more details on my YouTube™ channel!