Coastal Furniture Makeover: Using Water-based Stain
Disclosure: This blog contains affiliate links. I will receive a commission for items purchased through these links at no extra cost to you. I appreciate your support. Please read all labels and follow all manufacturer safety recommendations when working with paints, stains, and other equipment.
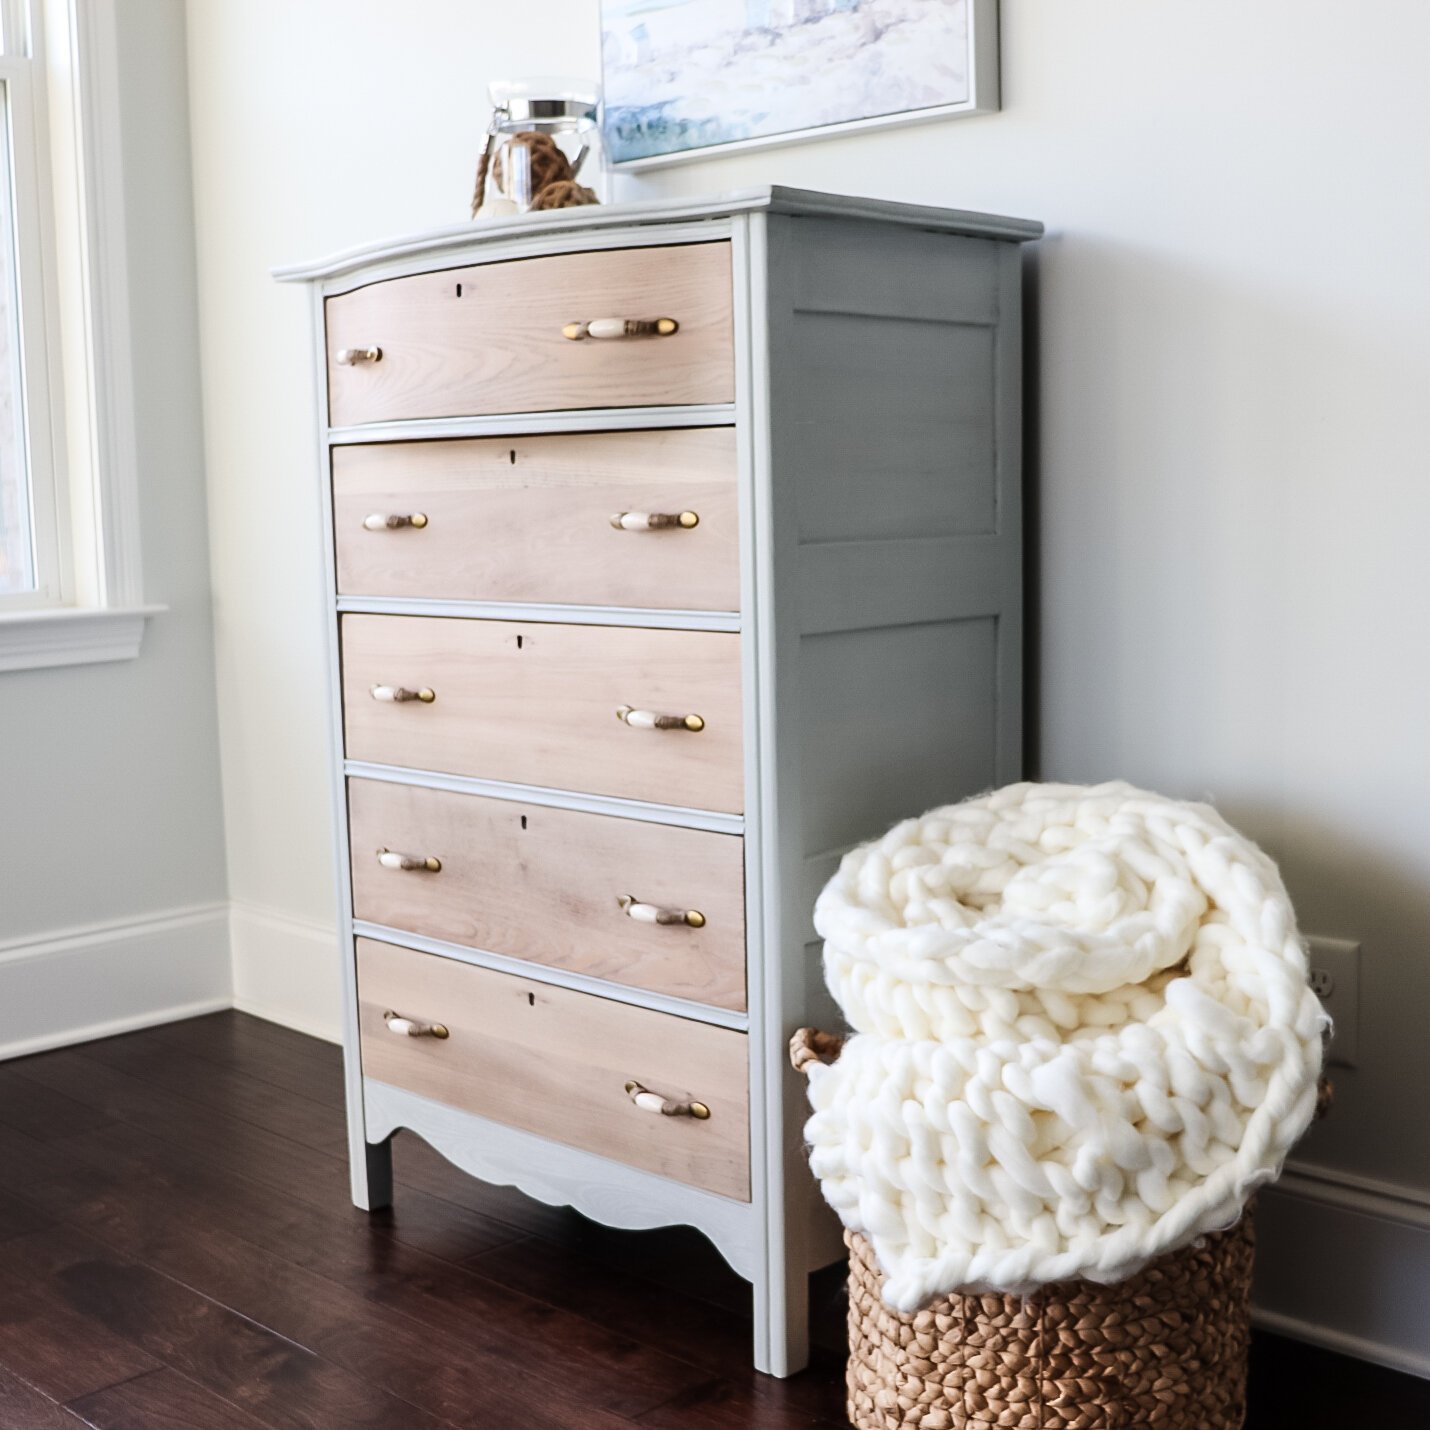
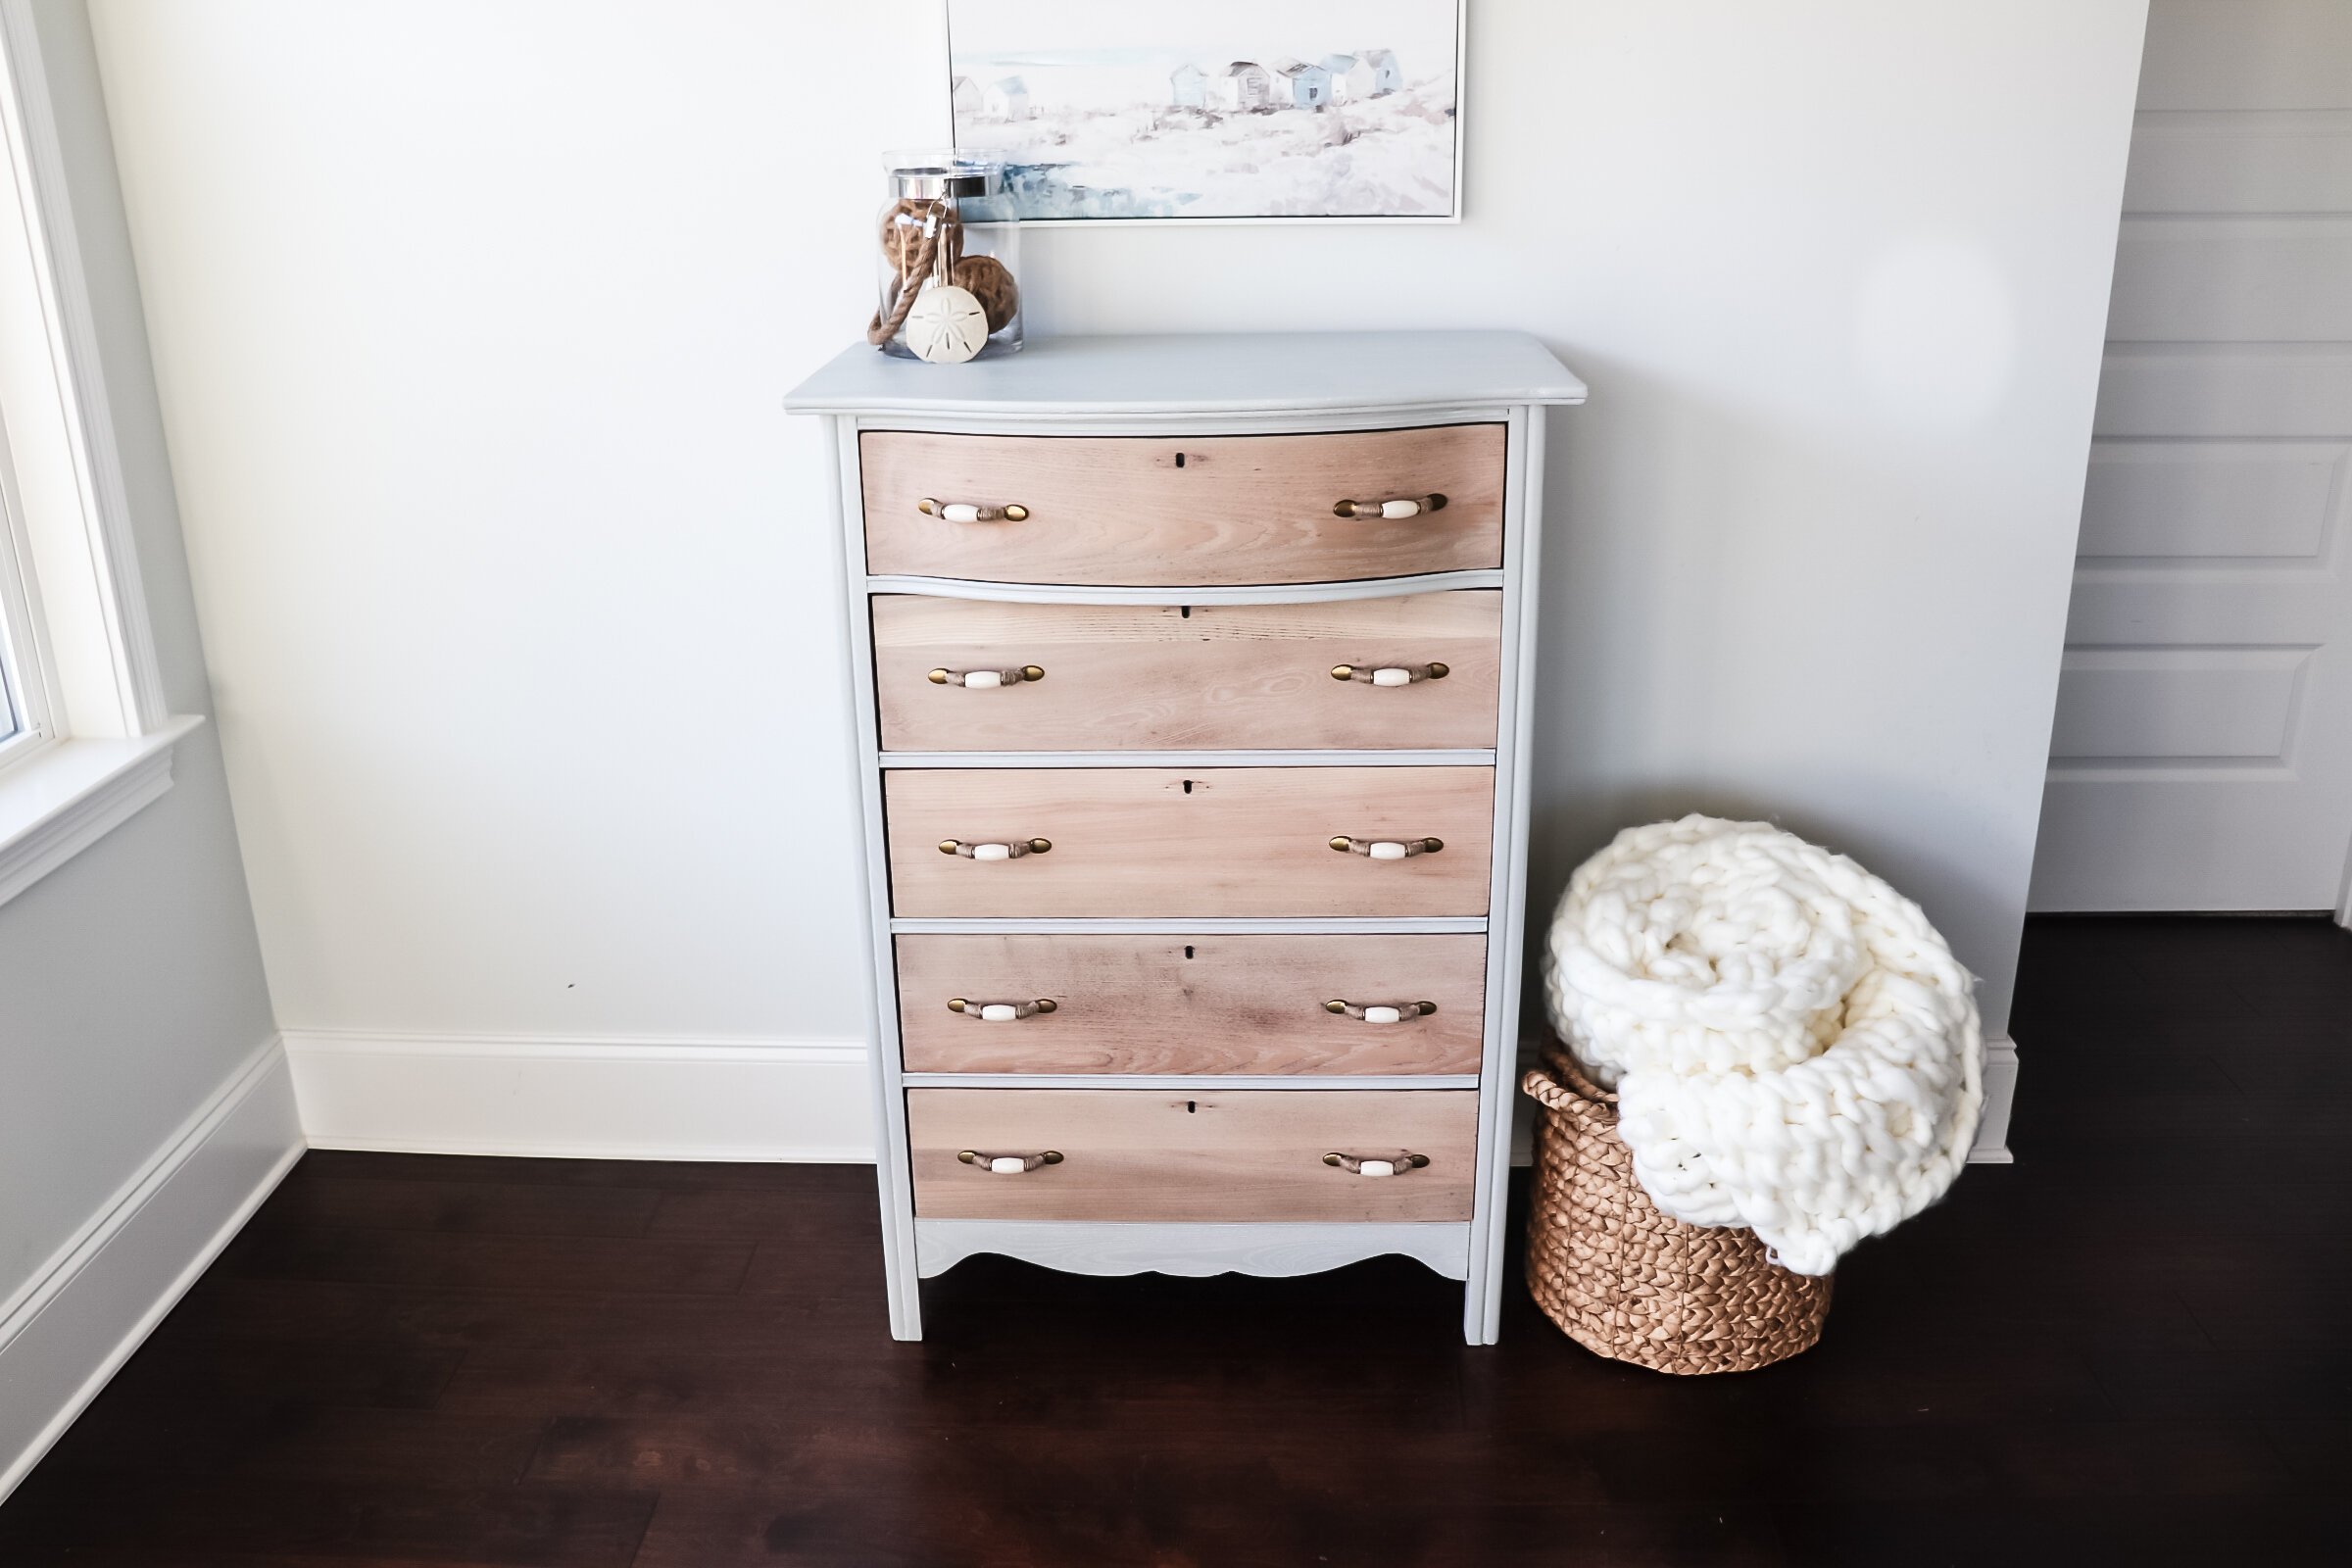
I love a good furniture coastal makeover because t’s the perfect opportunity to experiment with some water-based stains. I found this dresser on Facebook marketplace for $80 (see the before image below), and not only wanted to refinish it with stains, but I also wanted to try out a new wax for the first time.
The original inspiration of this coastal makeover was a fun “Antique to Chic” challenge that was put on by Minwax. I broke down this furniture makeover step-by-step, so if you want to see what I did to create it...keep on reading.

Using Water-based Stain for a Coastal Furniture Makeover
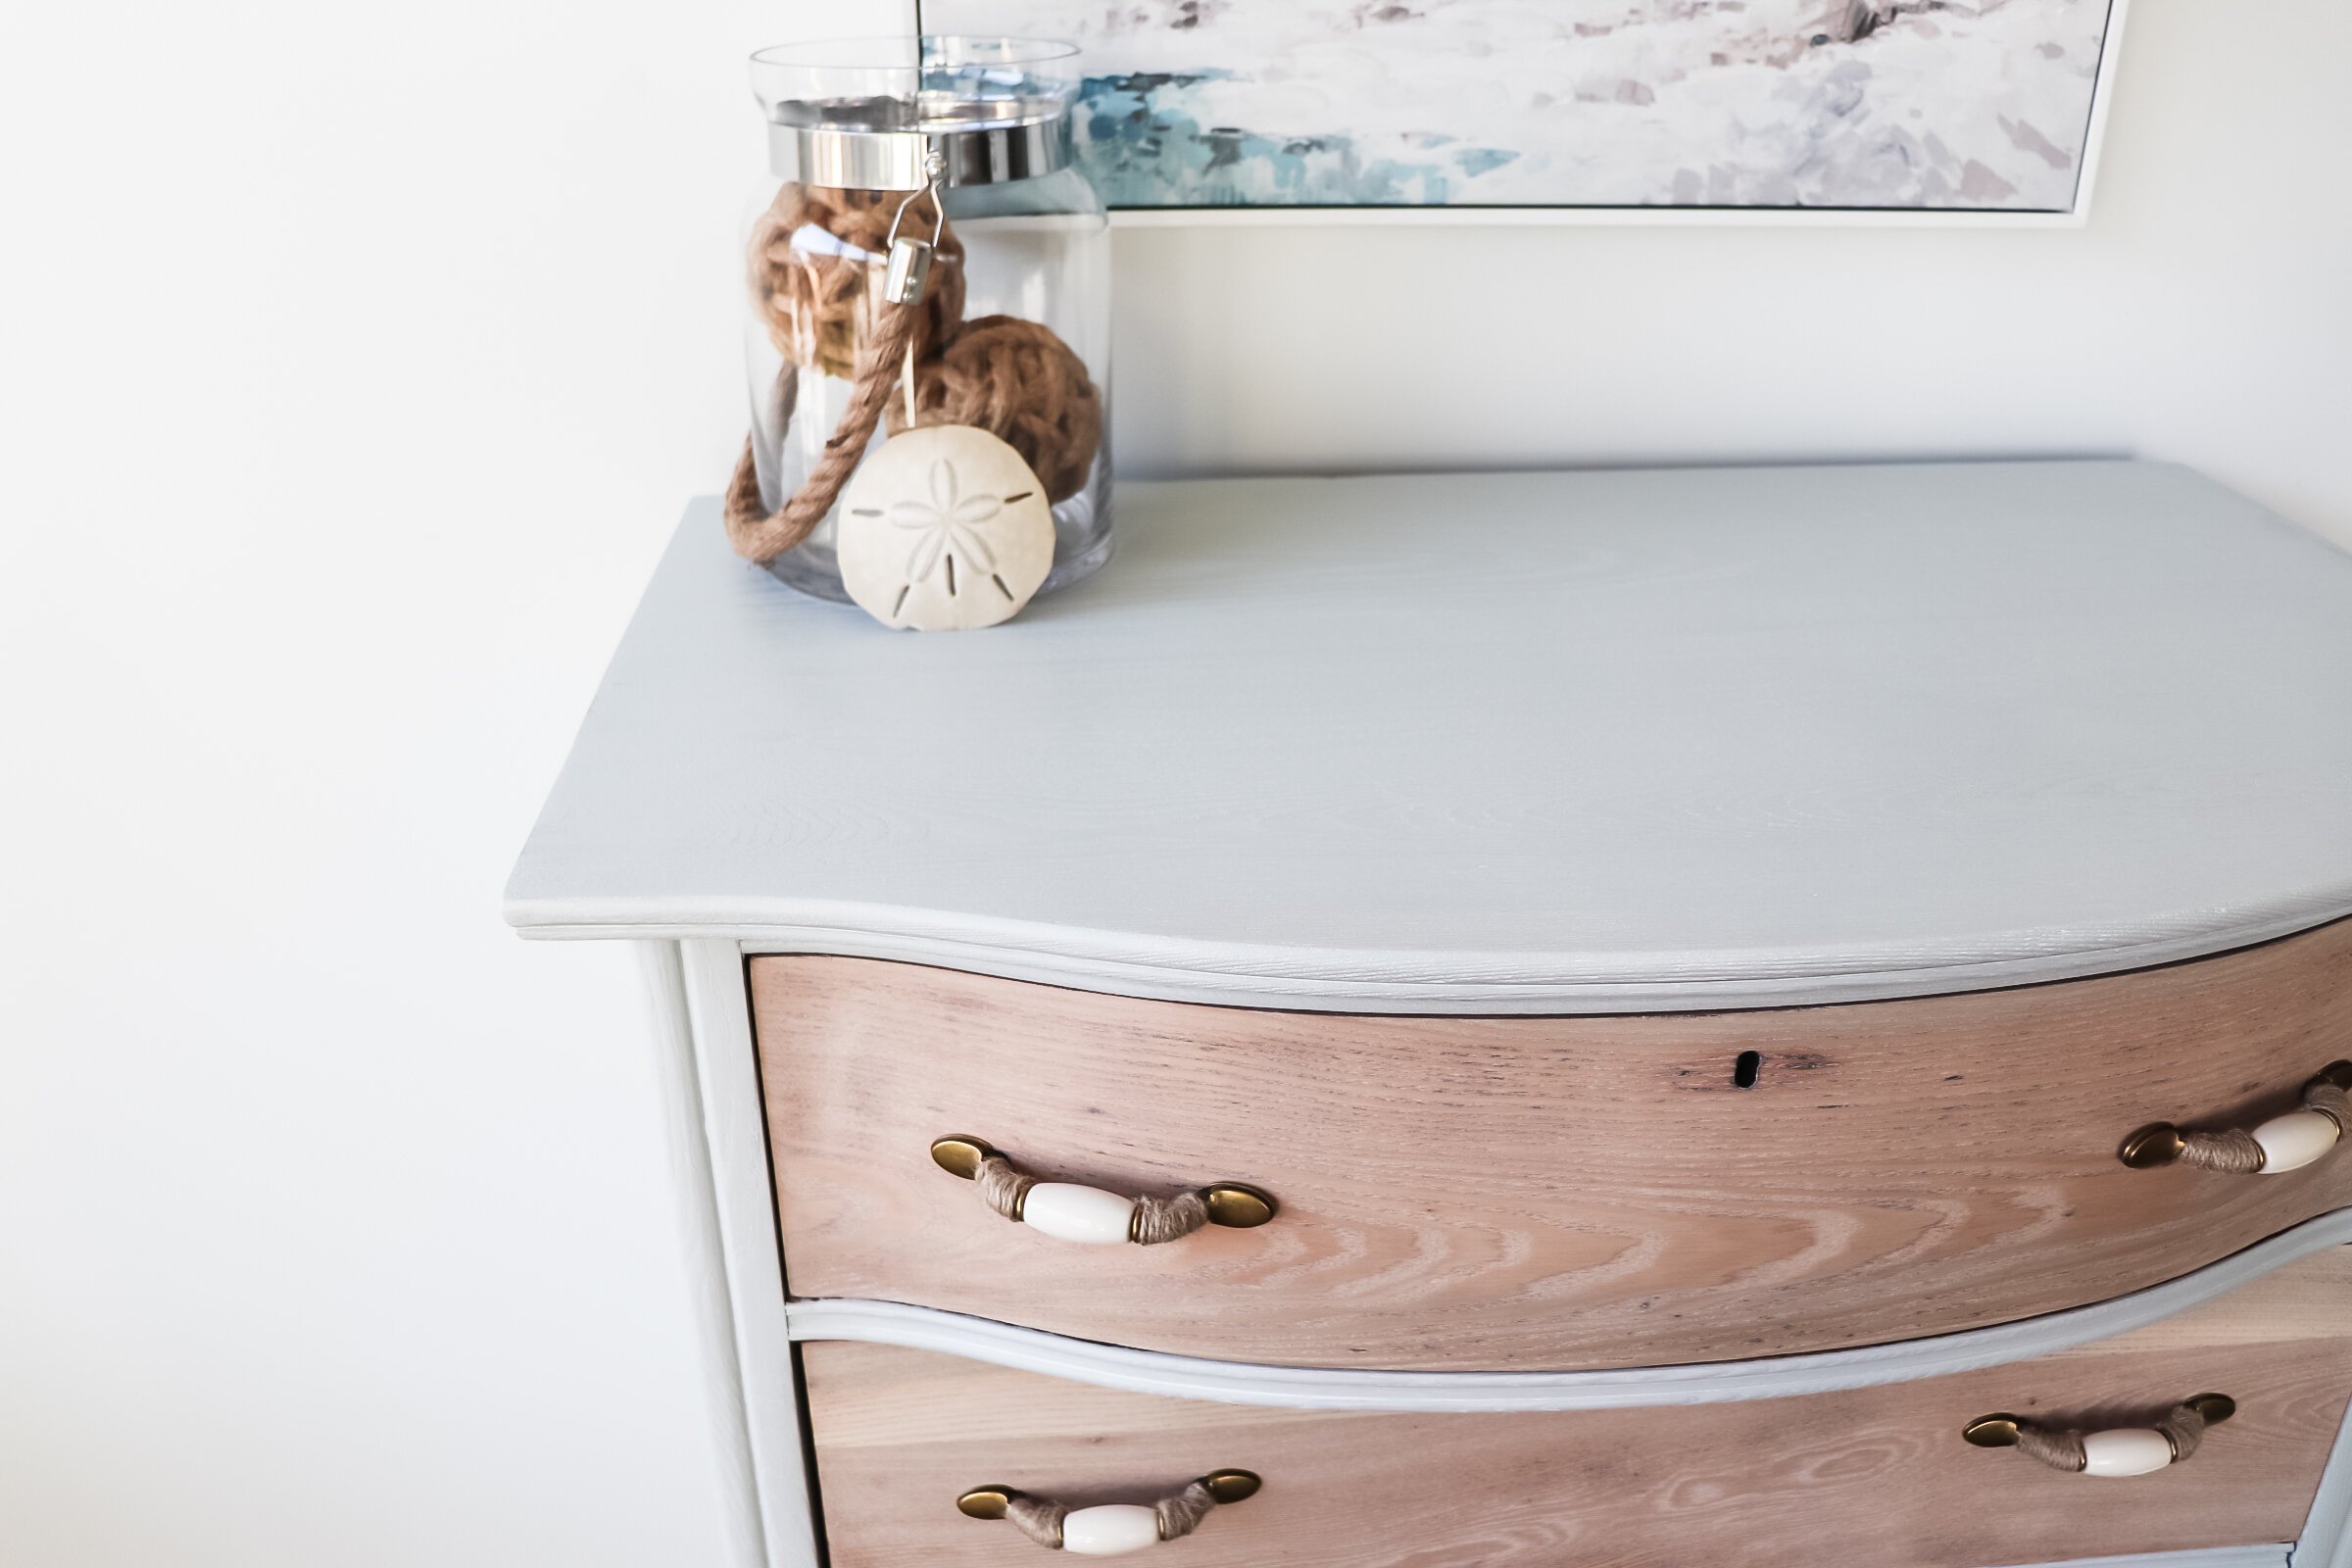
This piece that I snagged has such beautiful grain. Because the stain I used was water-based, it really helped me to keep the integrity of the grain intact. I went to my local Lowe’s and grabbed two different types of Minwax water-based stains - solid and semi-transparent.

With the solid stain, you will keep the grain texture of the piece, but not so much the original color, if that makes sense. With the semi-transparent, you will definitely have some of the wood and grain color show through a bit.
I decided to use the solid stain on the entire frame while using the semi-transparent on the drawers. The two-toned, light vibe that the two different water-based stains give together makes it such a perfect fit for coastal chic.
Materials You May Need for This Project:
Step-by-Step Coastal Furniture Makeover with Water-Based Stains
Step 1: Cleaning & Sanding
The piece I bought was in the addict, so I had a lot of cleaning to do. But overall, this dresser was in great condition which was great because there weren’t any repairs needed.
I stripped and sanded the entire piece on day one of this project, so I grabbed an orbital sander and three different kinds of sandpaper.

I started with a course (80) sandpaper, then worked my way to 120, and finally 220 to make it nice and smooth before adding the pre-stain.
Note: if you’ve seen some of my YouTube videos, I have used some heavy-duty sanders in the past. But what I love bout this orbital sander is that it’s affordable, easy to use, and still, helps save so much time on your projects.
Lastly, if you have little cracks and details in the piece that you can’t reach with the orbital sander, do some hand sanding.

Bonus Tip #1:
As you’re sanding, just remember to always go with the grain. :)
Step 2: Staining & Sealing
This is always the fun part because, with this coastal furniture makeover, the sanding is the hardest part of the project. Onto this staining.
Pre-Stain
But right before that, let’s start with the Minwax pre-stain (water-based). I typically always skipped this step, but with this Minwax stain that I have, it was HIGHLY recommended to use pre-stain...and I could understand why. It ultimately helps the wood absorb the stain evenly...and I’m so glad I used it.
Applying the stain is simple. Stir it first after opening. Use a synthetic brush to apply. Make sure to apply generously with the grain.
Let it penetrate for 1-5 minutes and then wipe back any pre-stain that wasn’t absorbed by the wood.
Let it dry for 15-30 minutes, and then do a light sanding with a 220.

Bonus Tip #2:
When working with the pre-stain (and same with stain), work in small sections so that it doesn’t set for longer than those 5 minutes.
Solid Stain - For Frame of Dresser
If you’re looking to imitate my project, the solid stain will be used for the entire fram of the dresser (everything put the drawers). Again, both of the Minwax stains I used are water-based which I love because that means it will have less odor and will dry much faster than oil-based stains.

You will be able to finish the stain and top-coat all in one day which is a bonus. Applying the stain is a simple process as well. Just like the pre-stain, work in small sections that you
can wipe it back immediately with a synthetic pain applicator pad. Doing this will give you a smooth and even finish with no brush marks. And as always, go with the grain on this coat as well.

Bonus Tip #3:
It’s a good idea to have several pad replacements on hand so that as your pad is getting clogged up from your piece, you can switch to a clean one. Also, have some small applicators pads on hand for more detailed sections.
I found this whole process super easy for the first time doing it. I was really impressed with what a streak-free finish that it provided.
Semi-Transparent Stain - For Drawers of Dresser
Once I was finished with the solid color stain, I moved onto the drawers with the semi-transparent stain. And with this stain, I didn’t get any tint...I wanted to keep it white for that white-washed coastal look.

You will apply this in the same way. With a synthetic brush, with the grain, small sections, and wiping it back immediately.
The only difference I made is that I wiped it back with a lint-free rag rather than a synthetic applicator pad. This takes a lot more of the stain off, and it’s going to show a lot more of that woodgrain to showcase the beautify of the wood.
Like I mentioned, the water-based stain will dry pretty quickly, so you will be ready to seal with a topcoat in 2-3 hours.

Bonus Tip #4
I wanted to note that my synthetic pad did shed a few little fibers into my stain. If that happens, just take a lint-free cloth and buff it out. It worked like a charm.
Step 3: Seal With Wax Topcoat
What you decide to use for your seal is completely up to you. You can definitely seal it with a polycrylic if you’re more comfortable doing that, but I had been dying to try Minwax’s wax so I used 2 different types.
With the wax, you will start by mixing it up with a stir stick just to make sure everything is incorporated.
I decided to use the Grain Highlighting Wax on my blue solid stain because I really wanted to bring out the texture of my wood. This wax made the grain in my piece white and also nicely seal my piece at the same time.

To apply the wax, take a very liberal amount with a lint-free cloth and some gloves, and work it in a circular motion. Let it set for 3-5 minutes, and then wipe it off with a clean lint-free cloth.
And here is the first time you’ll hear more say, “against the grain.” With this highlighting waxy, you want to wipe it off against the grain so that the waxy is really getting in down into it.

Bonus Tip #5
You don’t want this wax piling up in the crevices. So I just took a little toothpick and put that around my rag and got the excess out of all of those little corners
For the drawers, I used the Soft Touch Finishing Wax because I really like the way they look already. All this wax is going to do is seal and protect my piece.
This wax is applied in the exact same way. I do want to note that these waxes are oil-based and should be cleaned up with mineral spirits. So you can either throw your rags out or clean them when you’re done. Both of these waxes are going to provide a really durable finish once they cure down...they are soft and velvety and magical to the touch.
With the Soft Touch, you are going to let it set a little longer (about 15 minutes) than the Gain Highlighting one. Then you will wipe it down with a clean lint-free cloth...with the grain or against...it doesn’t matter with this one. You just want to get that excess off. These waxes will be dry to the touch in about one hour.
Note: like all wax, re-apply once a year!
Step 4: Coastal Furniture Makeover - The Finishing Touches
I let my piece dry overnight and so then it was time to assemble the hardware. The original hardware on this dresser was in bad share, so I found these fun pulls in the hardware section at Lowe’s.

But because of my coastal theme, I also grabbed some jute out of the rope aisle and wrapped them around the hardware. I fastened them with some hot flue and LOVED the way they added that beachy touch to the finish.
The Coastal Furniture Makeover Reveal
You guys, I just love this piece so much and am OBSESSED with the colors. It turned out just as I imagine, so I’m happy with all of the stain and wax choices I made for this piece. If you’d like to see a full visual tutorial, you can check out the YouTube Video as well.
But before you go, check out the amazing finished project below!