Modern Dresser Makeover: DIY Wife's DIY Custom Wood Base Tutorial
Disclosure: This blog contains affiliate links. I will receive a commission for items purchased through these links at no extra cost to you. I appreciate your support. Please read all labels and follow all manufacturer safety recommendations when working with paints, stains, and other equipment.
I love switching it up a bit by following someone else’s DIY tutorial. With this project, I tackled the DIY Wife’s Wood Base Tutorial in order to achieve this Extreme Modern Furniture Makeover...and I was blown away by the results. This definitely pushed me out of my comfort zone, so I’m so glad I took on this awesome challenge.
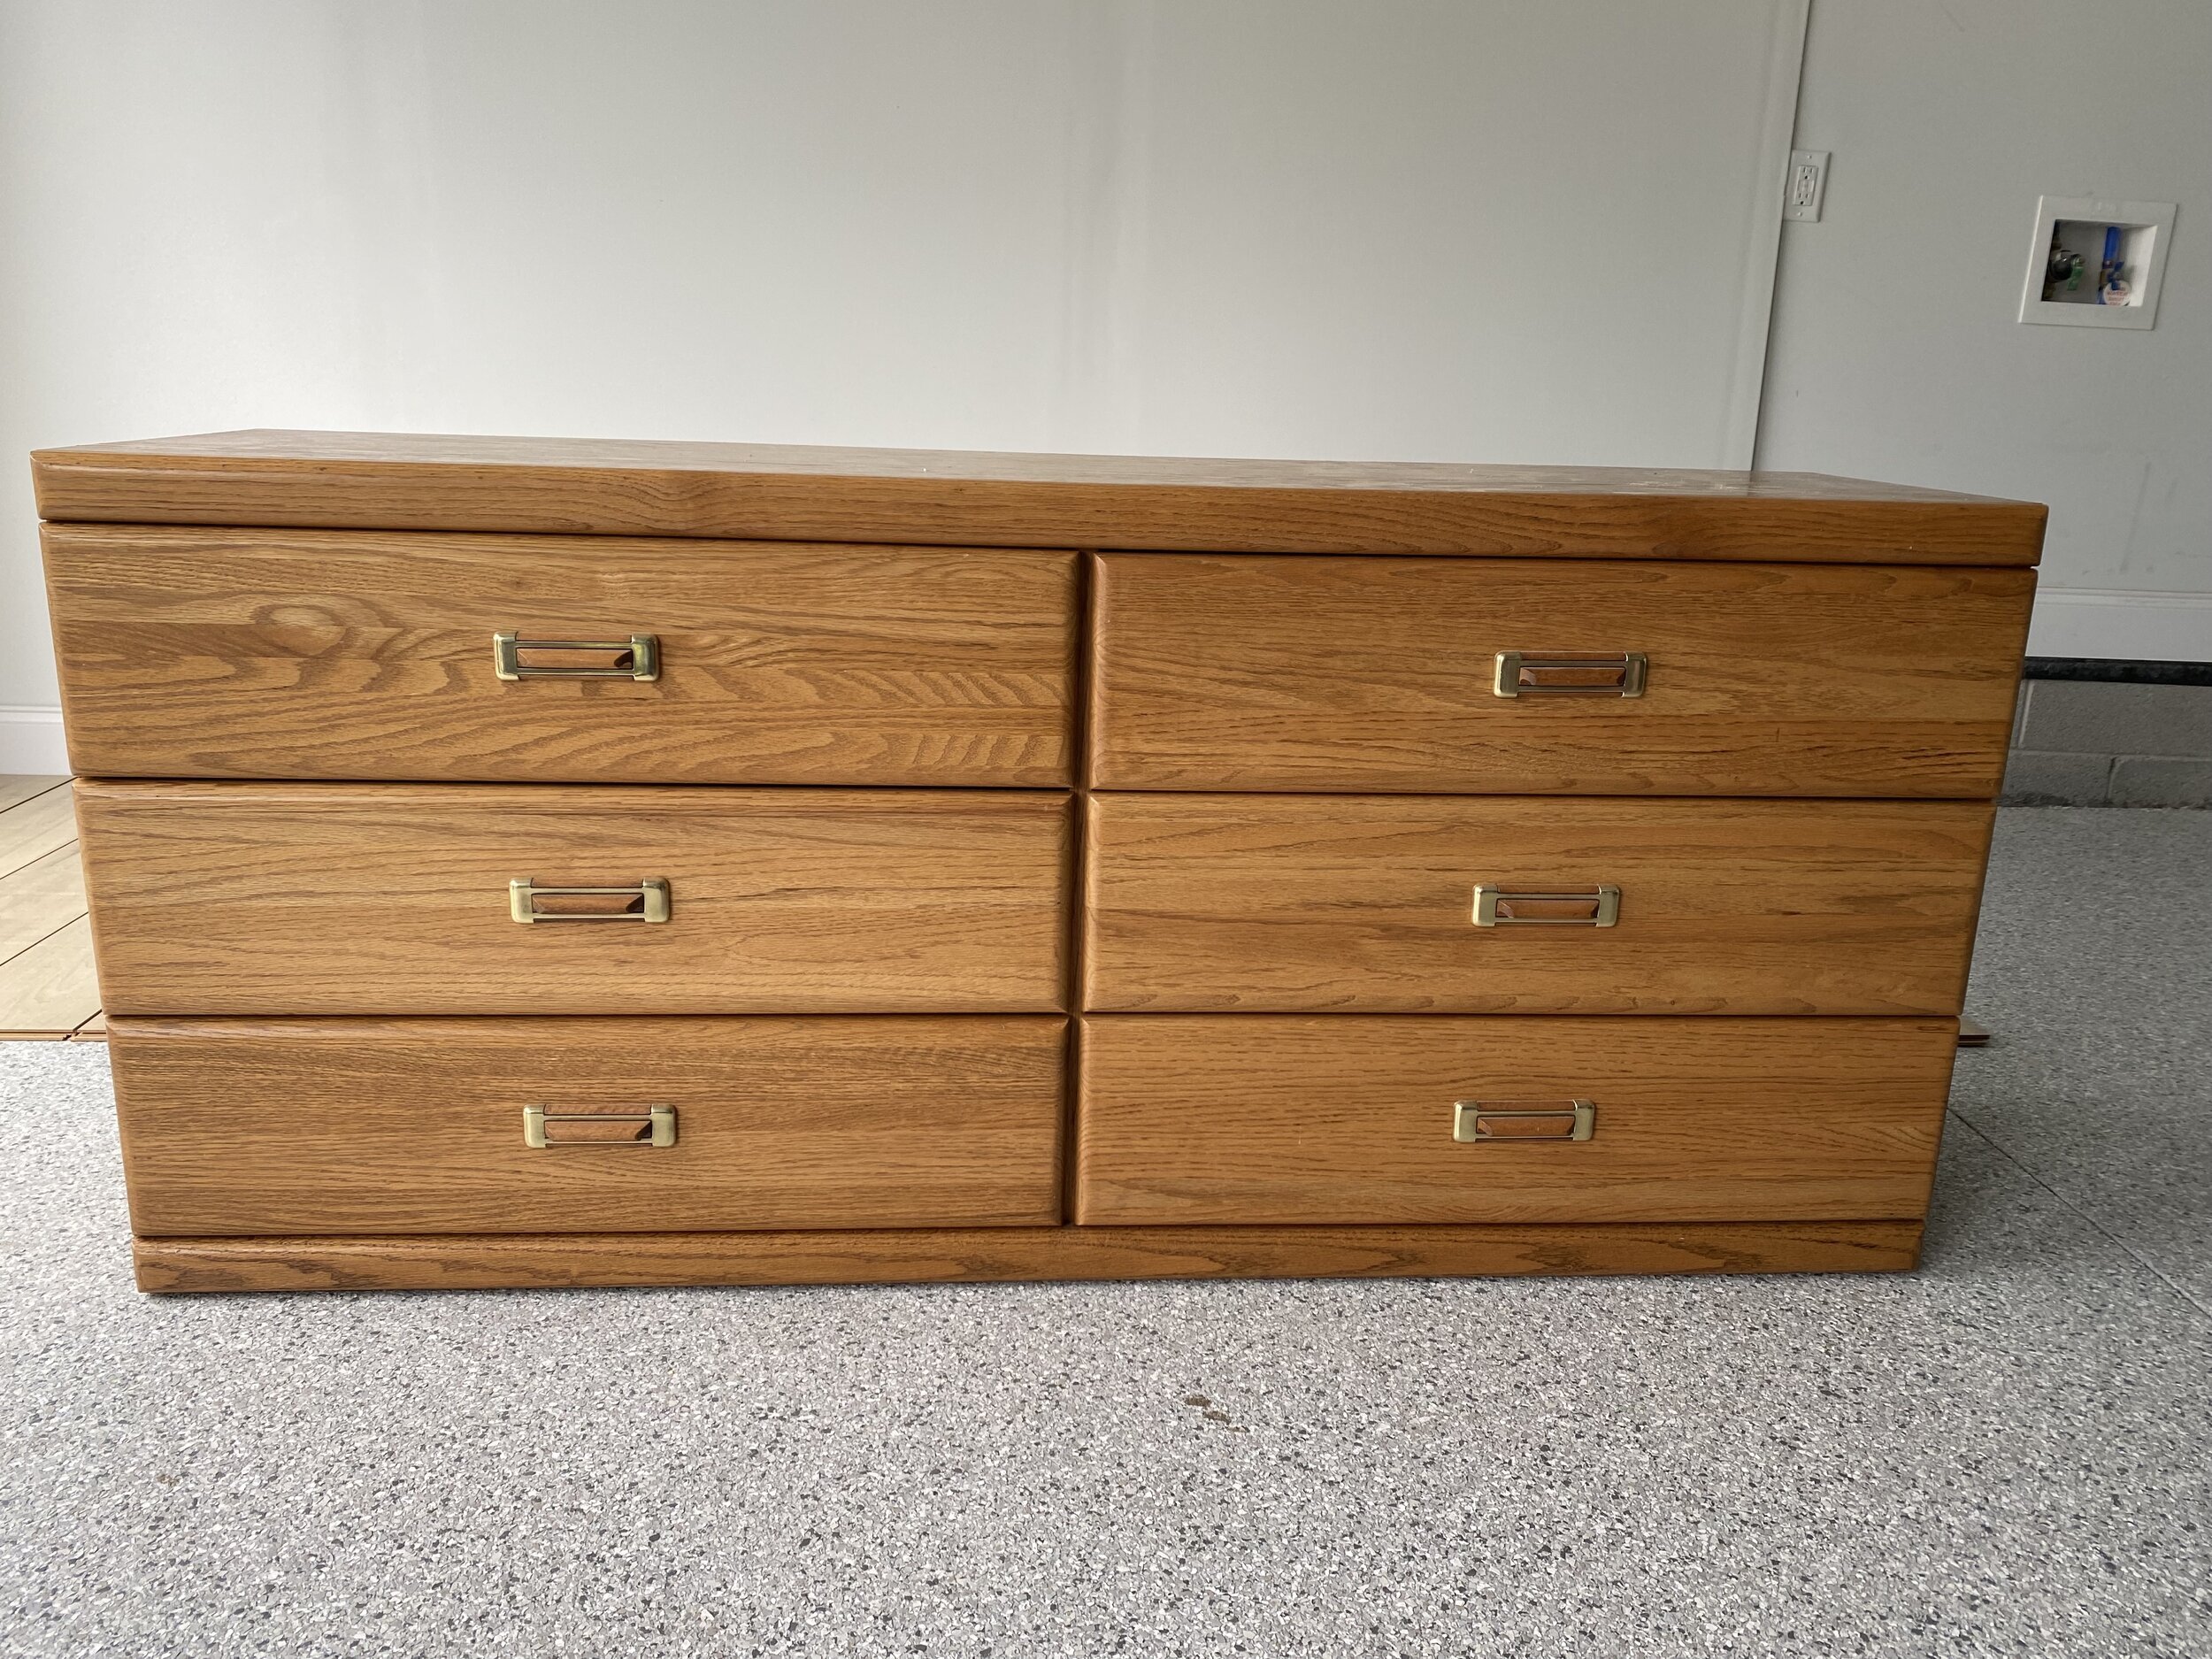
What made this project so fun (and challenging), was that I got to use more power tools than I'm used to in order to create the DIY wood base that the DIY Wife walks through in her YouTube tutorial. This is definitely an ugly duckling makeover. I got this dresser (pictured below) from Goodwill a really long time ago and figured it was the perfect piece to attempt this base on because it’s really low to the ground. This guy is honestly just quite awkward.
Materials You May Need for This Project:
Step-By-Step Tutorial: Modern Dresser Makeover
STEP 1: Prepping for the Wood Base & Dresser Makeover
As usual, prepping for a furniture makeover is an important first step...and it’s even more work when you are taking on the challenge of building a brand new base for your piece. So here are some of the prepping steps for this Modern Dresser Makeover.
Get Your Base Measurements & Get Your Wood
As I mentioned, I watched Andrea's awesome tutorial to get all my measurements before I headed to the store to buy my wood, and I was thankful to find the Red Oak that I was looking for at my first stop at Home Depot.

Bonus Tip #1:
If you’re not as experienced with the power tools like me, buy some extra wood. No need to head back to Home Depot if you mess up!
Remove Hardware
The hardware on my dresser was really dated, and I definitely wanted to give this a more modern look, so I removed them and filled in the holes.
Clean & Rinse Piece
Cleaning time! I used my trusty White Lightning solution in my spray bottle. It’s so important to clean your pieces before getting started, and I love using White Lightning because it really helps with cutting through the grease and residue.
And if you’re using this White Lightning product, make sure you rinse the piece afterward. Some clean water and a rag will do!
Sand or Buff Piece If Needed
The top of my dresser was bubbling in places, so I took a medium grit, sandpaper and smoothed those areas out. Then I decided to just go ahead and give this whole piece of scuff sand with a 220 sandpaper, just to make sure that my paint sticks really well. Depending on the condition your piece is in...you may want to do the same!
Repair Dings & Gouges
I had a really deep gouge on the side of my piece. So I'm just mixing up a two-part, all-purpose putty to fill that in. Okay. Since I had that all mixed up, I just use this to fill my holes. If you didn't have to repair a big gouge like that, you could just use Dixie Mud to fill your holes. That's typically what I do, but I'm going to use my Dixie Mud to actually grain fill.
Since this is an Oak piece, it had some really deep grain and I want it to be more modern and smooth. So I'm going to take my Dixie Mud, add a little bit of water, and paint that on to fill the grain.
Note: I was already using the all-purpose putty for repairs, so I used these to fill in the hardware holes since I had it all mixed up. But usually, I would go for my Dixie Mud to fill in small holes like this.

Bonus Tip #2:
If you’re working with oak or other deep grain wood, you can use Dixie Mud to smooth it over. Just add a little water and use a paintbrush to apply a thin coat.
Sand and Smooth out repairs & Dixie Mud Coat (if you used it to fill in deep grain wood)
I took a break from my grain filling to sand down my holes once they were dry. And then I grain-filled all the drawers. Once my mud was dry, I'm just taking a 220 sandpaper and removing the excess and you can see that that grain is nice and filled.
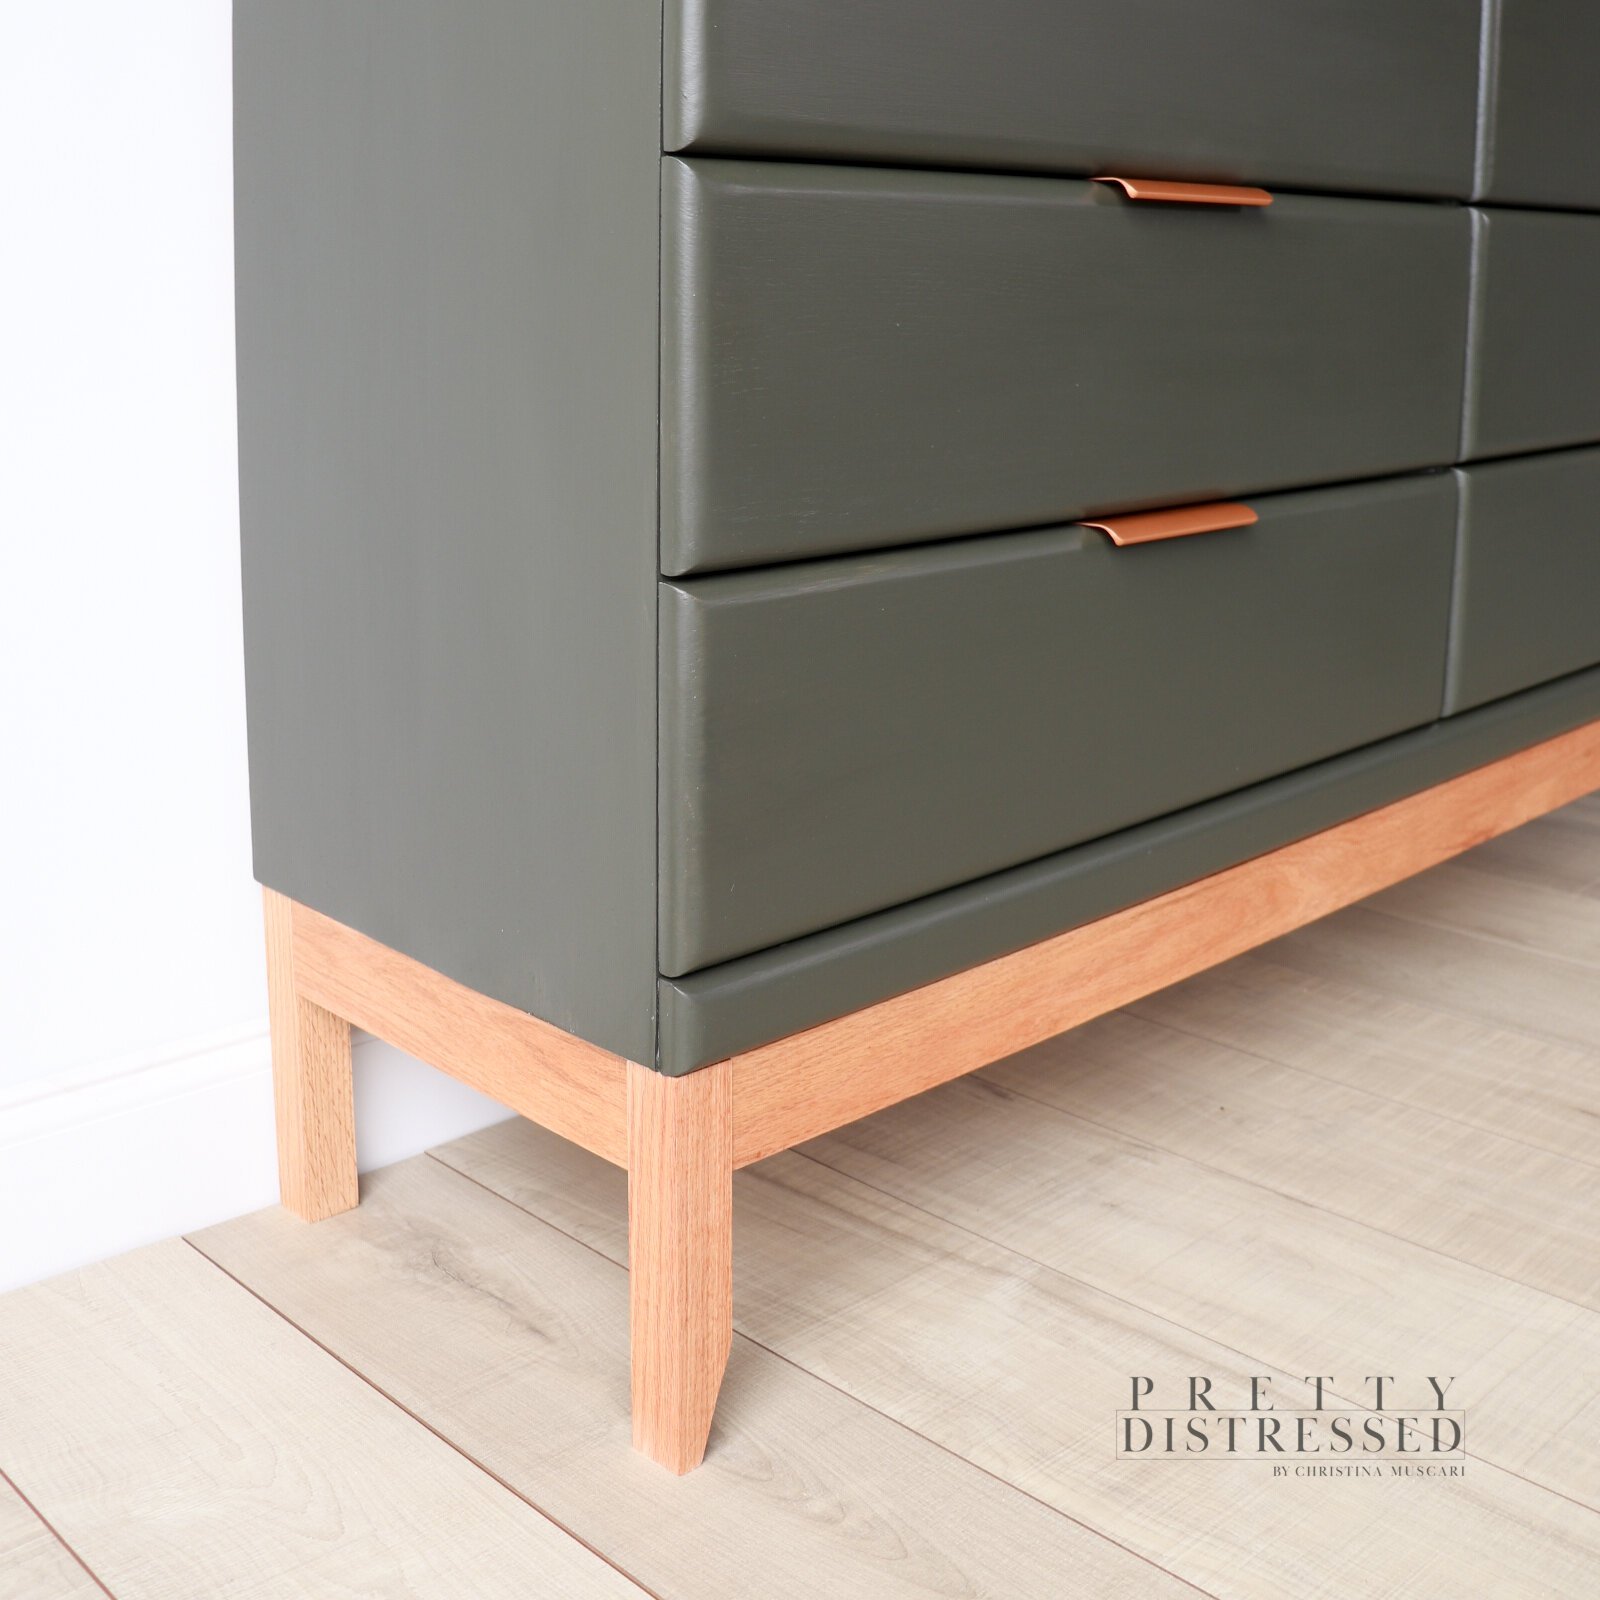
STEP 2: Building the Modern Wood Base
So here is the star of the show, right? Creating this sleek wood base is what makes this a modern dresser makeover. I love the way it turned out! So here is a little breakdown.
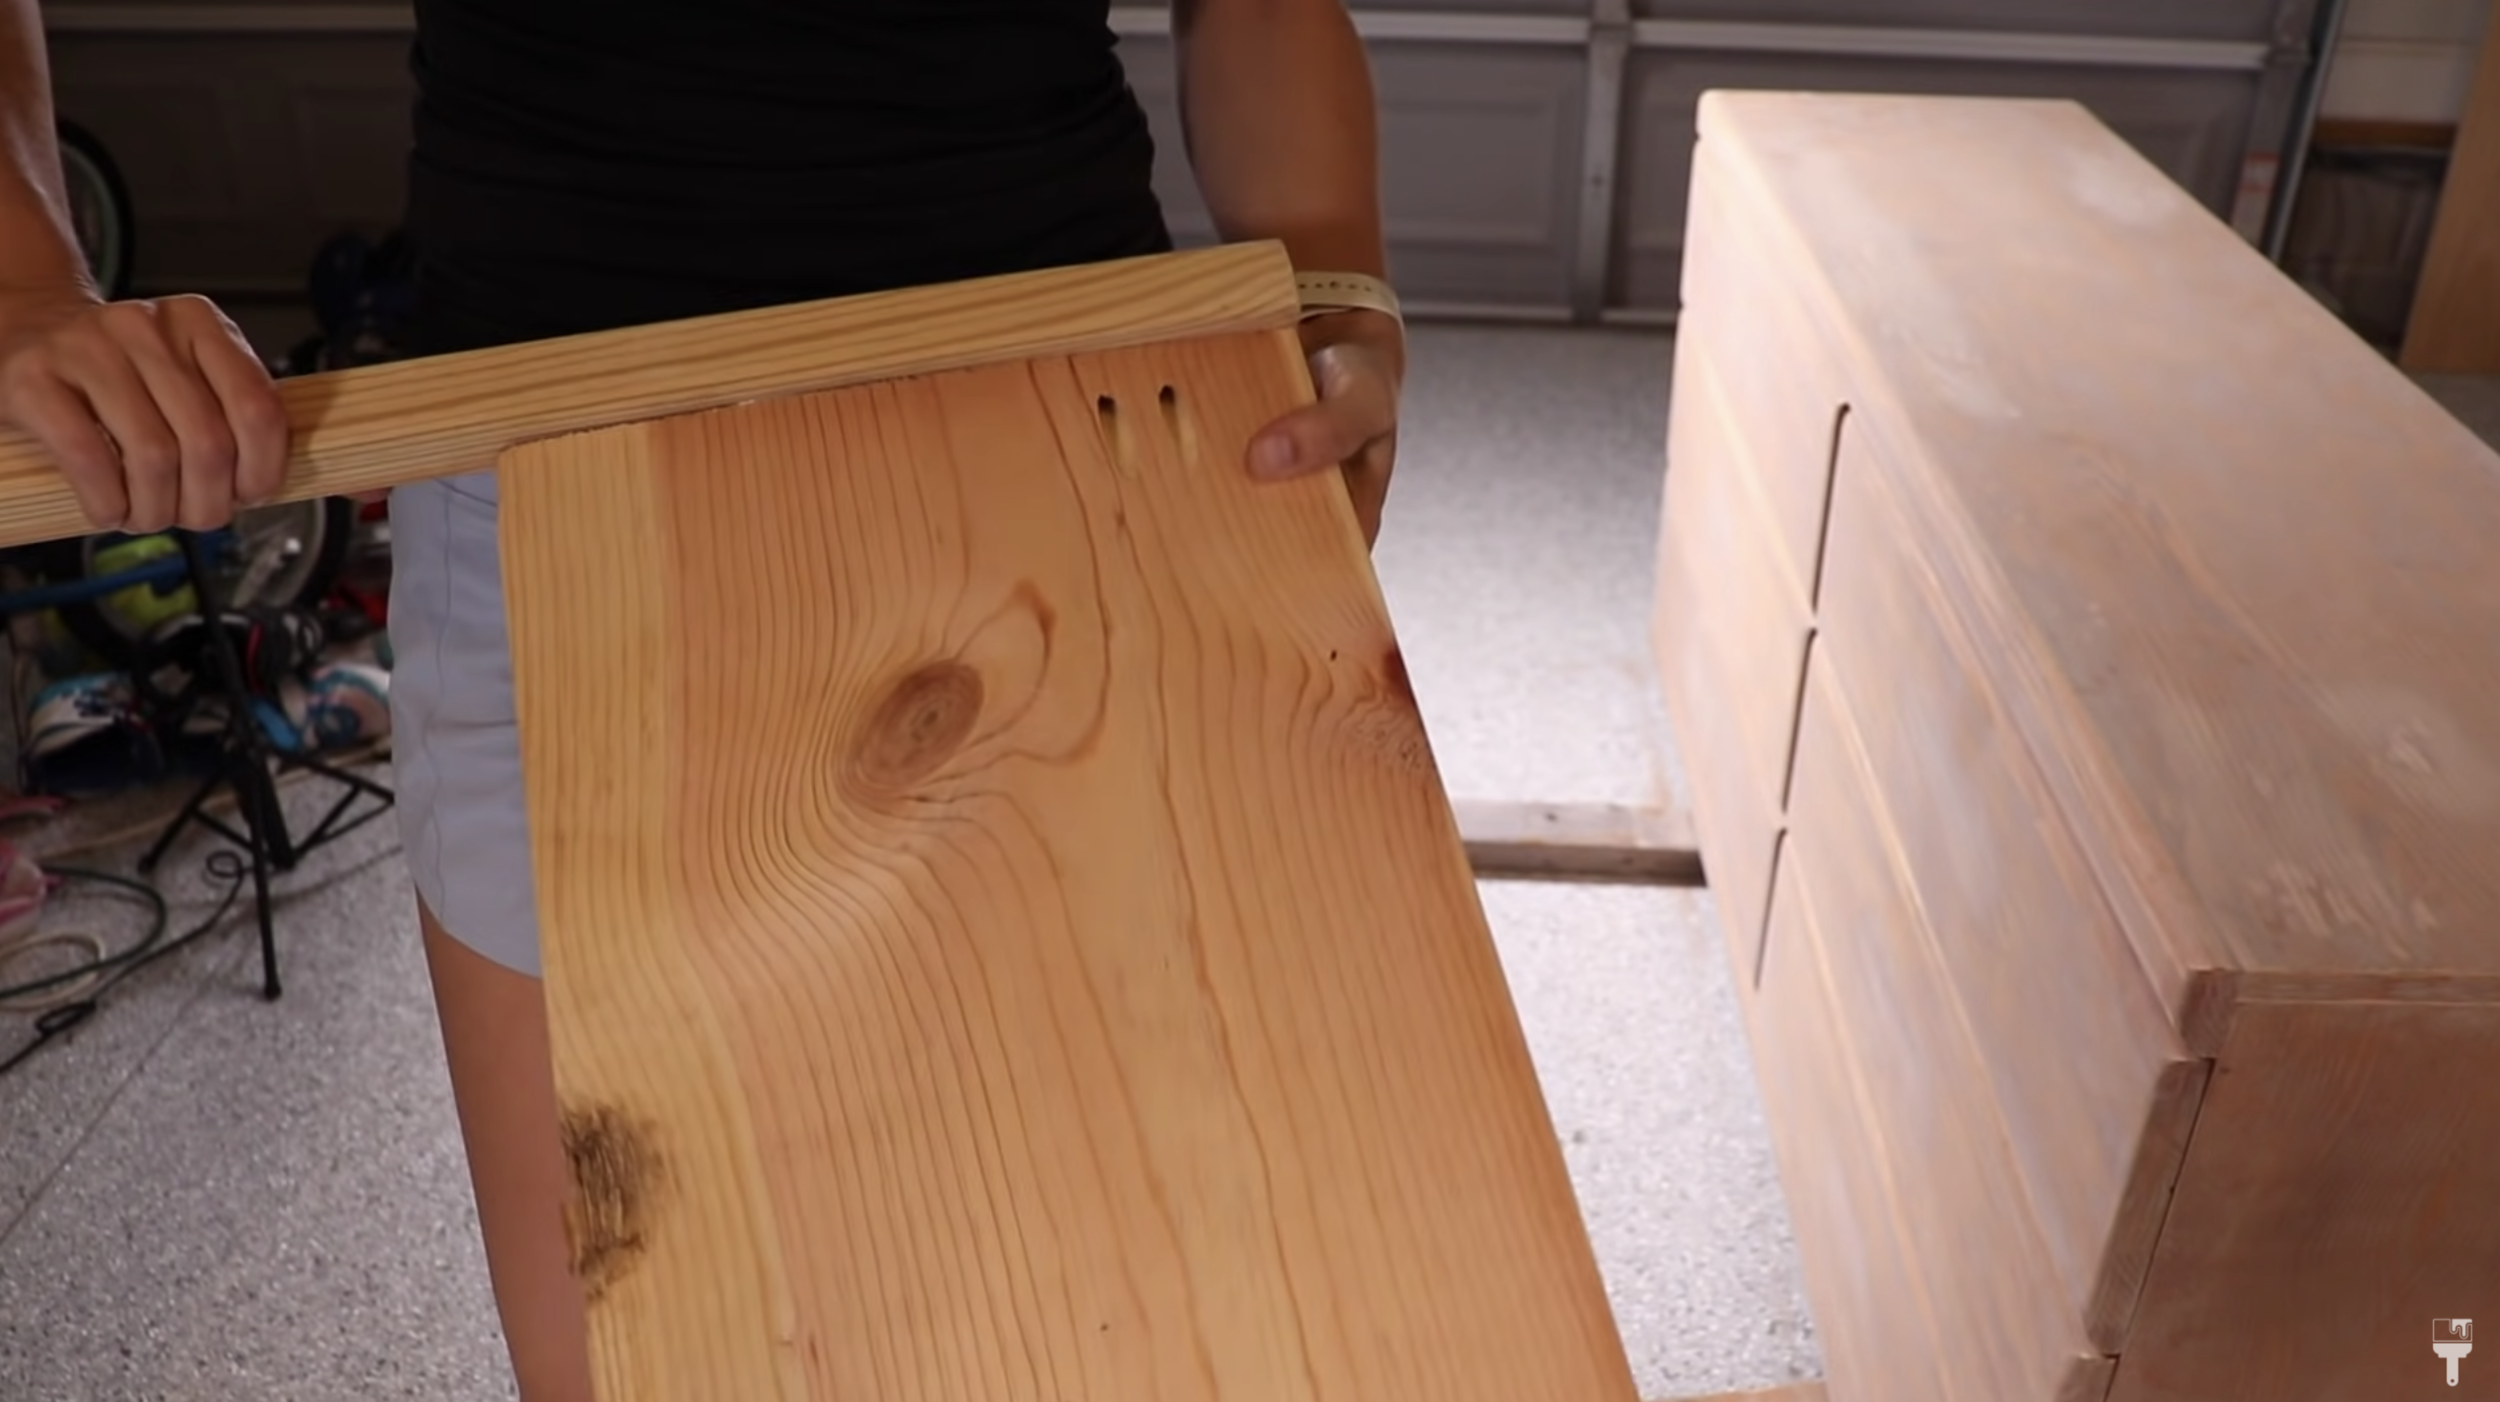
Cut wood to measurements
If you’re a nervous nelly like I was during this project, you may just check your length a 3rd, 4th, and maybe even 5th time before cutting your wood...haha. Kind of kidding...but also not. ;)
Remember, If you want detailed instructions on how to measure and cut your base, make sure you check out Andrea's video. And please just be really careful when you're using the saw and do not have your hand anywhere close to the blade.
Pocket Holes
I used the Kreg Jig K4, and I highly recommend it because it was so easy to use! This was my first time using it on my own and it worked like a charm. I did a pair of pocket holes at the end of each 1 x 3 boards. And that's how they attach to the feet.
Then I did some additional pocket holes down the side of each board. And that's the way it's going to attach to the dresser. Again, for more details that go check out the DIY Wife's video.
Bonus Tip #3:
Practicing is always a tip of mine for beginners (which is also me in this case). Practice your pocket holes if you have a spare piece of wood. I did this and I’m glad I did because I messed up a couple times!
Assemble Base
For my base, I used the fine thread hardwood screws that Andrea recommended.
Full disclosure: I cracked two different feet while assembling the base. My note to you here is to use clamps and drill some pilot holes for this step. I had fine screws and did it really slowly, but it still cracked. Lesson learned!
After assembling, I gave the wood a nice light sanding. If you are more of a visual person, you can check out my tutorial on this specific piece or the DIY Wife’s tutorial.
Step 3: Painting Your Piece
Wipe Down & Apply Primer
I always do a wipe down of a piece right before I get started with painting because particles are always flying around whether you see them or not. I primed my piece with Dixie Belle’s BOSS in Gray because I was going to use a darker paint color. Gray primer is great for that. :)
I got this piece from Goodwill, so this primer will definitely help block some of that “old” smell that it had. It also created a nice clean surface for the paint to adhere to since I did so many repairs on it.
Paint 1st & 2nd Coat
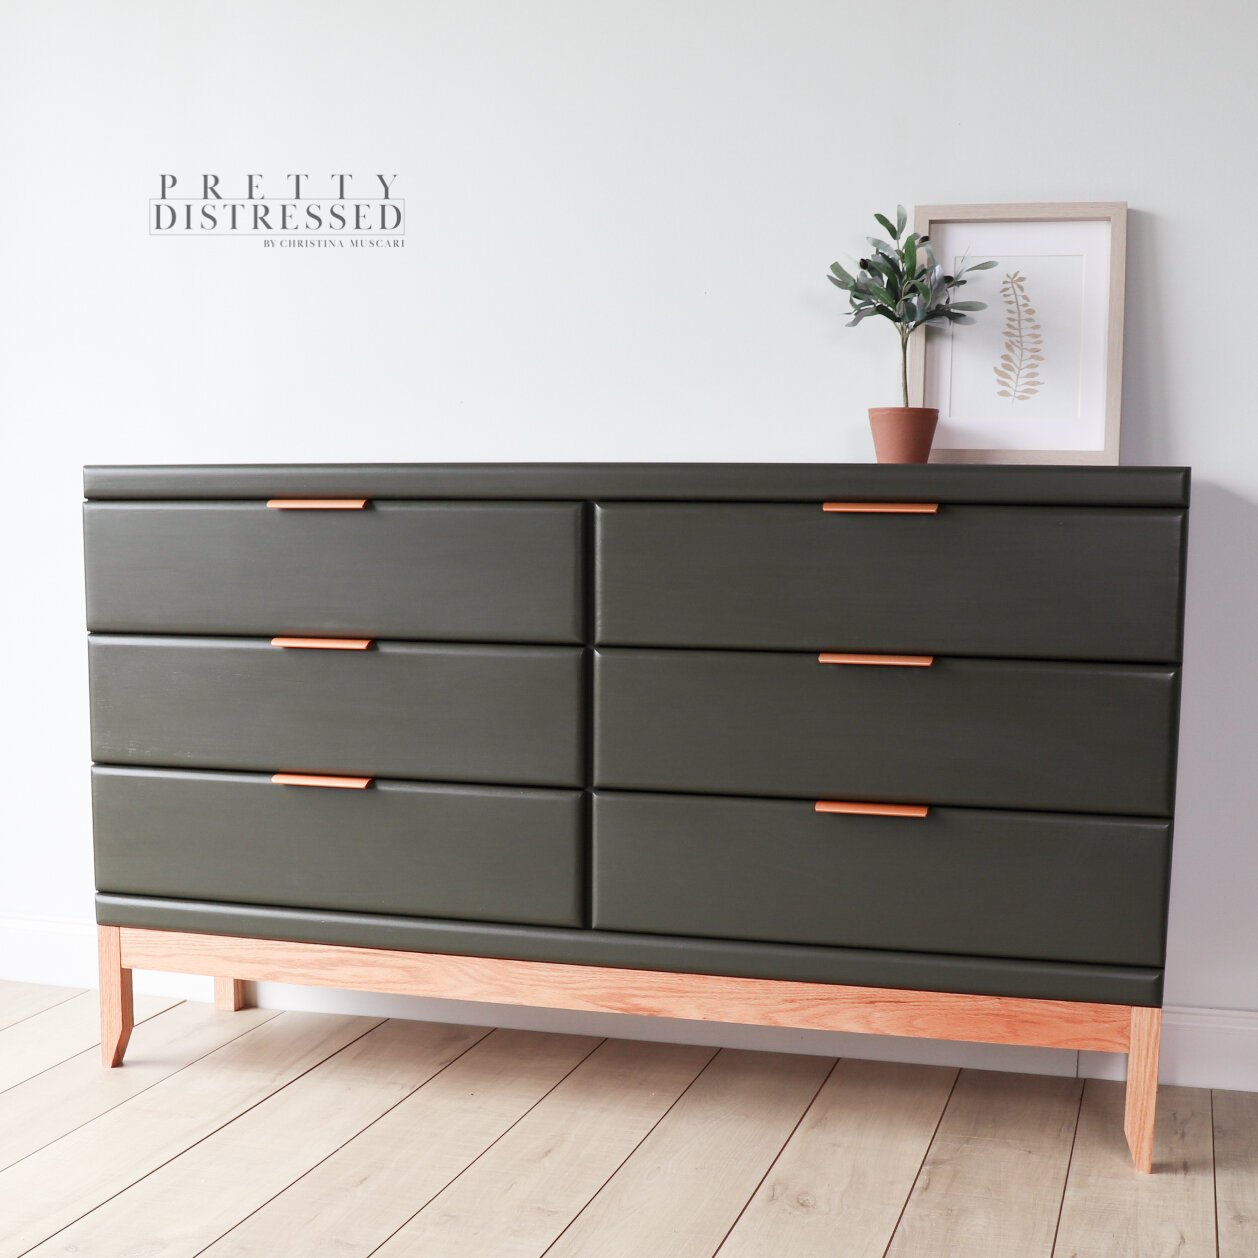
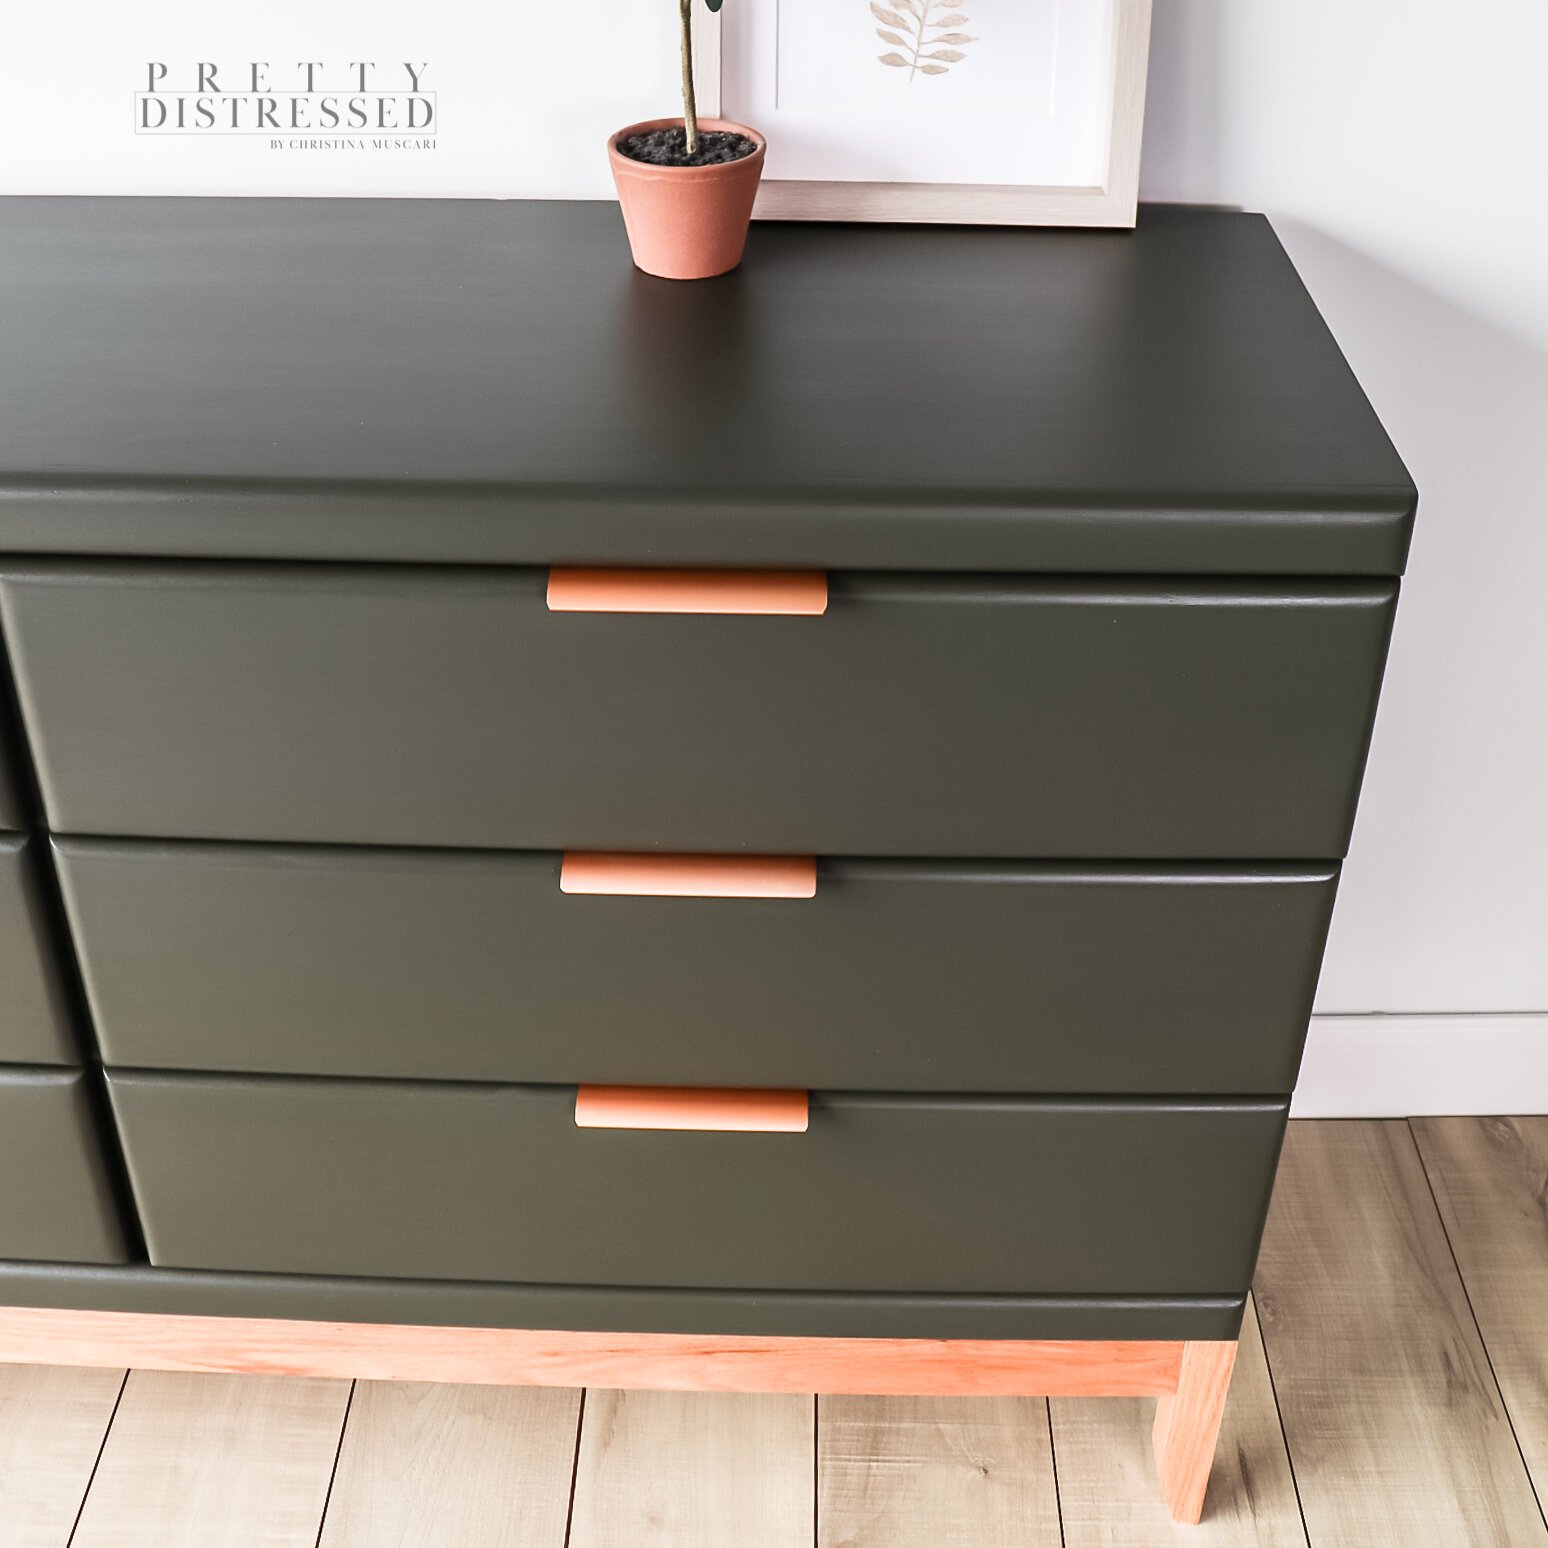
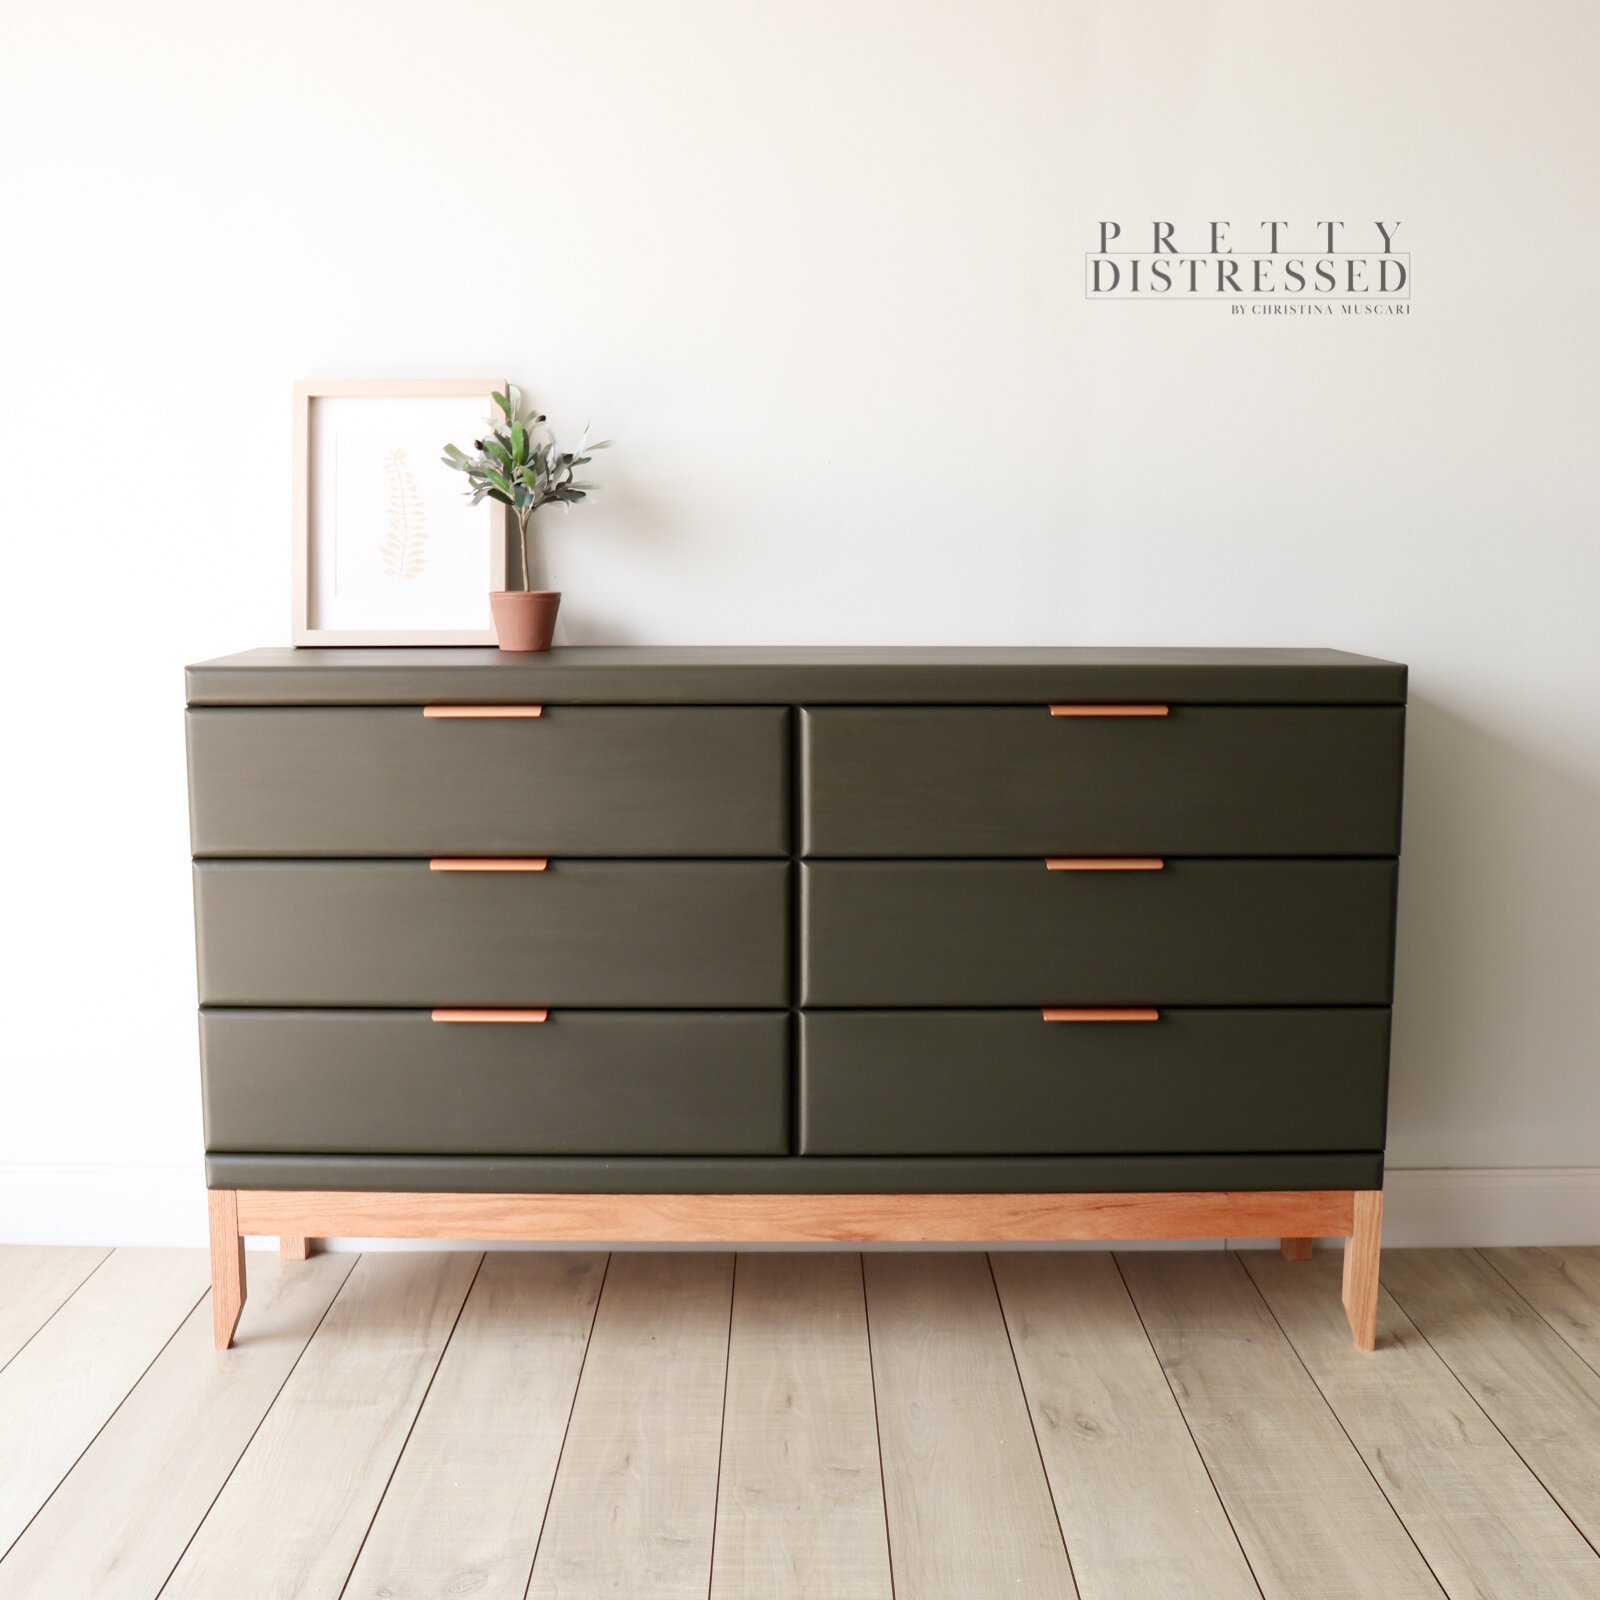
I painted this piece using a beautiful, dark green paint with a black undertone that I’d been wanting to try forever. The paint color is Dixie Belle Collard Greens, and it was perfect for this extreme modern makeover.
I also used my Dixie Belle Angled Mini Brush to apply this…it’s one of my favorite brushes to use.
Onto day 3 of this project and my first coat was looking amazing. So I went ahead and applied my second coat in the exact same way.

Bonus Tip #4
For a modern, smooth look, put water in a spray bottle and have it on hand to help smooth the paint out while you are applying it.
Step 4: Finishing Touches
Attach the Base
I let the 2nd coat dry completely before my husband helped me flipped the dresser on its side to attach the base.
We clamped the base on to get it in place before we started to attach it. The pocket holes I drilled in the base earlier in the process worked perfectly.
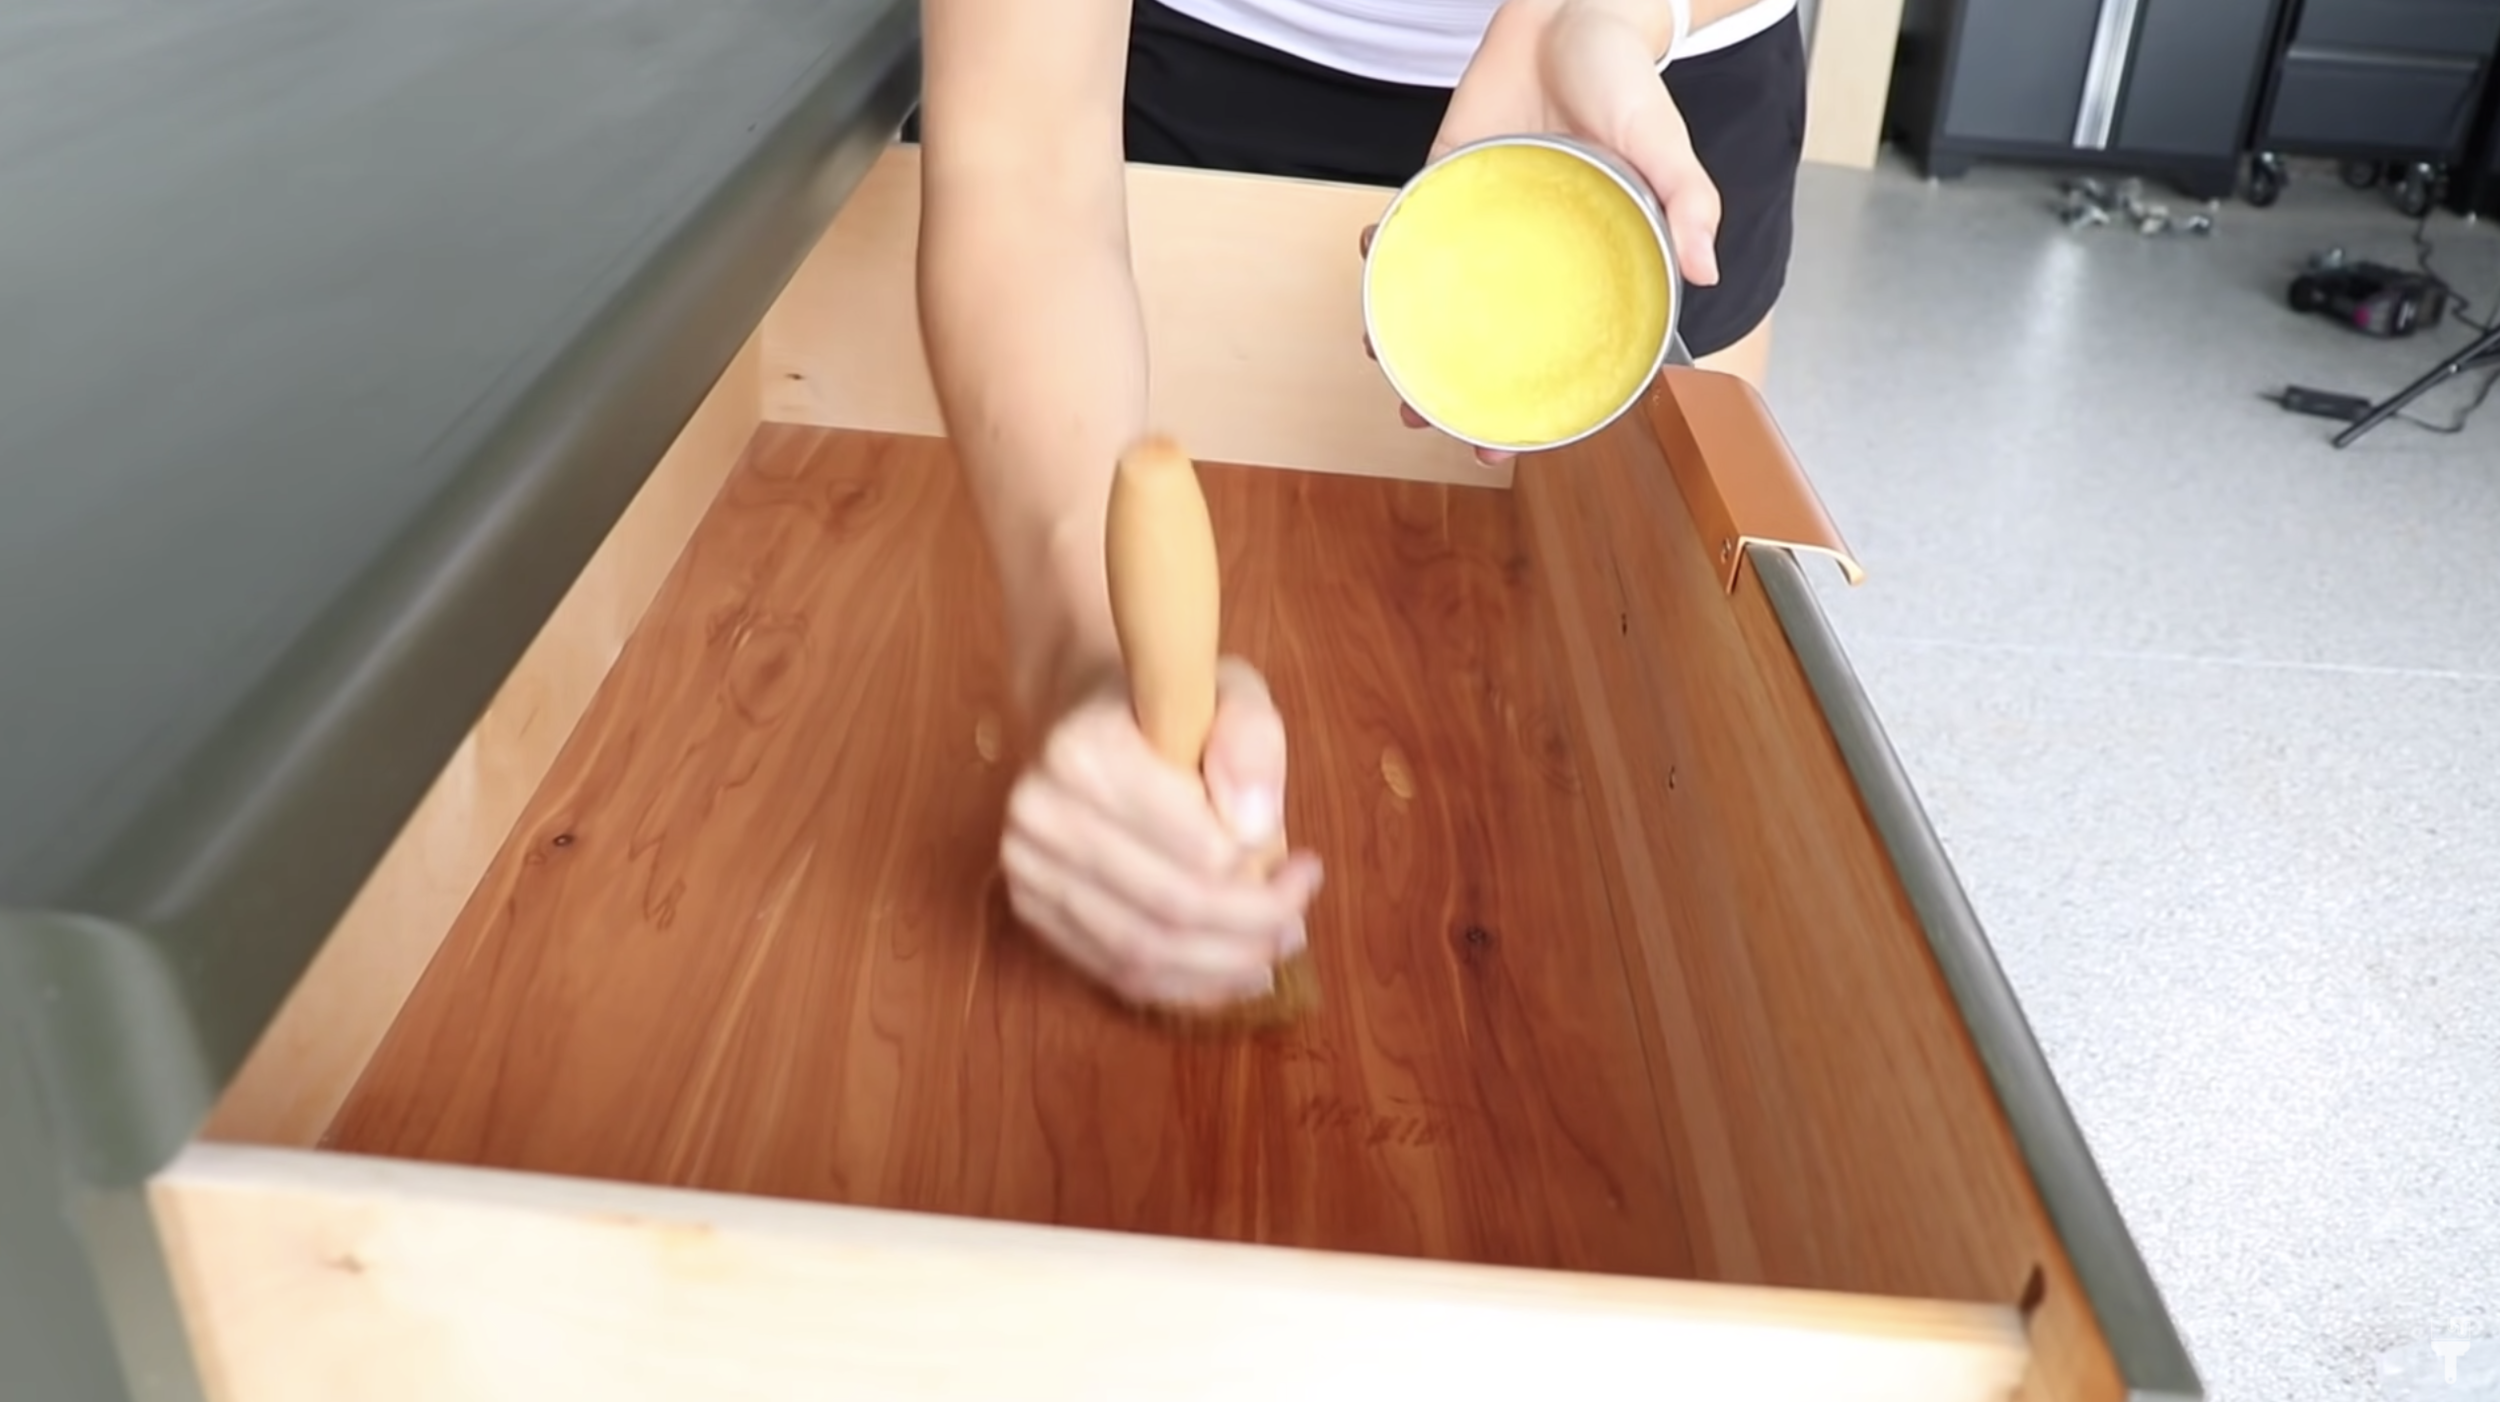
Seal Your Piece
Now I’ve got to tell you about one of my favorite Dixie Belle products. To seal this piece I used Big Mama’s Butta in my favorite scent of ORANGE GROVE. I used the Best Dang brush to apply it.
With a lot of my projects, I use a clear coat in flat, so I wanted to change it up a bit.
I love using natural wax on darker colors to really help it pop. Plus I wanted to use this on the base because I saw Katie Scott do it…and the way that this Big Mama's Butta made this red oak look was just absolutely gorgeous.
Once finished applying the wax, I simply took an old black t-shirt to wipe back any excess.
Bonus Tip #5
You can actually use Big Mama’s Butta on the inside of drawers to rejuvenate them and freshen them up.
Add the Hardware (Reassemble or Add New!)
As I mentioned earlier, the hardware on this piece didn’t fit with this extreme modern dresser makeover, so I got these super cool Finger Pulls from Amazon. They ended up being perfect for this project.
These drawers are Oak, so I drilled some small pilot holes in the drawers to help my screws go in.
The Finished Modern Dresser Makeover
Okay, so before the big reveal, I wanted to quickly bullet point a few things I learned during this project:
My number one takeaway is that pilot holes and clamps are going to be your best friend for actually putting the base together.
The Kreg Jig K4 is really, really easy to use…I highly recommend it.
Be kind to yourself! This was a really really hard project for me. It took a lot of time and a lot more effort than I’m used to putting into furniture. It can get frustrating when you are trying new things, so just know that it probably won’t be perfect. ;) But it’s all a learning experience.
So she’s not perfect, but I’m so happy with the outcome and I really do love the finished product. I have to say thanks again to Andrea, the DIY Wife for sharing this amazing tutorial.
Thanks for hanging out here on my blog with me! You can see this full tutorial on my YouTube Channel: Modern Extreme Furniture Makeover. check out the after images below!! She’s pretty, right? :)