Dining Table Makeover: Don't Buy New Furniture
Disclosure: This blog contains affiliate links. I will receive a commission for items purchased through these links at no extra cost to you. I appreciate your support. Please read all labels and follow all manufacturer safety recommendations when working with paints, stains, and other equipment.
If you’ve been around for any length of time, you know I’ve been painting furniture for a long time. Today, I’ll be doing a dining table makeover on one of the very first pieces of furniture that I painted. This table belonged to my husband’s grandmother, so it’s been an honor to have it in our home. It’s been in my dining room for years, and it’s ready to go modern.
The best part of this makeover is that I accomplished it in under $150, so I hope that this step-by-step tutorial encourages you to reimagine your existing furniture! You don’t have to buy new pieces to give your home a new look!

Products Used for this Dining Table Makeover
How to DIY Your Dining Table Makeover
Step 1 (Optional): Remove any wax build up
When I originally finished this table, I sealed it with wax because that's what everybody did back then. It is not super durable for a dining table. So this time around, I’ll be sealing it with something more protective. But before I get going on this makeover, I have to strip that wax buildup that’s on here. You can do this a number of ways, but I like to use rubbing alcohol.
Remember, this is an optional step if you know the piece you’re refurbishing has wax build-up. Otherwise, you can skip this step!

Step 2: Clean with TSP soap
When you're painting a piece of furniture you want to make sure you give it a good clean. You don’t know where it’s been or if it’s been polished over time, etc. It’s important to break all of the substance buildup down. The best way to do this is to scrub your piece with TSP soap like White Lightning.
Step 3: Rinse with clean water
I know cleaning is boring, but it's an important step in getting your paint to adhere correctly. And a part of the process is rinsing because leaving the soap residue on your piece is just as ineffective as not cleaning it at all. Make sure to get some clean water and rinse the entire thing down to get off that residue.

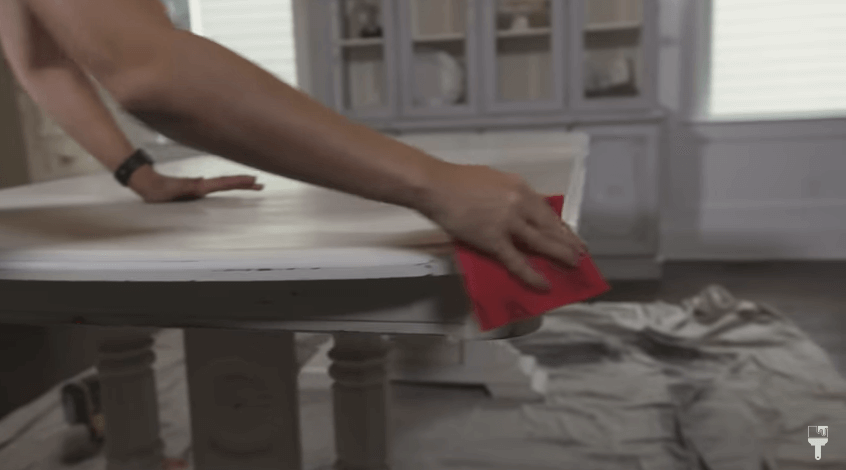
Step 4 (Optional): Scuff Sand
You probably know how I feel about scuff sanding. I always recommend it, but I did list it here as an optional step. I consider scuff sanding as insurance because it’s going to help your paint stick a little better. Overall, you’re going to end up with better results if you don’t skip this step.
I like using a 220 grit SurfPrep Rad Pads and putting a little elbow grease into sanding it by hand. Although, if you want to save time, you can invest in an orbital sander which can be purchased for about $50.
When you're scuff standing, you don't have to remove the existing finish on there. You just wanna see it really dull and roughed up. Once you scuff sand, make sure that your piece is free of dust by wiping it back with a damp cloth.
Step 5: Make any alterations to modernize or repairs if necessary
Every piece of furniture is going to be different. Some will require repairs, and you may even want to make alterations to some in order to get the design you’re looking for. My dining table is in great condition, but there is still a panel between the decorative legs that’s outdating it.
As you may have noticed in some of my recent makeovers, I’m trying to get away from the distressed farmhouse look in my home. This isn’t because I think farmhouse is dead, but I’m just ready for a new look, so this old-fashioned table needs some modernizing. I’ll be removing those panels to give this dining table makeover the modern look I’m going for.

Step 6: Paint with furniture paint
Now that we’ve prepped our dining table makeover, it’s time for the paint! To modernize this piece, I’ll be painting it in a moody blue/black color. I get a lot of questions when it comes to which paint to use, how to get a smooth finish, and other painting tips, so I’ll break down this section into a bit of a Q & A format.
What kind of paint do you use on a dining table?
To paint furniture, you don’t want to grab latex paint or paint you’ve got out in your garage. That kind of paint is meant for walls and isn’t going to stick to your furniture well. You want to be sure to get paint that’s meant for furniture like Dixie Belle Mineral Chalk Paint. For this dining table makeover, I’m using the color Midnight Sky.

What consistency should my paint be?
Dixie Belle’s chalk mineral paint is on the thicker side, so I do like to thin it out a bit. I ended up using 1oz. of water to 12oz. of paint.
What paint brush should I use to paint furniture?
For this project, I used Dixie Belle’s Angle Synthetic Brush to put my paint on. This is a nice, smooth synthetic brush. The angle of the brush helps me get into the rounded corners and nooks of the piece.
How do you get a smooth finish when painting furniture?

When you’re using a paintbrush, it’s inevitable that you’ll have some brush strokes. But… there are definitely things you can do to get a smoother finish.
Have a misting spray bottle of water on hand to mist the paintbrush as you’re painting.
Start your brush stroke in the middle of the piece and work your way outward so that you avoid drip marks on the edges.
After you’ve completed a strip of paint, go over it from one end to the other without stopping to get rid of any stop/start marks.
Overlap each strip of paint with the last while it’s still wet. This is called “having a wet edge.”
Give the piece a light sanding against the grain of the brush strokes in between each coat.
Make the subsequent coats of paint thinner by adding more water
Note: Use tips 2-5 for your topcoat as well!

Step 7: Seal with a durable topcoat
As I mentioned, when I first did a makeover on this dining room table, I sealed it with wax which wasn’t the best option. This time, I’m using a much more durable topcoat and using Clear Coat Flat. It’s going to give a good protective finish.
If you have a flat surface to work with, apply the topcoat with a Foam Brush. That’s going to give you a nice smooth finish. Because the bottom of my table isn’t flat, I’m using the same angled brush for the legs and the foam brush for the tabletop.
Tip: I know I’ve mentioned it before, but if you’re putting a topcoat on a dark color, mix in a tiny bit of your paint into your topcoat to avoid having a hazy finish. And don’t worry as you apply the topcoat… it’ll have a white pigmentation, but it will dry clear and flat.
Remember, you can use the same sanding technique in between coats to achieve a smooth finish!

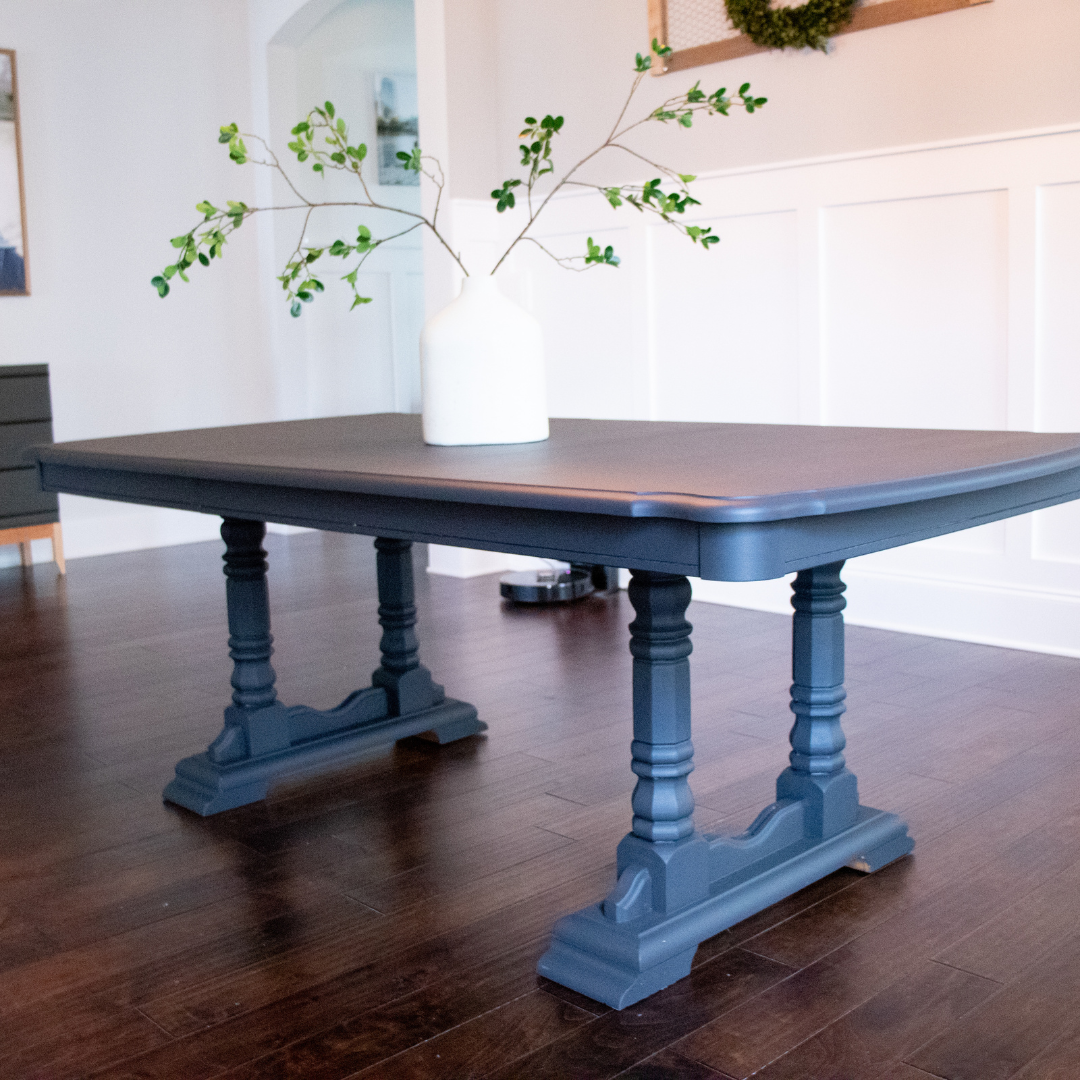
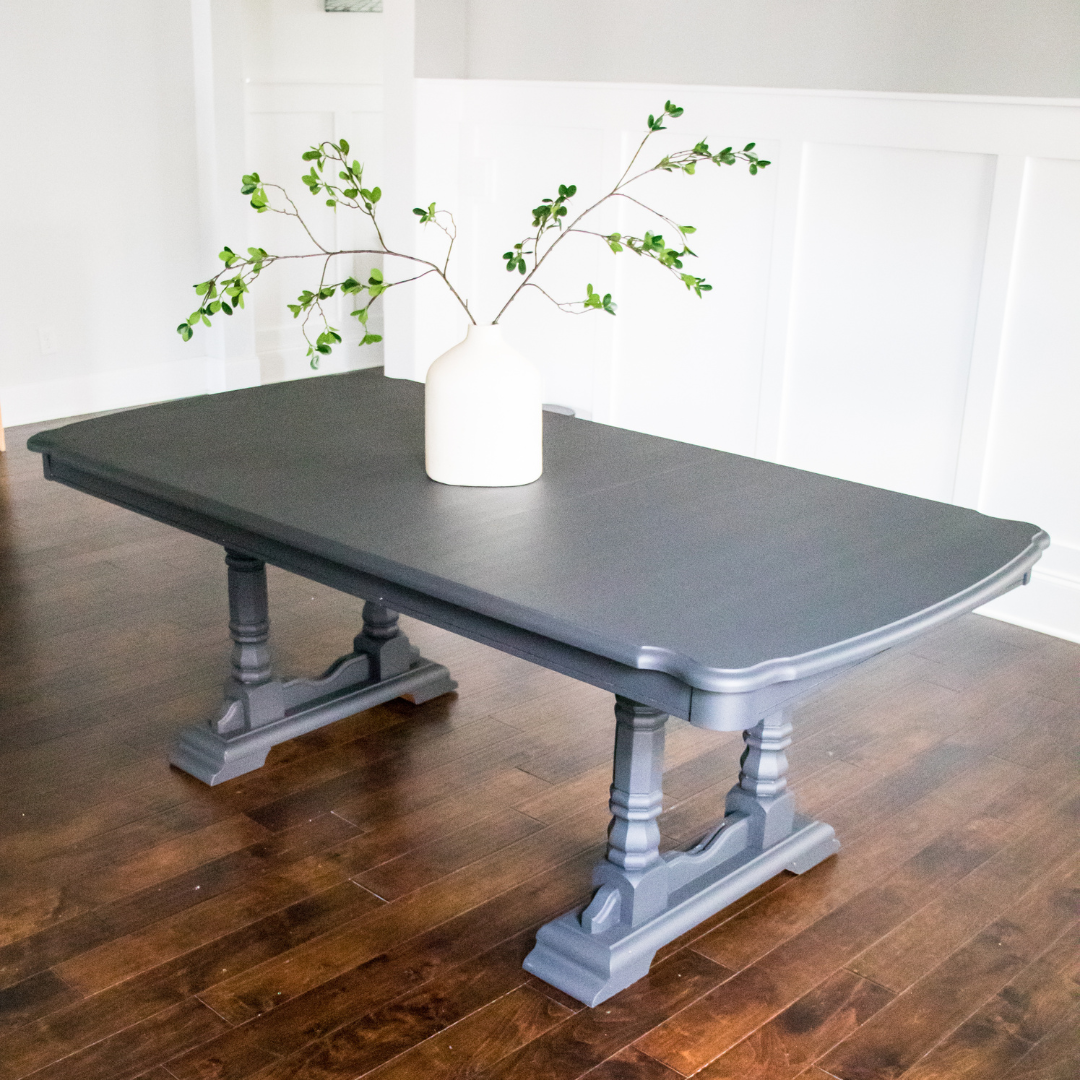
Dining Table Makeover Reveal
Voila! Our dining table makeover is complete! Again, I love living as sustainably as possible, so re-making over this dining room table was the perfect way to prove that you don’t have to purchase a new piece of furniture to update your space.
And bonus, it’s nice on the wallet too! I spent less than $150 to upgrade my table. I hope you love it as much as I do.
If you want to see the full dining table makeover, you can view it on my YouTube channel. Otherwise, take a look at this finished piece!