DIY Coffee Table Makeover: Orange Oak to Modern Coastal
Disclosure: This blog contains affiliate links. I will receive a commission for items purchased through these links at no extra cost to you. I appreciate your support. Please read all labels and follow all manufacturer safety recommendations when working with paints, stains, and other equipment.
Orangey oak always seems to give outdated vibes. So when I saw this 1980s orange coffee table for $20 at Goodwill, I knew I had to get it and give it a good DIY coffee table makeover.
This piece caught my eye because it was on a super deal, and getting any piece of furniture with a $20 price tag these days is a win in my book. I also loved that this unique coffee table had one big drawer that would be a great storage space for games, movies, video games, etc.
I think I’ll be able to flip this for a profit easily!
Before we walk through this step by step makeover, take a look at how it started out.

Products Use for This DIY Coffee Table Makeover
Dixie Belle Chalk Mineral Paint Dried Sage
Synthetic Mini Angle Paint Brush
Best Dang Brush (Natural bristles)
Surf Prep 3" x 4" Electric Ray (Use Code PRETTYDISTRESSED10 for 10% off your order)
Step 1: Clean and Rinse

Of course, the very first step of my project is to clean and rinse the piece. I grabbed my trusty Dixie Belle White Lightning to get the job done. After scrubbing with the TSP solution, I gave it a good rinse with some clean water.
Step 2: Sanding and Scraping
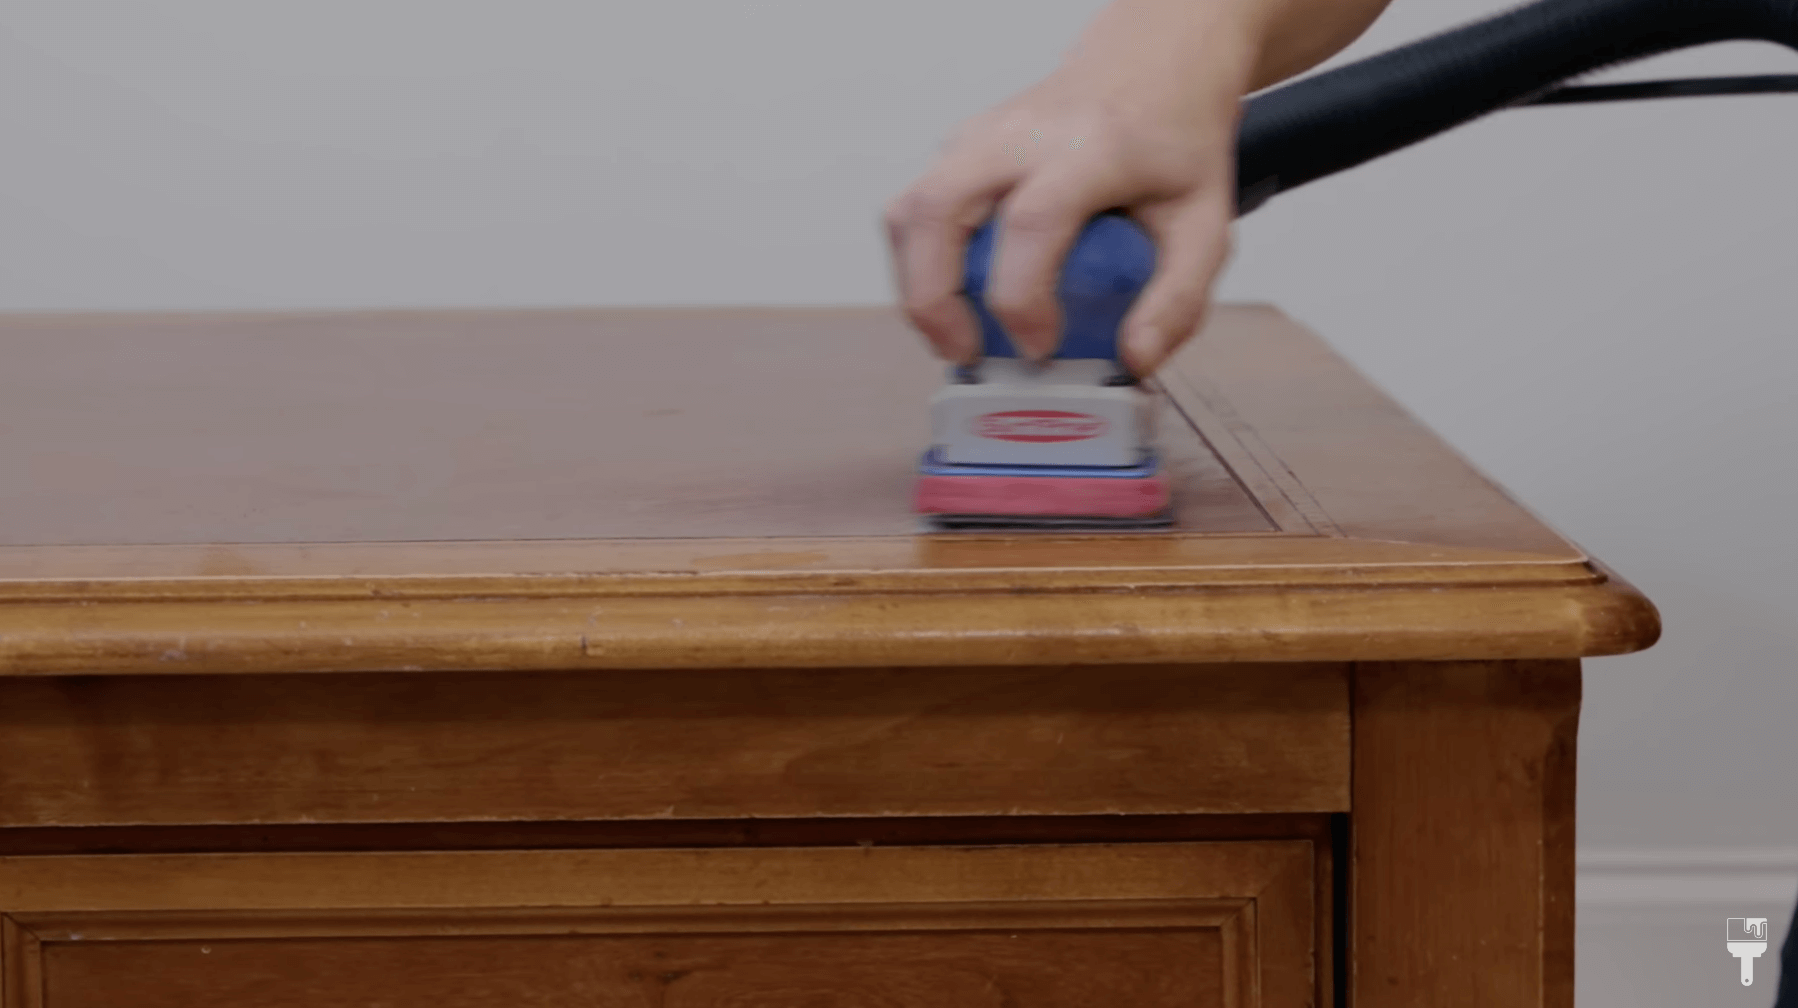
My goal for this DIY coffee table makeover is to strip back the top surface to raw wood so that I can do a white wash paint over it. This orangey oak had a lot of varnish on it, so after sanding for a while, I decided to use a carbide scraper. Because the varnish was so thick, I knew the scraper wouldn’t do any damage to the raw wood.
This scraper is not gonna work on every single project, and to be honest, this is the first time I've used it on a project where it has really helped.

After using the scraper, I used my Surf Prep Electray Ray Sander to remove the remainder of the varnish and smooth it out. Lastly, I used my foam attachments to to a scuff sand on the entire piece.
Note: The Surf Prep is definitely an investment, but I want to encourage you with the fact that you don’t need to have a heavy duty sander to get the job done. An orbital power sander does a great job and costs around $80.
After I was done sanding, I used a tack cloth to remove the dust that it kicked up.
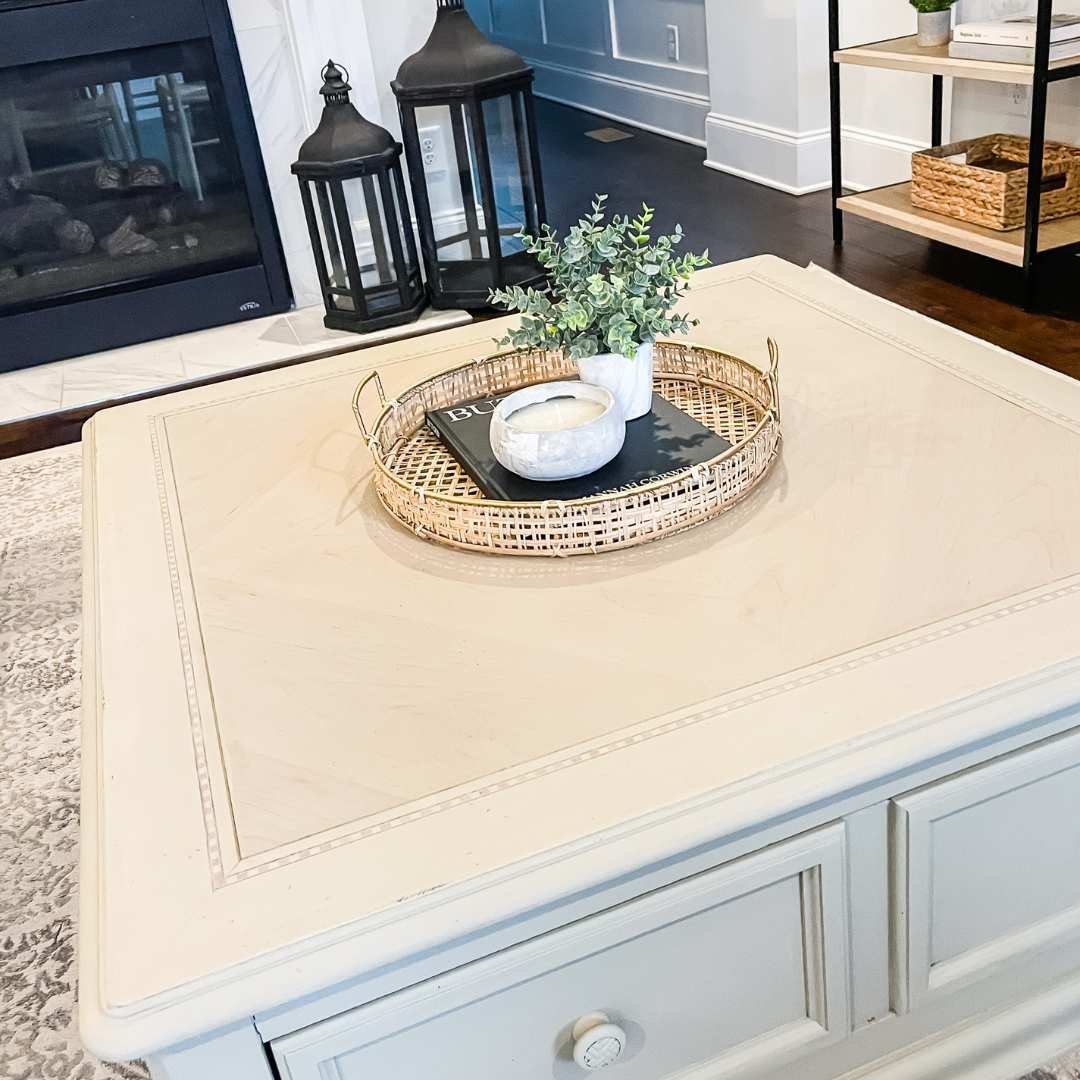
Step 3: Paint Raw Wood with Wash

Now it’s time to stain the top surface of this piece. I’m going with a chalk paint (Dixie Belle Dried Sage color) and creating a wash with it.
To create the wash, I did a 1 to 1 ratio of paint to water and mixed it well.
Before adding my paint wash to the top, I mist some water over the surface which helps with the open time of your paint before drying.
I painted the surface with the grain, which got a bit tricky because of the diamond pattern. I worked in sections but completed the entire surface before wiping the excess back to expose the raw wood underneath.
When doing this on your piece, use a lint free rag to wipe back any excess and try to go with the grain for a seamless look.
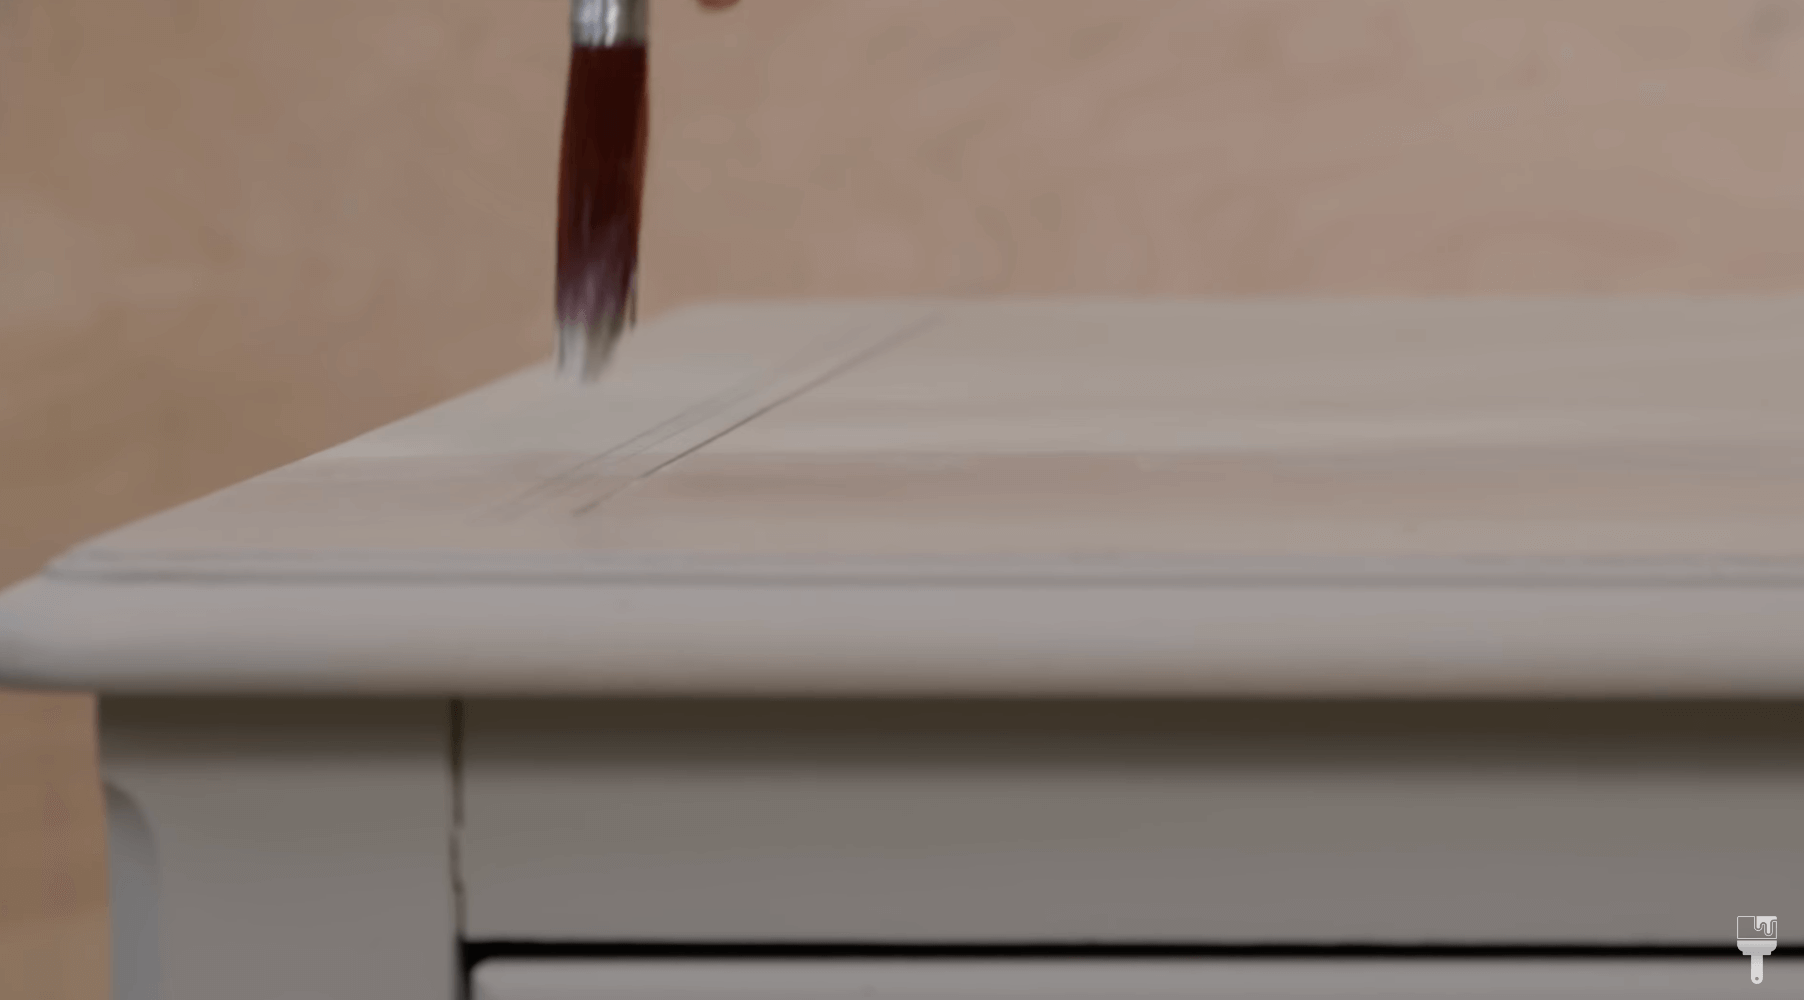
There was some etching around this table, so I grabbed a little artist brush to remove some of that paint in the groove.
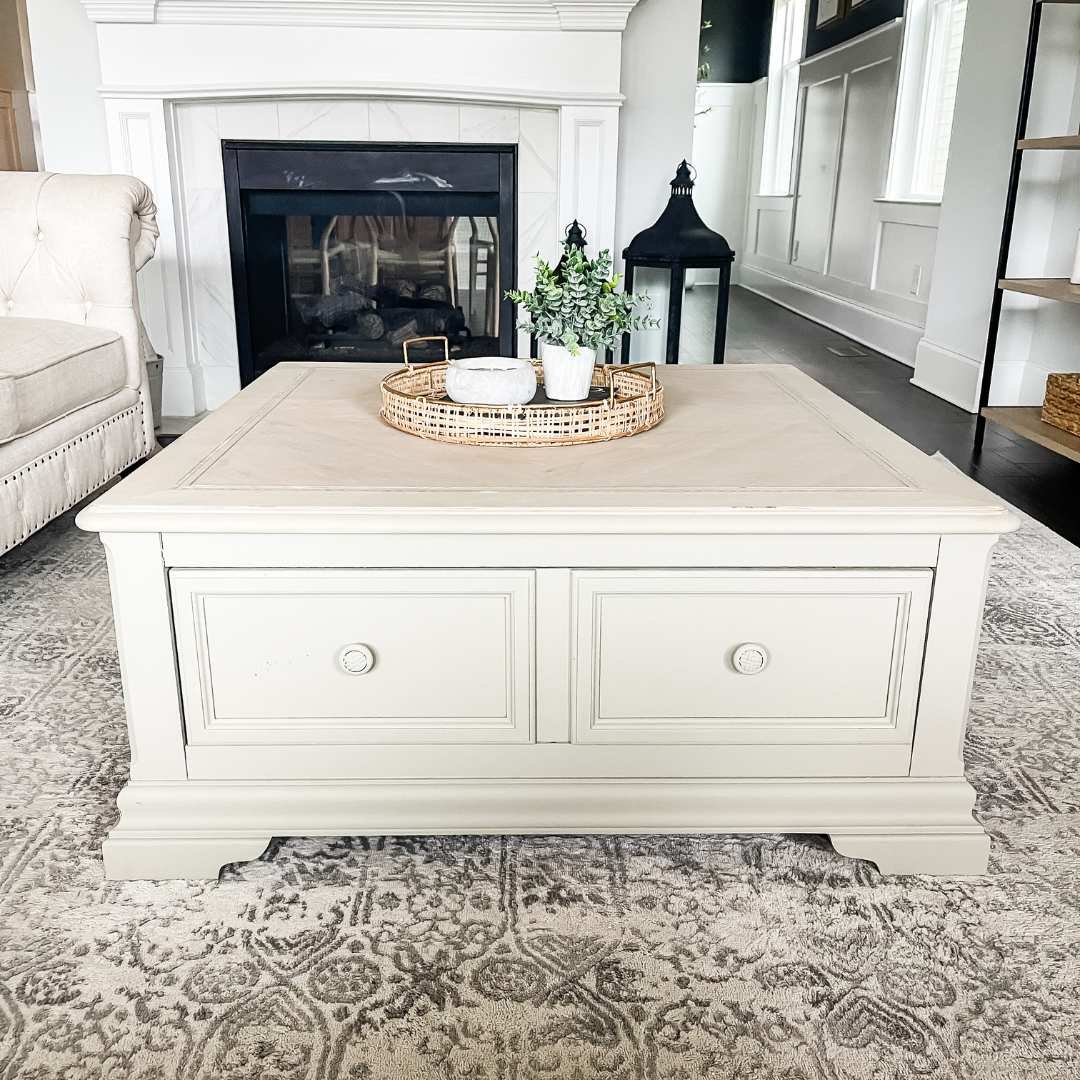
Step 4: Paint Base with Full Strength Paint

Now for the rest of the DIY coffee table, I decided to use the same paint color in full strength to give this piece a monochromatic look.
I also sprayed the base before painting with my mister to get a smooth look. I painted two coats with a paint brush having waited two hours in between coats.
Step 5: Big Mama’s Butta in Orange Grove
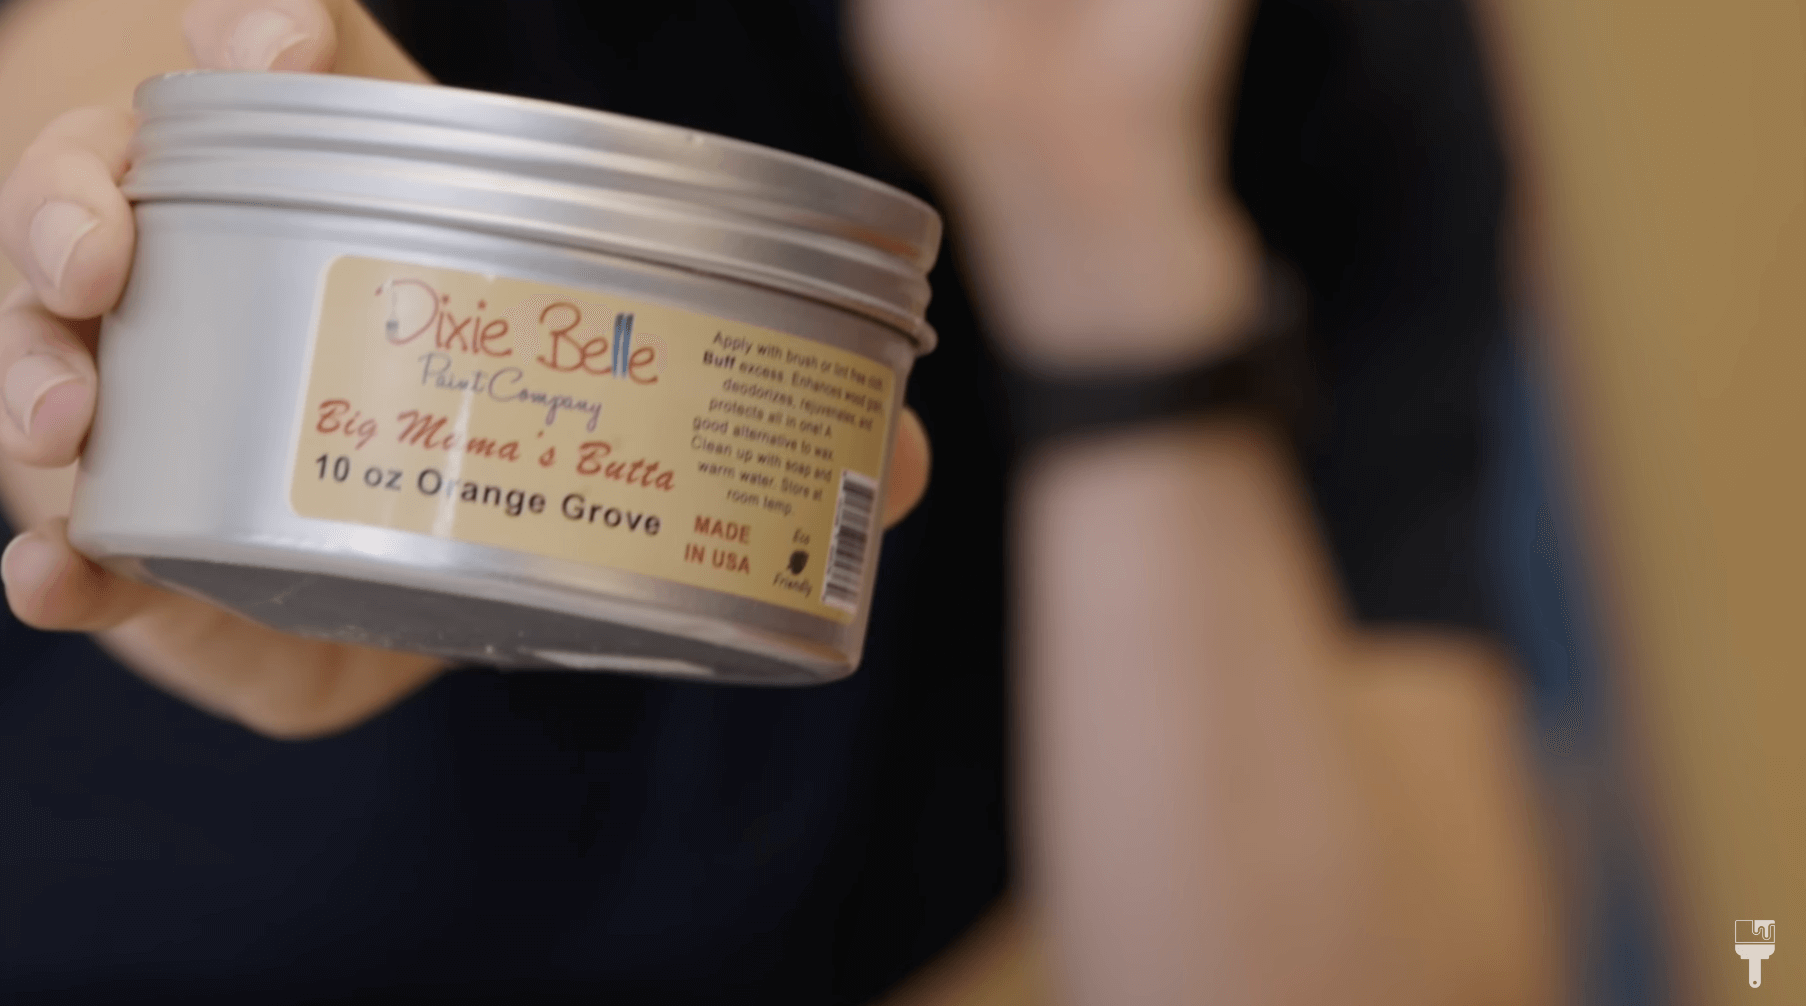
Now for the drawer. The bottom of it was a little beat up, so I used my paint scraper to remove any goo, gave it a good clean, and then grabbed my Big Mama’s Butta in the scent of Orange Grove. My favorite!
This will freshen the wood up a bit and make it smell a whole lot better!
Step 6: Clear Coat
We’re almost done! After the coffee table was dry, it was ready to seal. I used my Dixie Belle Clear Coat in Flat to seal this piece. If you’re using this, you can use two or three coats for the best protection waiting a couple hours in between each coat.
Step 7: Finishing Touches
You know when we get the the “finishing touches” that we’re close to the reveal!
Hardware

I liked the original hardware on this coffee table, but I decided to paint them so that they’d match the monochromatic piece.
Bleed Through
Usually I’m done when I’ve added the hardware back onto my piece, but I unfortunately had some troubleshooting to do. I wanted to share this here because not everything goes right all the time!
I had some bleed-through on a small section of the drawer. This means I either broke the finish when I was sanding or there were some oils there that I didn’t get when cleaning.

No problem … It's fixable!
Because there was no bleed-through anywhere else, I did some spot correcting. I grabbed my Dixie Belle BOSS which is a stain and odor blocker. I applied it to the area, let it dry, and repainted over it.
Pretty simple fix!
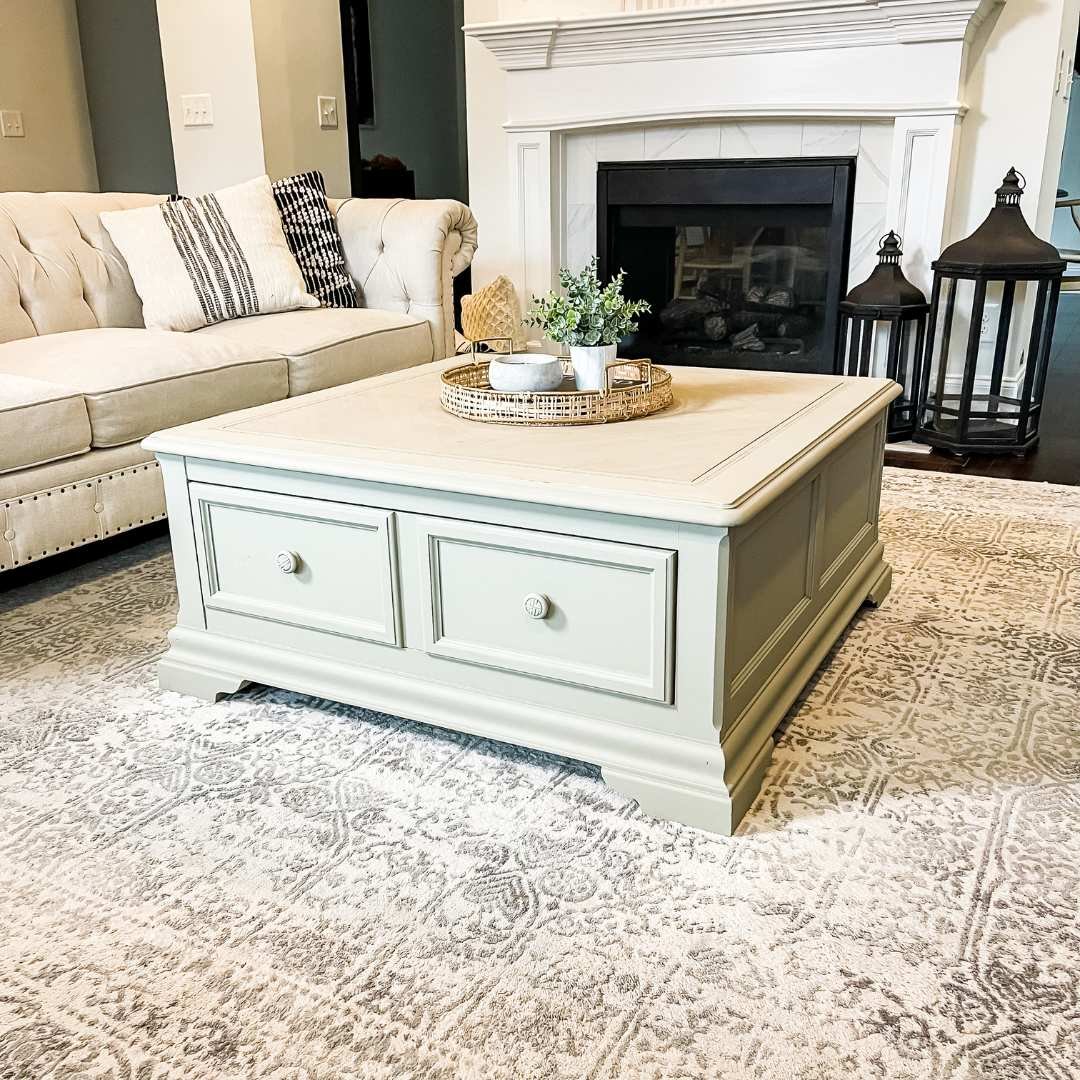
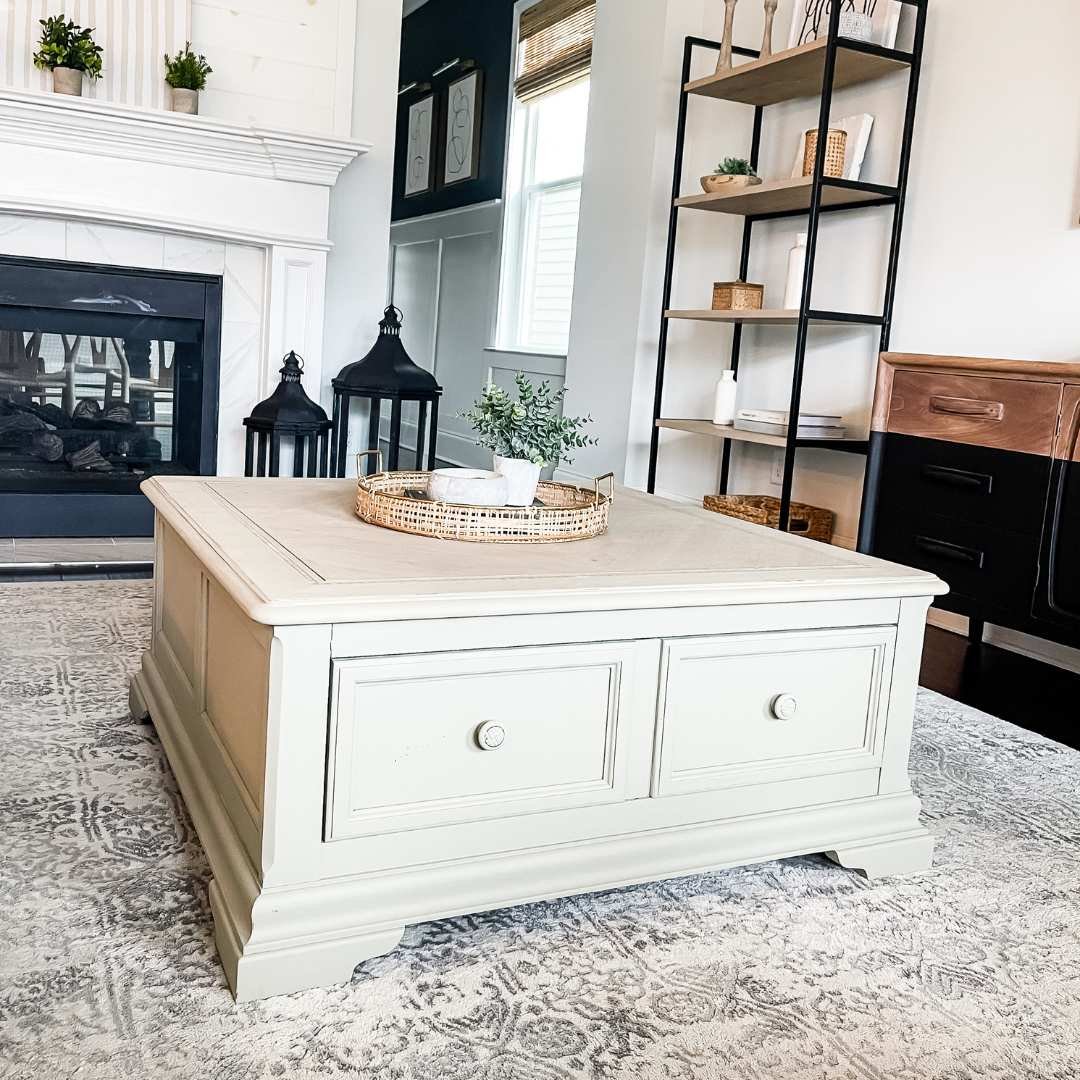
DIY Coffee Table Makeover Reveal
Wow. We started with an orange oak $20 coffee table, and I’m so happy with what we ended up with. It’s a beautiful coastal modern coffee table that I think would go well in any home.
If you want to see this DIY coffee table makeover come to life, you can watch the full tutorial on my YouTube™ channel.
I hope you love it .. here is the finished product!