DIY Closet Built Ins: Closet Makeover
Disclosure: This blog contains affiliate links. I will receive a commission for items purchased through these links at no extra cost to you. I appreciate your support. Please read all labels and follow all manufacturer safety recommendations when working with paints, stains, and other equipment.
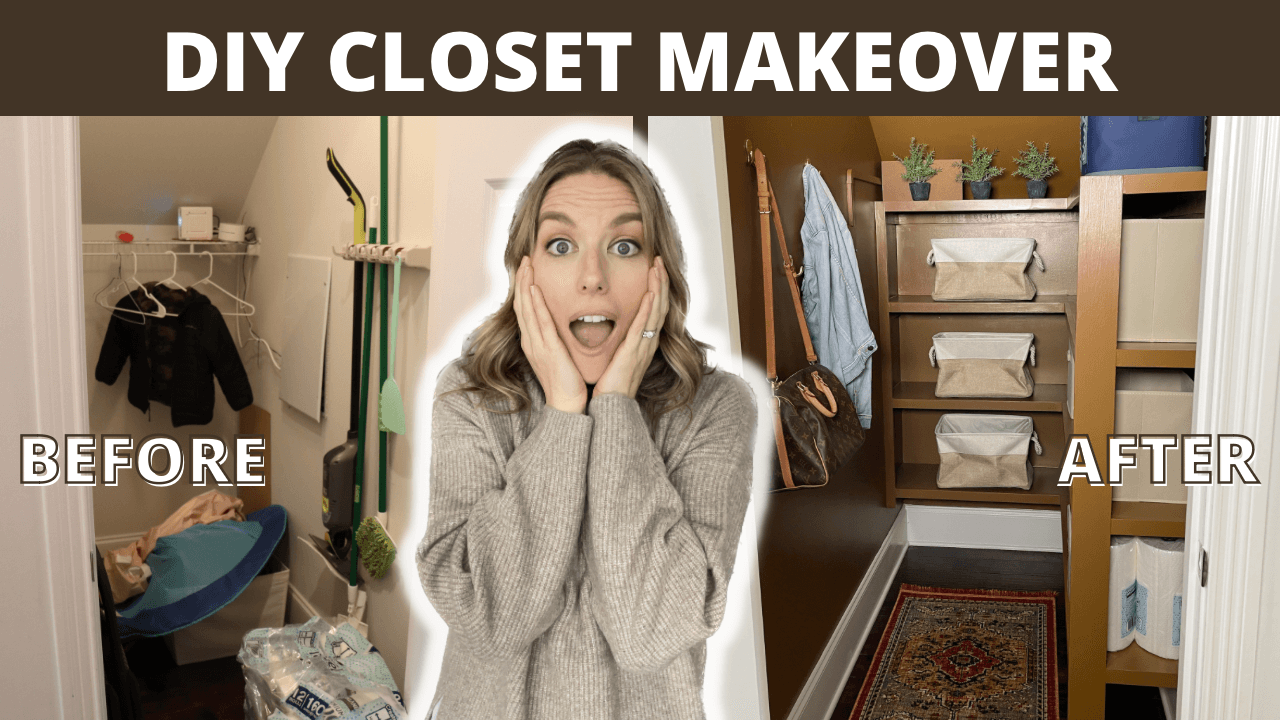
We’re going DIY today! You know I love a good challenge, so I’m stepping outside of my comfort zone and doing a closet makeover with DIY closet built-ins!
The closet under my stairs has always been an awkward space. It’s under the stairs, so it has a slanted ceiling. The hanging rack is all the way in the back, and there’s always stuff on the ground, so it’s hard to get back there to hang our coats.
I’m going to start with a blank slate and get everything out of this closet (including removing the wire rack), but first, let’s take a look at what it looked like before this project began.

DIY Closet Built Ins Project Materials
Tools
18V ONE+ HP Compact Brushless ½” Drill/Driver Kit
18V ONE+ HP Brushless Airstrike 18GA Brad Nailer Kit
18V ONE+ HP Brushless Sliding Compound Miter Saw Kit (New Model)
18V ONE+ 5” Random Orbit Sander
Materials
1X2-8FT PRIMED FJ S4S BOARD
1X3-8FT COMMON BOARD
3/4 12X96 MDF SHELVING
1x4 - 6 FT COMMON BOARD
Microfiber roller (for primer)
Behr Cabinet & Trim Paint (Uber Umber SW color)
Behr Scuff Defense
1 1/4" Brad Nails
Decor
Confession: I’ve never built shelves before! I took a look at my primary room closet and my pantry that have built-ins to figure out how to build them myself.
Visualize

The first thing I did was visualize the space by taping it off with painter’s tape. I grabbed some 12-inch shelves that I had to set up against the wall to make sure there was still going to be enough room to move around in there.
Plan and Measure

After visualizing, I went in and more accurately measured and marked where I wanted each shelf and how long they were going to be so I knew what materials to purchase.
After doing some research, I decided to use MDF boards for my shelving. You could also use plywood or wood, but based on the weight I was going to need, MDF boards would suffice.

I also decided to go with 1” x 3” common boards for the cleats that my shelving was going to sit on. You can buy these primed or unprimed. I went with unprimed because they were a lot cheaper. I will just prime them to cover up the knots before I paint them.
Lastly, I got 1” x 2” primed common boards for all of the trimming. I went with primed because these will be very visible, and I wanted them to look really nice.
I was able to pick these all up at Home Depot and in total I spent $142.63 cents on these materials.
Cut and Hang Cleats

Now we’re getting to the fun stuff. Let’s get these cleats on the walls! I used a stud finder to make sure I drill into them when hanging the cleats. After measuring the length of the walls, I went to my miter saw to make the cuts in the 1” x 3” boards. If you don’t have a miter saw, I’m making straight cuts today, so you can use a circular saw for this project as well.
To attach these cleats on the wall, I'm using some premium wood screws that are 2 ½” long. I’m hanging these based on the measurements I made earlier, and I decided to make the shelves about 15 inches apart so that basic cube storage baskets will fit on them easily. I made sure everything was nice and level before I started putting in my screws.

Bonus tip: To hang the rest of your cleats quickly, line it up right above the installed cleat. Put the screws in part way in line with the screws from the cleat, and then scoot it up to exactly where you want to install it. This will ensure that your screws stay in line with the studs since studs run vertically.
I repeated this process that I did for the back wall all along the side wall.
Cut and Hang Shelves

Now that my support cleats were up, it was time to grab my MDF boards. I measured each shelf individually and cut them to size. Your closet isn’t going to be completely level, nor is it going to be completely square. So I found it best to just measure the section, cut it, and then place it in there to make sure it fit.
After I cut the smaller shelves that are going to go on the back of the wall, I put four pocket holes across the bottom of them so that I could connect the shorter shelves to the longer ones. That will give them a stronger hold. I used my Ryobi Brushless Drill to drill the pocket holes as well as screw them together with the longer boards.

To attach the boards to the support beams/cleats on the wall, I used my 18-Gauge Brad Nailer. I loaded them with 1 ¼” nails. I did 1 nail about every six inches. You could use screws here as well, but since I’m using MDF, I liked using the nailer instead.
Install Trim

Once the shelves were installed and secured, I was ready to trim it all out to make it look pretty and polished. I measured each shelf individually, made the cut with the trim, installed with the Brad Nailer.
I placed the trim flush with the top of the shelves keeping in mind that a bit will hang underneath. Don’t go too crazy with the nails as you will need to fill in those tiny holes later.
Add Support Beam

Since the front side of the shelves (closest to the door) is open without a wall to secure it, I needed to install a support beam using a 1” x 4” board. I put pocket holes on each side of the shelves to secure my support beam with screws.
And that’s it! My DIY closet builts in are BUILT!
Painting MY DIY Closet Makeover
Now that my build is complete, it’s time to prep it for paint.
Wood Filler
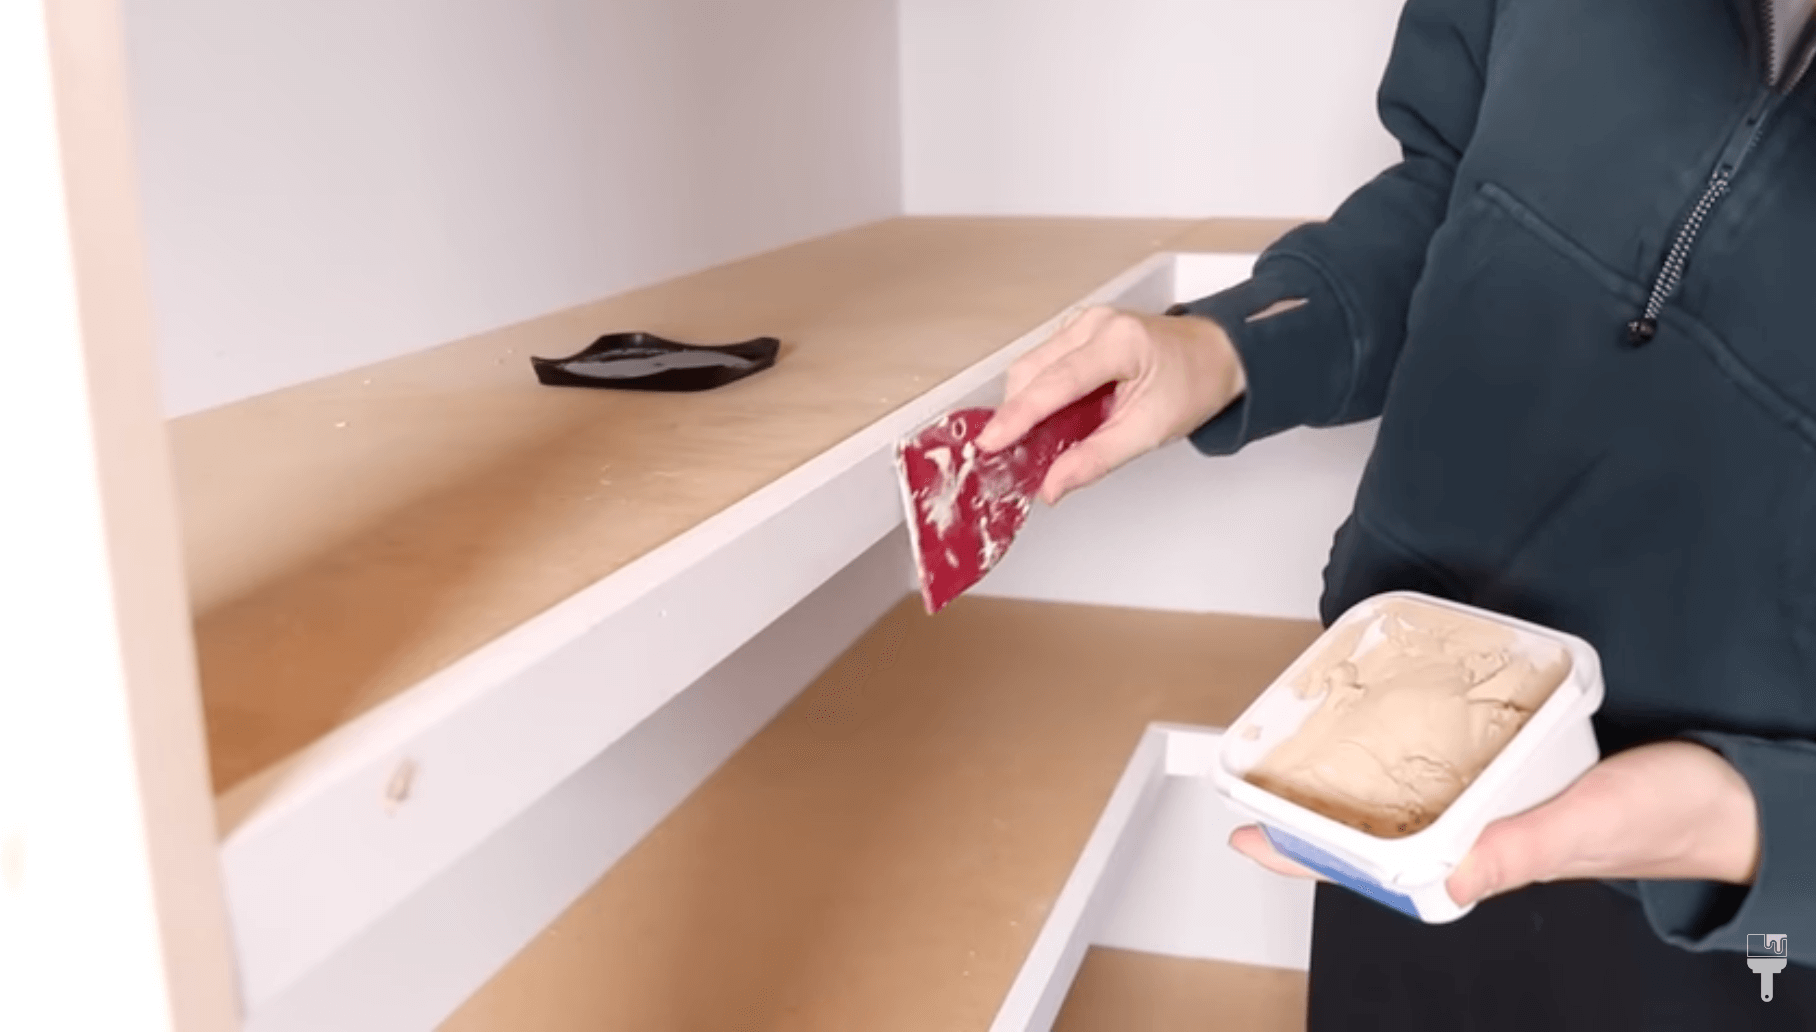
I took wood filler to fill in the little holes from my Brad Nailer. After it dried, I sanded down the entire surface with my orbital sander with a 220-grit sandpaper.
Prime Built-ins

I used an oil-based primer to prep my shelving since it’s MDF. This primer will seal it up nice and tight before I introduce a water-based paint which could swell the MDF.
It will also seal my common board nicely. It’ll hide the knots and block any tannins that are in that wood so I don’t get any bleed through.
Paint Built-ins

This DIY closet built in makeover is really starting to come together. And now it’s time to paint! At this point, I could have painted the shelves white and been done with it, but I thought that would be kind of boring. I wanted to elevate it and give it a designer look.
I picked up Scuff Defense Behr paint to paint the walls, and some Semi-Gloss Cabinet, Door, and Trim paint for the shelves. I’ll be painting the entire closet in an umber color! It’s a beautiful, rich, dark brown color with some orange undertones. I’m so excited to see how it turns out.
Before I painted though, I quickly used some all-purpose caulk to fill in any nooks and crannies. After filling in the gaps, you can grab a wet t-shirt to smooth it out before letting it dry.

I used a paint brush and roller to paint the walls and the shelves. Like I mentioned, the paint color is the same throughout, but I have two different finishes (egg shell for the walls and semi-glass for the shelves), so it’s going to give it a cool looking contrast.
I did two coats on the shelves and the walls.
Finishing Touches

And now it's time for the finishing touches. I painted the utility cover as well as a cable hider that I got off of Amazon. I also made a little board that I painted to cover up the modem on the top shelf.
I installed brass hooks on the open wall for guests to have their coats and purses. And lastly, I got some storage cubes and baskets to keep everything neat and organized.
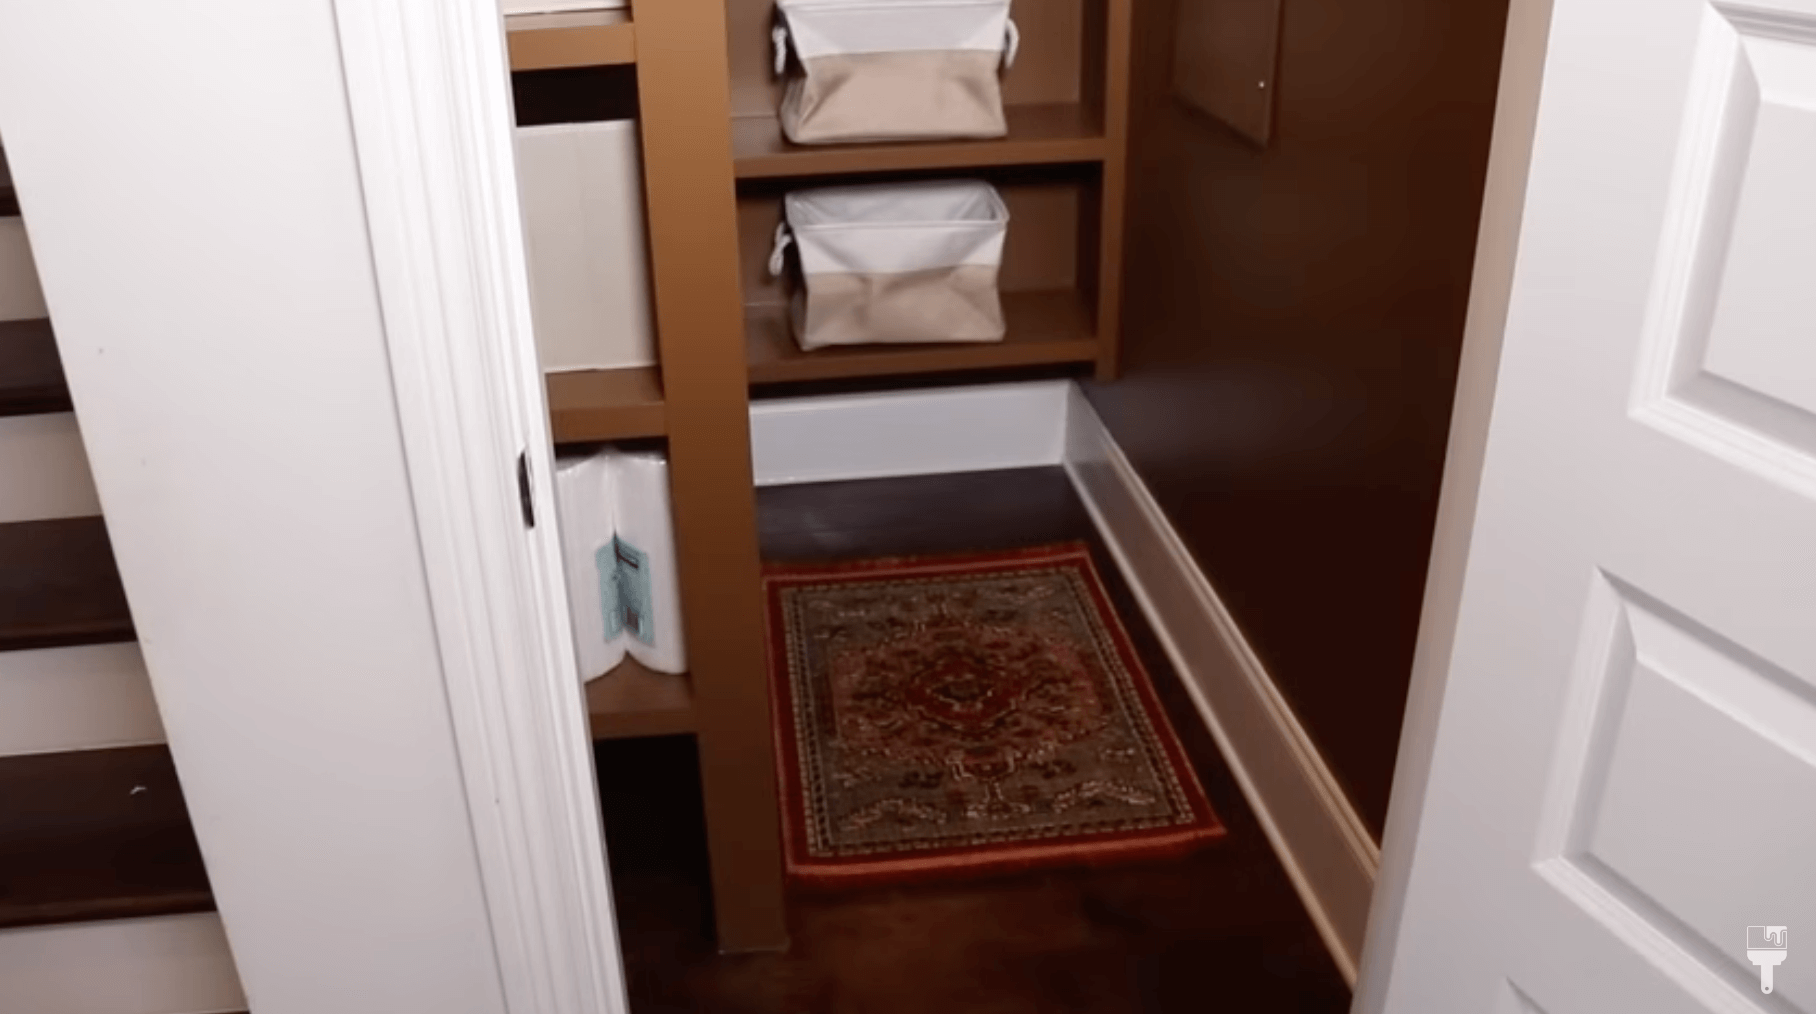
And since my top back shelf isn’t very usable, I put some faux greenery on top to hid the modem and a little better and give it a pop of color.
The last finishing touch was putting in a rug that I use for my staging that matches perfectly.
DIY Closet Built In Reveal
Okay, are you ready for the big reveal? I love that I took my very boring and non-functional closten and turned it into a beautiful, usable space. I really hope you enjoyed this DIY closet built-in breakdown, but if you want to see it come together, head over to my YouTube Channel for the full closet makeover.