
Fluting Furniture: IKEA Rast Hack Part 1
Disclosure: This blog contains affiliate links. I will receive a commission for items purchased through these links at no extra cost to you. I appreciate your support. Please read all labels and follow all manufacturer safety recommendations when working with paints, stains, and other equipment.

Well, do I have a treat for you today. This project was had quite a lot to it … so much that I decided to break it down into TWO blog posts. So this is part one to the IKEA RAST hack where I focus on fluting furniture.
For part two of this extreme makeover, I’ll break down how to create a faux epoxy marble top with Total Boat Marbling.
What’s so great about this project is that the IKEA RAST nightstand is so simple and affordable, but with some hard work and patience, you, too, can turn it into a high end look. Before we jump in, let’s take a look at my inspiration piece.

Tools and Materials Used for Fluting Furniture
Total Boat DIY Epoxy White Marble Effect Countertop Kit (PRETTYDISTRESSED10 saves 10% thru 12/31/22)
Lilly Moon Paint Smoky Gel Stain MUDSLIDE (PRETTYDISTRESSED10 for 10% off)
3/8" x 36" Square Dowels (I found these for much cheaper on Amazon!)
RYOBI ONE+ HP 18V 18-Gauge Brushless Cordless AirStrike Brad Nailer
3/4 in. x 12 in. x 4 ft. Square-Edge Shelving MDF Board
Fluting Furniture Steps
The IKEA RAST nightstand is definitely the easiest IKEA piece I’ve ever put together. It’s a smaller piece which is the way to go when you’re testing new techniques like I’m doing today. And as you can imagine, there’s a lot of prep work when it comes to fluting furniture. So here’s the breakdown.
Step 1: Build the bottom and attach the feet
I always love to add feet to my furniture pieces to give them a modern look. Usually that’s a pretty simple process, but because this nightstand doesn’t have a bottom, I had to do some extra work.
I bought a piece of MDF for the faux marble tabletop, and luckily, there it is long enough for me to cut a piece for the bottom as well. I marked and made my cut, secured it to the bottom of the nightstand, and screwed my new Gold Feet on.

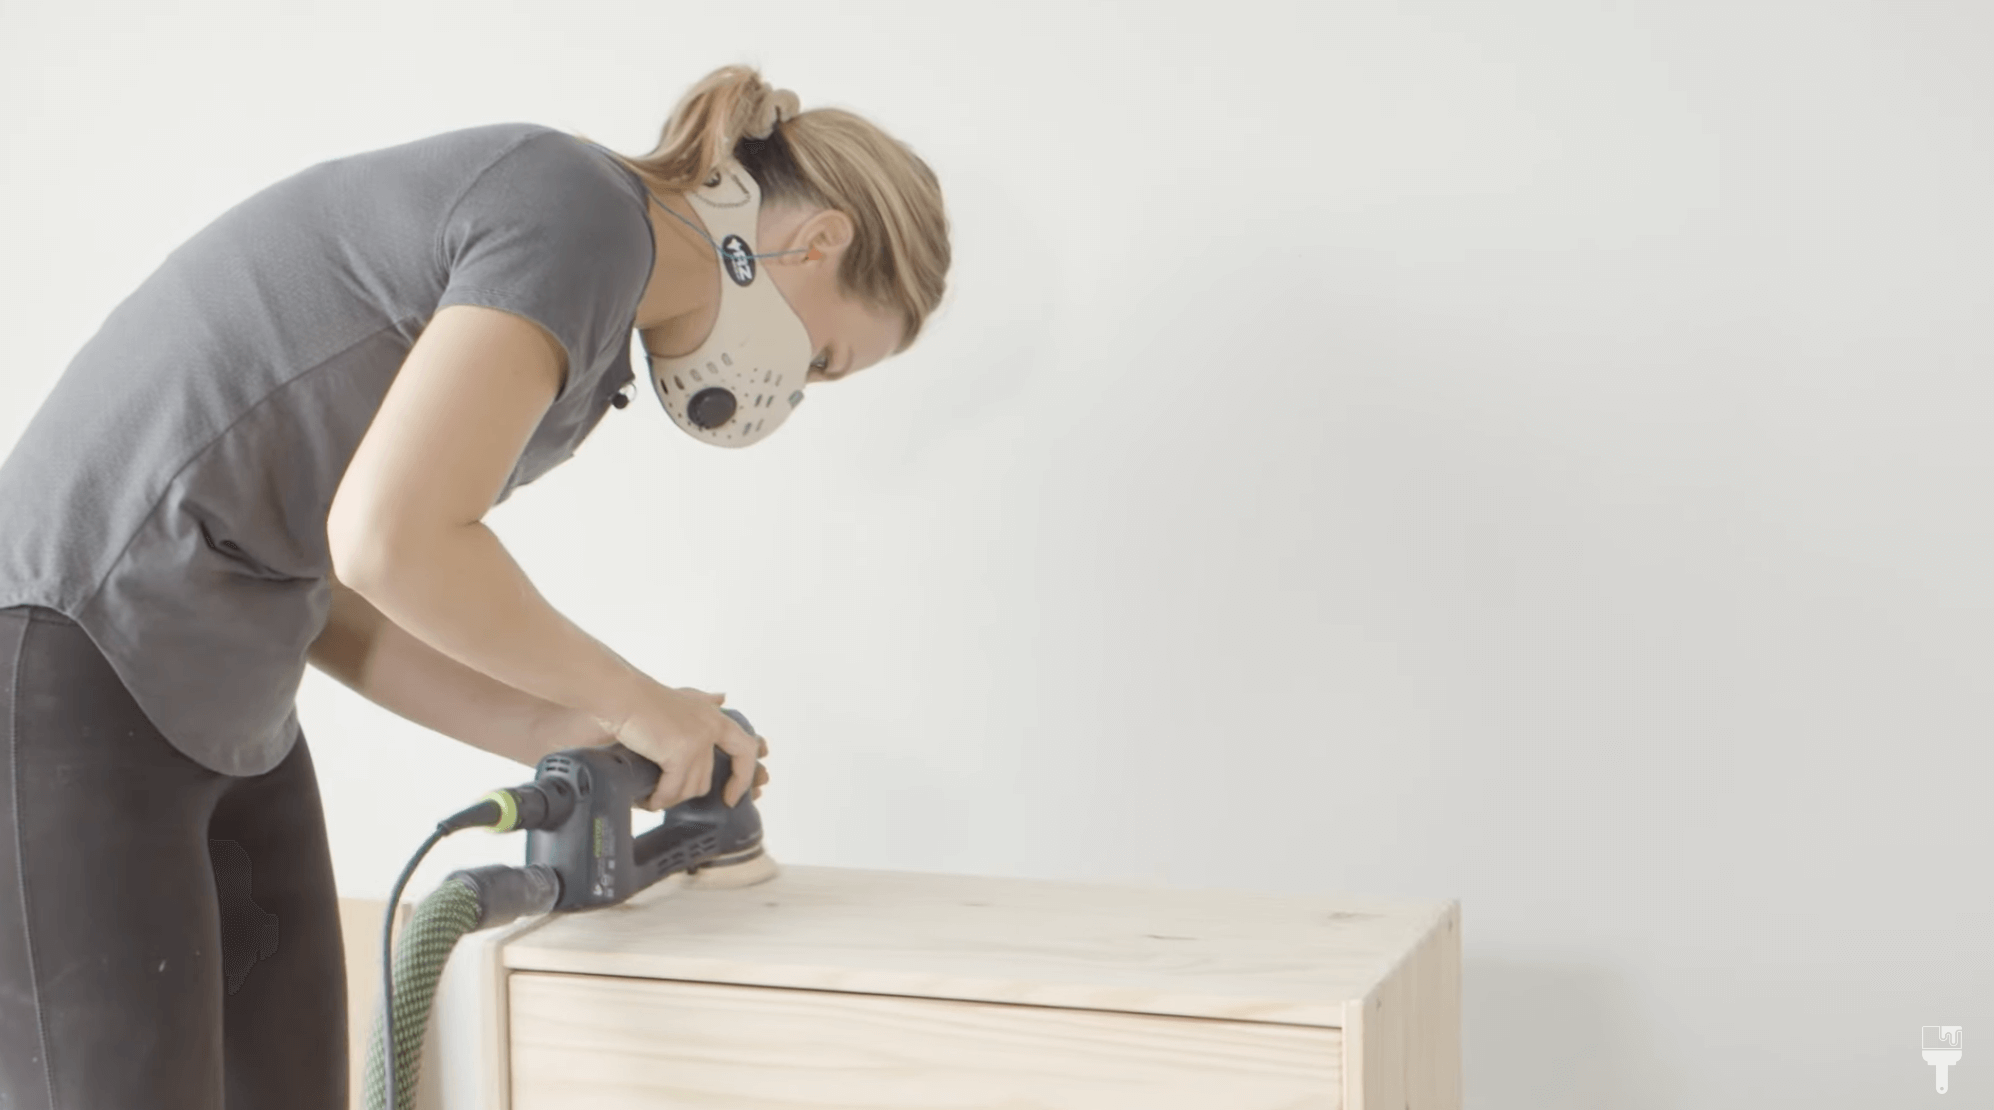
Step 2: Fill hardware holes and sand
Before going in to stain this piece, I needed to fill in the hardware holes because the pulls that I have don’t fit the existing holes.
After filling in the holes I had a bit of sanding to do. This was in pretty good shape to stain, but it did have areas that were pretty rough, so I took a fine sandpaper and smoothed everything out before getting started with the stain.
Step 3: Stain using Lilly Moon Paint Smoky Gel Stain
My inspiration piece is a really dark brown color, so to mimic that I’m using the Lilly Moon Paint Smoky Gel Stain in Mudslide. This stain is water-based, so it’s really easy to clean up. It’s not flammable, and you get more coverage because it has more of a paint consistency.
I used a Pad Applicator to apply the stain. With a water-based stain, you won’t have a lot of excess, but you can use a lint free cloth or t-shirt to wipe off any excess if you’d like.
Another benefit of using this water-based stain is it’s going to dry a lot quicker than an oil-based one. I’ll be able to do my fluting work much faster! It also has a protectant built into it, so I won’t need to top coat afterward either.

Step 4: Cut and sand wooden dowels for fluting
Okay! I love the way the stain is looking! Now we’re going to get into the technical part of this whole process and begin fluting furniture! I’ll be fluting this entire piece which involves a lot of pieces.
I picked up 60 wooden dowels from Home Depot at $1.76 a piece which is what I needed to cover the whole nightstand. In hindsight, I realized I probably should have ordered them in bulk online, so keep that in mind if you’re going to do your own fluting.
The easiest part of this process is the cutting because once I cut my template pieces I was able to use the Miter Saw to quickly cut the rest.
After I got all my pieces cut, the very tedious part came in where I had to sand each side of the dowels. I know that sounds super annoying to have to do, but there were rough spots and stickers on each dowel, so it had to be done.

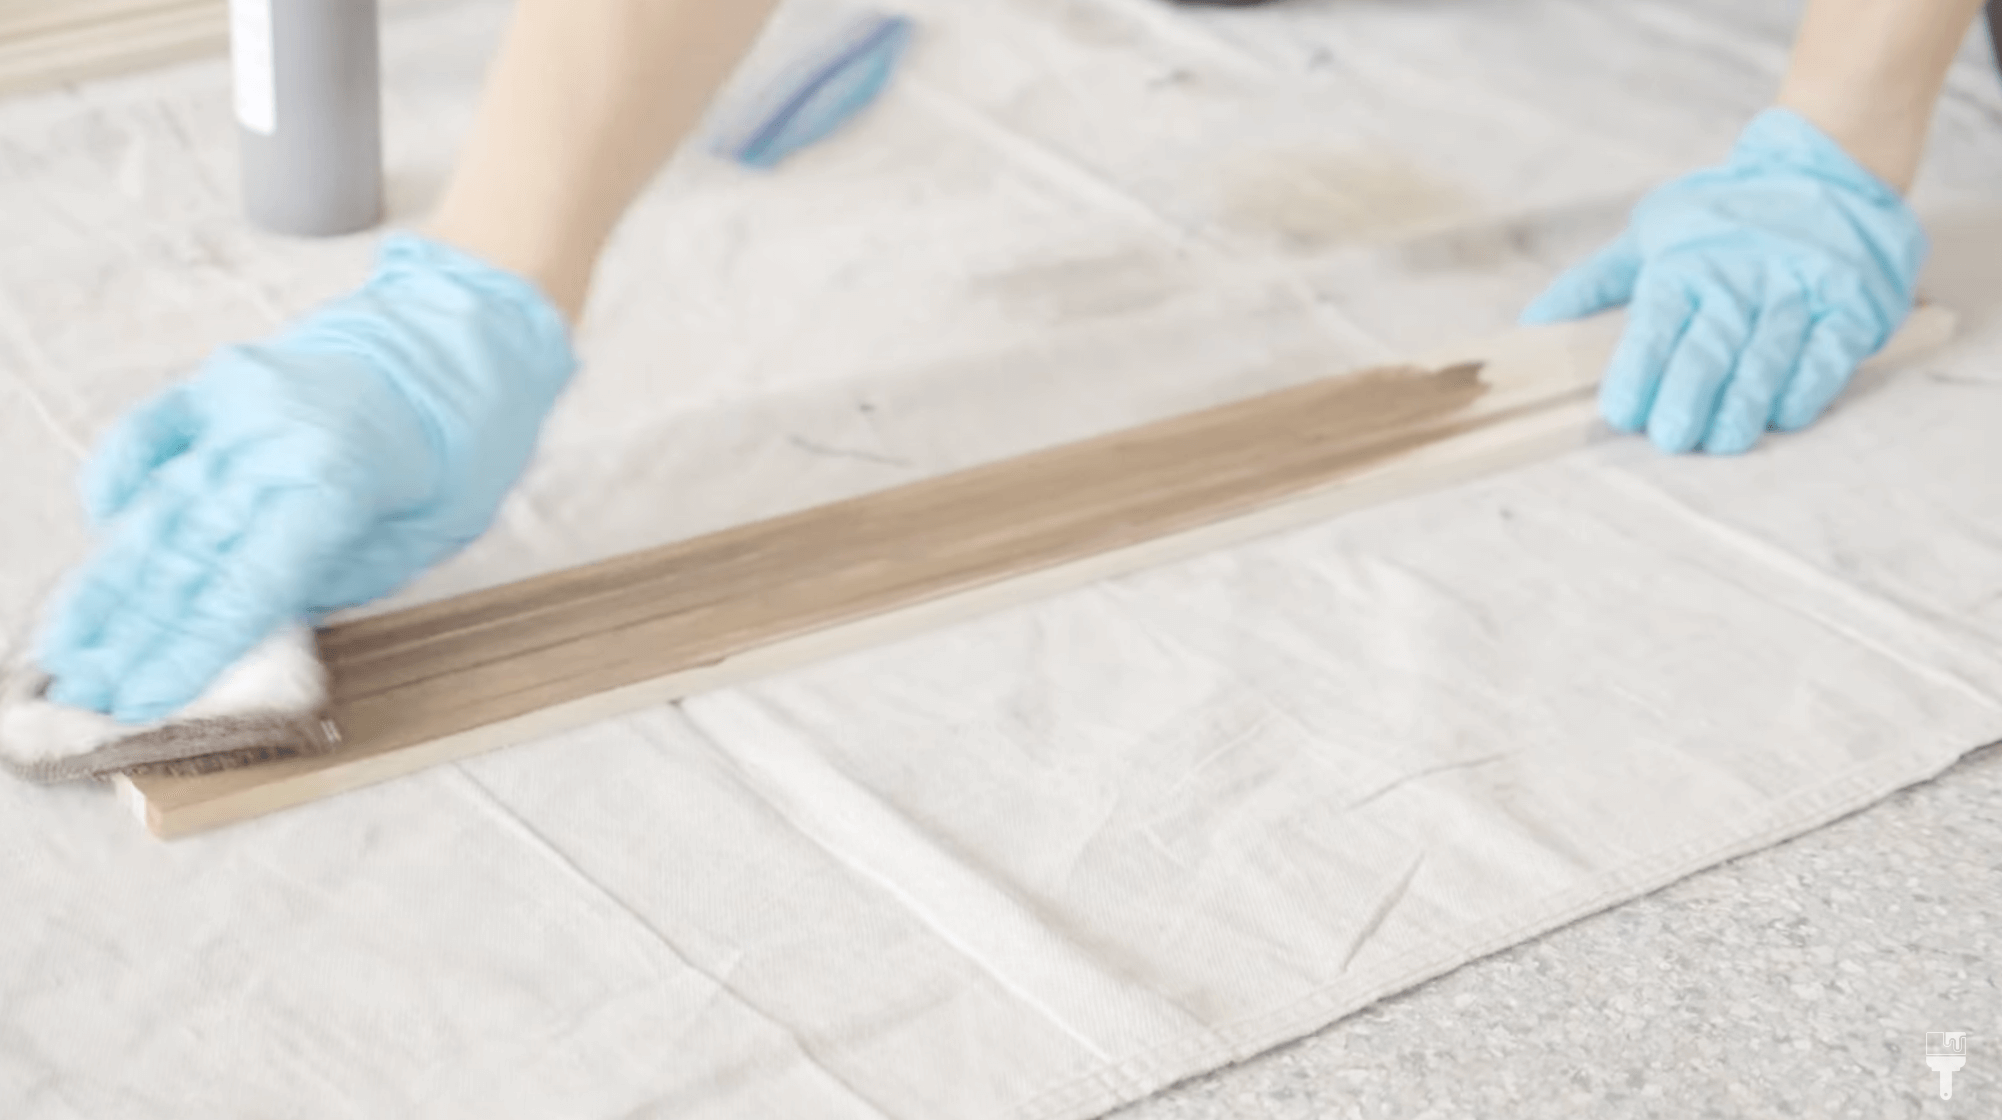
Step 5: Stain dowels and apply fluting
The next step is to stain the individual dowels (on every side) and apply the fluting.
The method that I came up with to stain these faster was to stack about eight of them together, stain that whole side and then flip them on the next side to repeat the process. This was definitely a lot of work, but I wanted to make sure no wood showed through, so it was worth it.
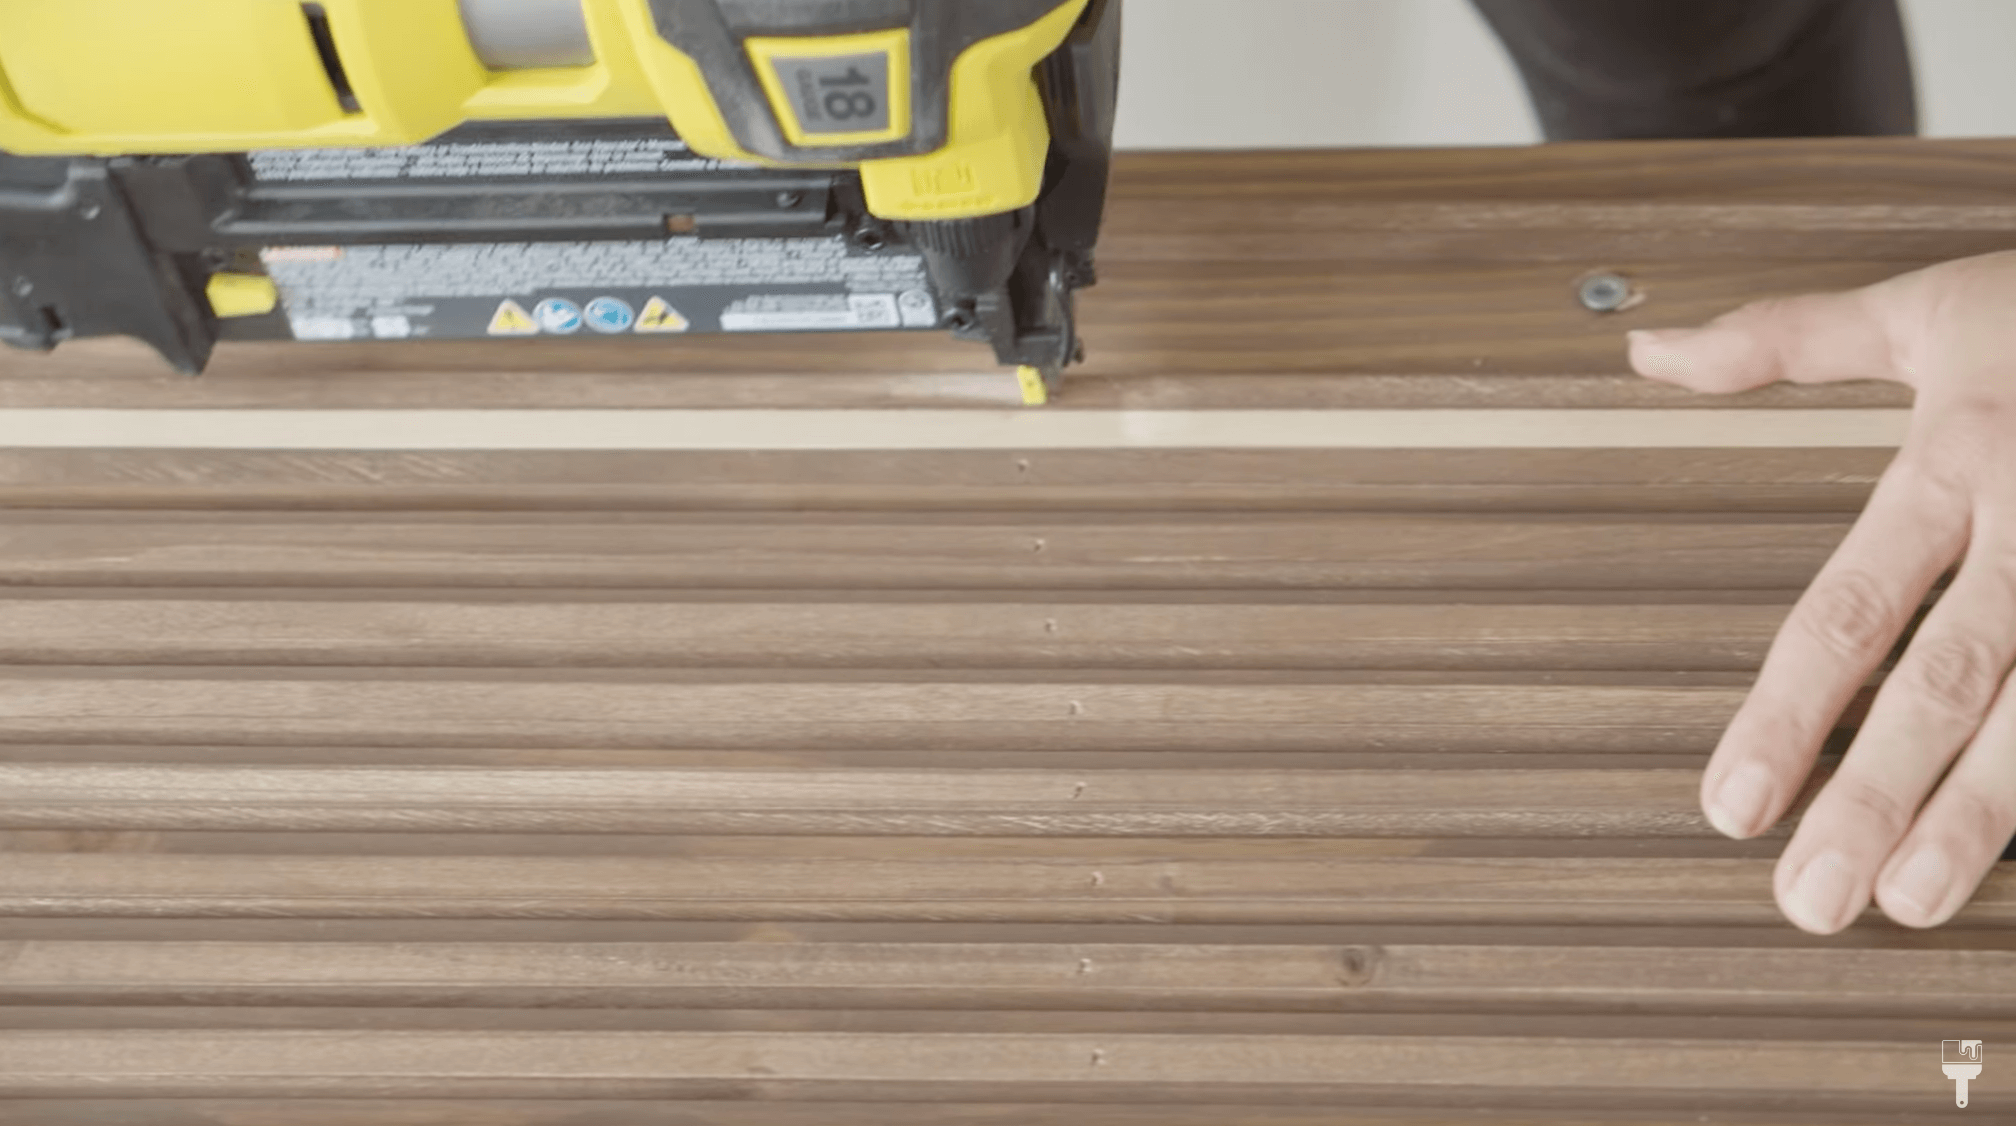
The spacing of the fluting is simple because you can use one dowel as your spacer. You just want to make sure the first dowel you attach is level and that you’ve done your math from side to side to make sure it will line up evenly with the sides. If you don’t want to hurt your brain with too much math, you can do what I did and put the first dowel in the center, make sure it’s level, and then work outward.
I used my Ryobi 18 Gauge Brad Nailer with the smallest nails you can use (⅝ inches). I made sure to sink the nails a bit so I can put wood filler on top and make it look super chic and seamless.
And I'm sinking the nails a little bit so I'll be able to put wood filler on top of here and make it look really smooth and seamless.
Step 6: Fill in little holes from brad nails
Time to fill these tiny holes from the brad nails. I wanted to save myself some time, so I mixed in some stain with the wood filler in hopes that I didn’t have to do touch ups in every single hole.
As I filled in the holes, I removed the excess quickly so that I wouldn’t have to sand afterward. Once I was done with that process, I took some stain and did a second coat on all of the fluting. It worked out beautifully!

Step 7: Stain touch-ups
I did have some touch-ups to do! I didn’t stain the tops of the dowels, so I took my artist's brush and stained the top of all the fluting. Again, super tedious, but that’s just the nature of this project. As long as you’re mentally prepared for that, you’ll be fine.

Step 8: Install new hardware
The last step is to install the new hardware! BUT, I’m not ready to commit. Haha. I had my long pulls that match my inspiration piece, but unfortunately, I couldn’t match it up with the fluting.
I do have some finger pulls, but I’m going to circle back around and make my decision in part 2 of this blog!
Is fluting furniture worth it?
As you can probably imagine, this project takes time and patience. But I’m loving the high end look that fluting furniture gives … so I’m absolutely ok with this process. I’m glad I started with a smaller piece like this nightstand.
So yes, fluting is labor intensive and a bit pricey, but is it worth it? I think so!

Want to see the reveal?
Usually, I’m not about the suspense, but because this is a two part blog series, I want to save the final reveal! Head over to part 2 where we tackle a faux marble epoxy tabletop! See you over there!
If you want a sneak peak, you can head on over to my YouTube™ video to see this nightstand transform before your eyes!