Marble Epoxy: IKEA RAST Hack Part 2
Disclosure: This blog contains affiliate links. I will receive a commission for items purchased through these links at no extra cost to you. I appreciate your support. Please read all labels and follow all manufacturer safety recommendations when working with paints, stains, and other equipment.
Thank you for joining me in part 2 of this makeover where I give the very affordable IKEA RAST a high-end look. In part 1 you saw me do some tedious work in fluting furniture. And in this blog we will be revealing the final look after I show you how to create a faux marble look using marble epoxy.
Before diving into this epoxy kit, I wanted to share an “oops” moment I had so that you don’t make the same mistake. When I cut my MDF board, I forgot to account for the fluting on the sides, so my board was too small. I simply re-measured and cut another board before getting started with my marbling. No big deal, but wanted to give you a warning! ;)
I want to remind you what my inspiration piece looked like, so here’s a quick view.

Tools and Materials Used for Marble Epoxy Makeover
Total Boat DIY Epoxy White Marble Effect Countertop Kit (PRETTYDISTRESSED10 saves 10% thru 12/31/22)
Lilly Moon Paint Smoky Gel Stain MUDSLIDE (PRETTYDISTRESSED10 for 10% off)
3/8" x 36" Square Dowels (I found these for much cheaper on Amazon!)
RYOBI ONE+ HP 18V 18-Gauge Brushless Cordless AirStrike Brad Nailer
Marble Epoxy Kit from Total Boat
Okay, I’m really excited and also really nervous because this is my first time attempting this marble epoxy countertop look. But lucky for us, these types of things now come in full kits so you will have everything you need to get the job done.

Today I’m using the Total Boat marbling kit. Here are some details on this kit so you can decide if it’s the right one for you:
I’m using my MDF that I cut, but you can pour this epoxy on top of all kinds of materials including wood, formica, laminate, etc. Basically, any type of countertop you have, you can put this on top of it.
The kit comes with a light gray and dark gray powder for the marbling effect. So you can choose if you’d like it to be light, dark, or even a mix of the two.
There is some math involved, but the instructions in the kit are very simple and easy to follow!
Lastly, a quick note to make sure you work with epoxy outdoors or in a well ventilated area.
First Coat of Marble Epoxy
When working with the marble epoxy, you’ll need to do two coats as the first one will act as a sealing coat that will make the material waterproof. So for this first coat, we won’t actually be doing the marbling part.
Mixing Epoxy and Hardener
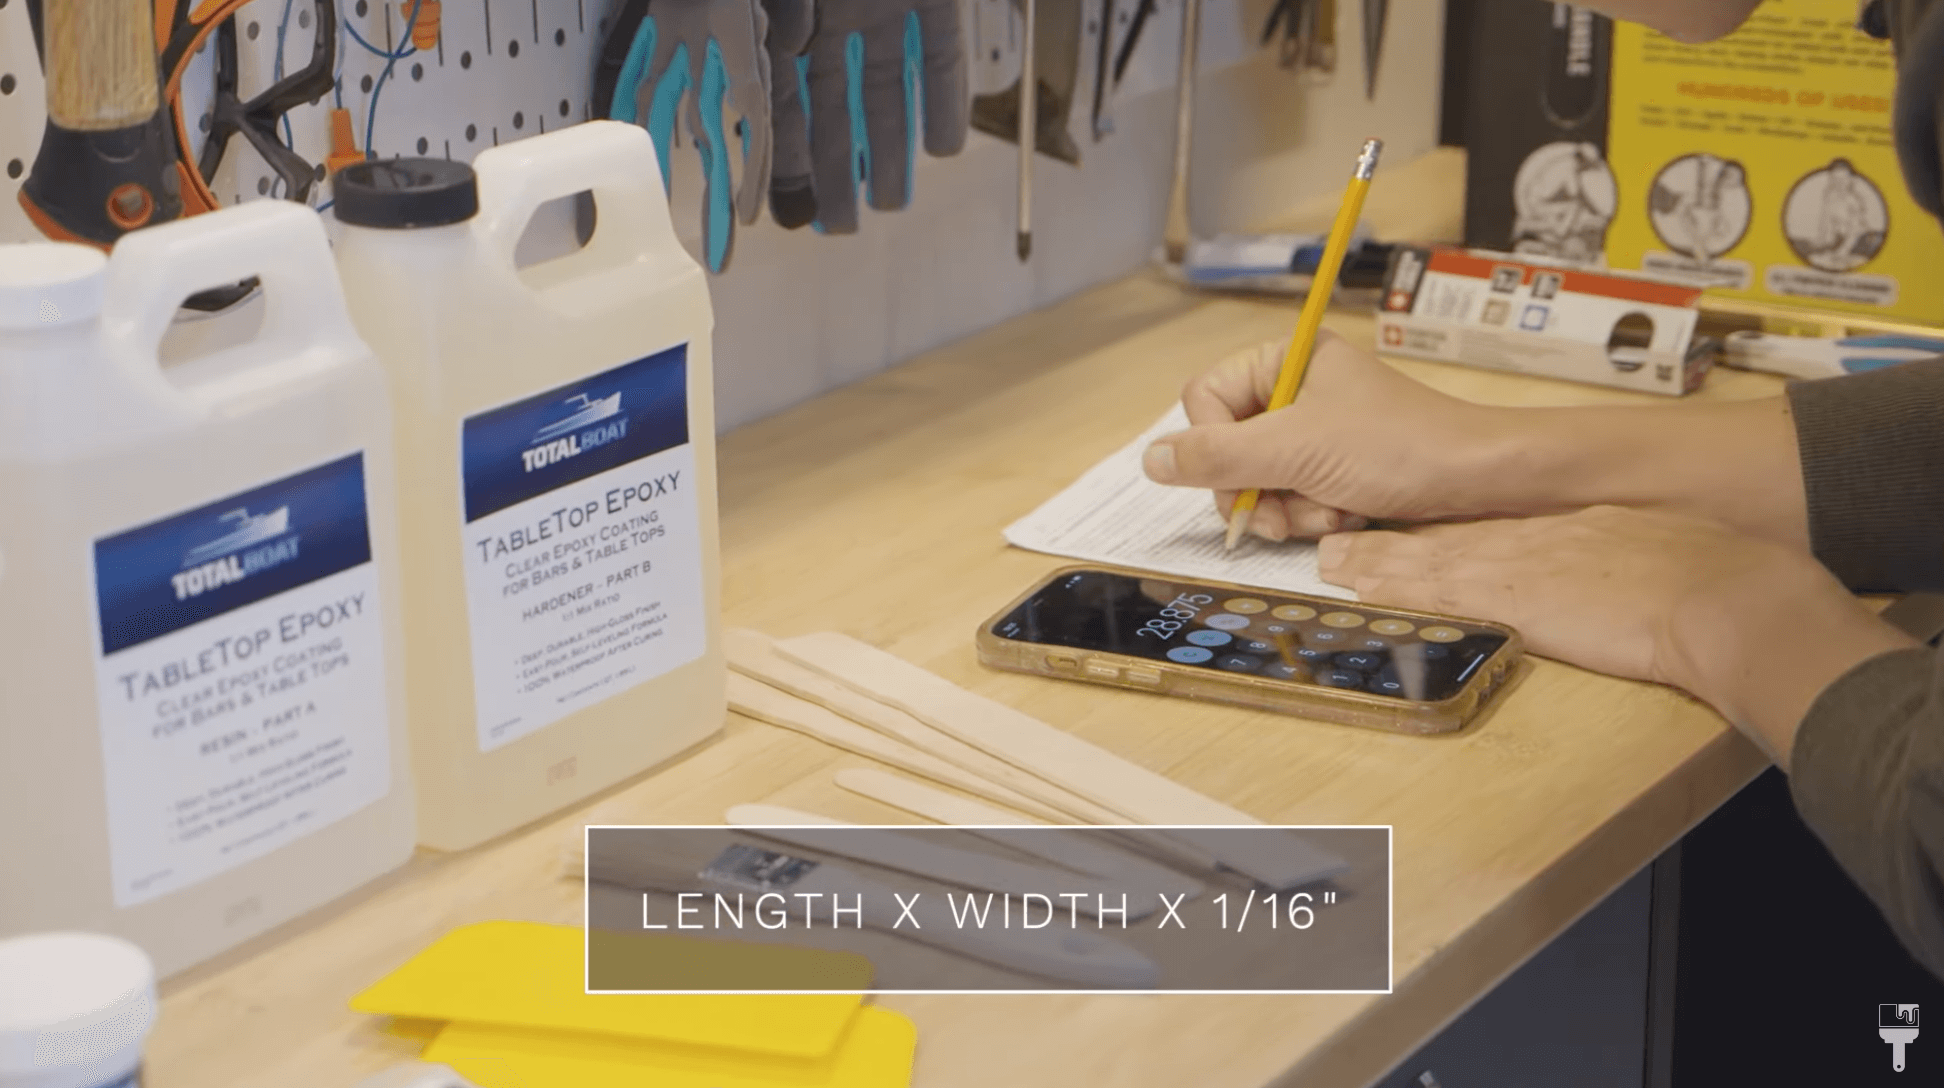
Now for the mixing. Here’s the equation on how much epoxy you need for the SEAL COAT:
Length of Surface x Width of Surface x 1/16”
When you multiply that, you're gonna get your cubic inches. Remember, the Total Boat kit has clear instructions, so don’t worry!
For my first coat, I needed 10 fluid ounces so I did 5 ounces of resin and 5 ounces of hardener. I stirred for 2-3 minutes making sure to scrape everything off the sides and bottom.
I transferred it to another cup and stirred for another 3 minutes.
Add pigment
Okay, now it’s time to add the white pigment for our marble base. Remember, we aren’t doing the marbling effect quite yet.
This pigment is a liquid substance, so you’ll add small amounts at a time until the epoxy mixture is opaque.

Once my epoxy was fully mixed, I placed it on the board in an “S” shape then used the plastic spreader to spread it out evenly across the top. This epoxy has a really long open time, so you have plenty of time to spread it out. Also note that any strokes you make will disappear because it self-levels. Any excess will run off the sides.
It needs to get tacky and that'll take about 4-6 hours before I was able to add my second coat and start with my marbling.

Second Epoxy Coat
Now for the super fun—and also scary—part! Let’s get our marble epoxy on!
For the second coat you’ll need twice as many ounces. I actually made 24 ounces because I needed to have a separate cup for my veining color.
As a reminder, this kit comes with light gray and black gray … so it’s a choose your own adventure kind of situation. Because this is my first time, I opted for the light gray.

Mixing and adding mica powders
I went ahead and mixed everything like I did last time, but this time, I set a few ounces aside for my gray veining. And I also added the silver pearl mica powder to my white mix to get that iridescent sparkle that will mimic the marble look.
I also added my light gray mica powder to the side mix that I had for my marble veining.
Applying final marble epoxy layer
I applied the second layer the same way I did the first by pouring it in an “S” shape and spreading it to make it smooth.
Once it was all coated in white, I started with the veining! (Take a deep breath with me).
Apply veining

This is a bit scary because there is literally no instructions on “the right way” to fake vein your epoxy marble. Haha. You’ve just got to go for it.
Simply dip your stirring stick in the gray pigmented epoxy and drizzle it as “naturally” as you can. I suggest looking at pictures of marble before starting for some inspiration.
Once you get the veining on, you can take a chip brush or use your finger (with gloves) to mush the colors together a bit. This does create air pockets, but that when we grab our air gun! This will blog the little bubbles away and will begin to disperse your pigment. It will feather it out and give it a more natural look.

This is where trial and error is definitely necessary. I played with the air gun for about 30 minutes. You’ve got to trust the creative process!
What I Learned Working with Marble Epoxy
After letting my new marble epoxy table top dry overnight, I was really impressed by how it turned out. It was my first time, of course, so I learned a lot!
Here are some takeaways:
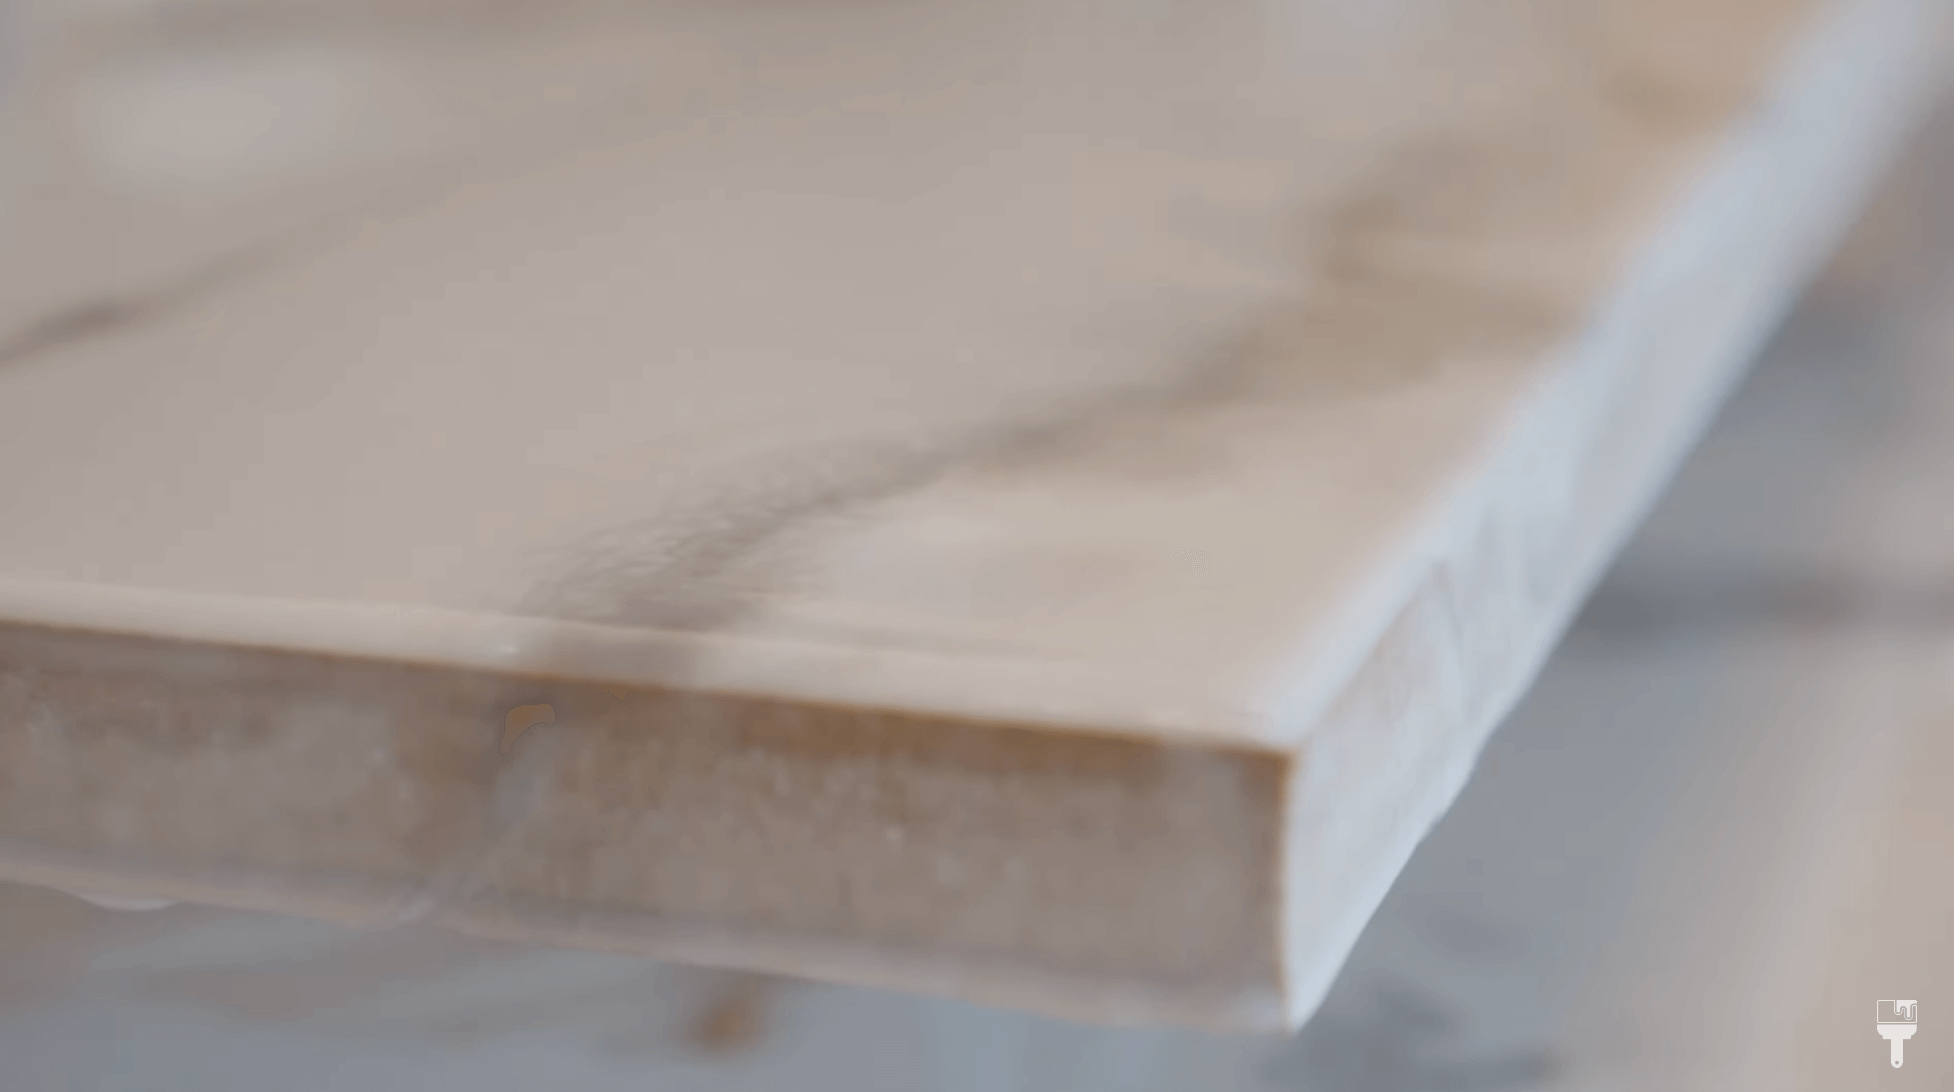
1. I should've primed the sides with some type of white paint. The epoxy does run off the sides, but it pulls more to the top, so I definitely have some brown MDF coming through.
2. As I was using my heat gun to fan and feather the veining, I accidently turned the setting too high, so I scorched the edges a bit.
3. That being said, I do like the heat gun method. It really helped me get the natural marble look. I just have to be careful next time!
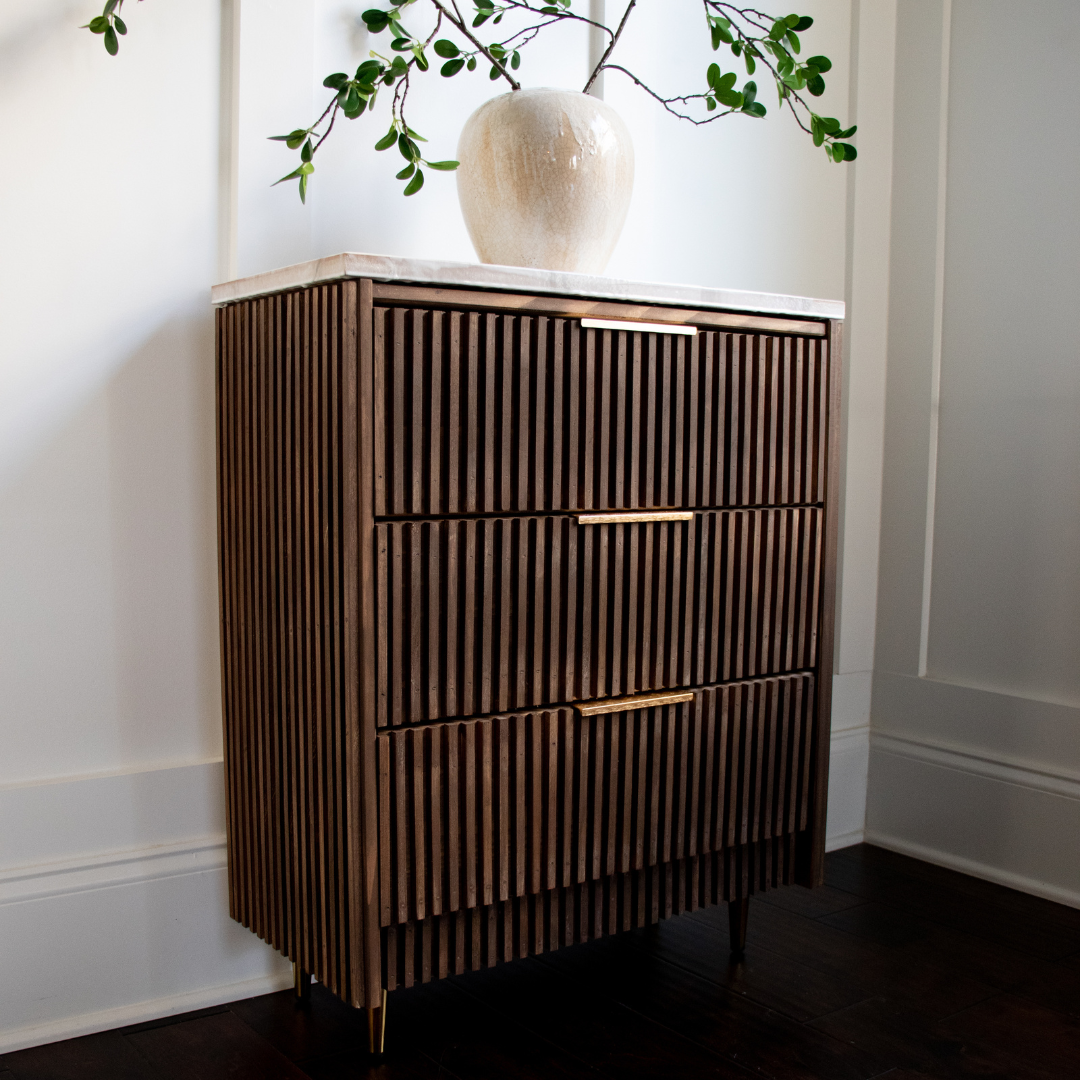
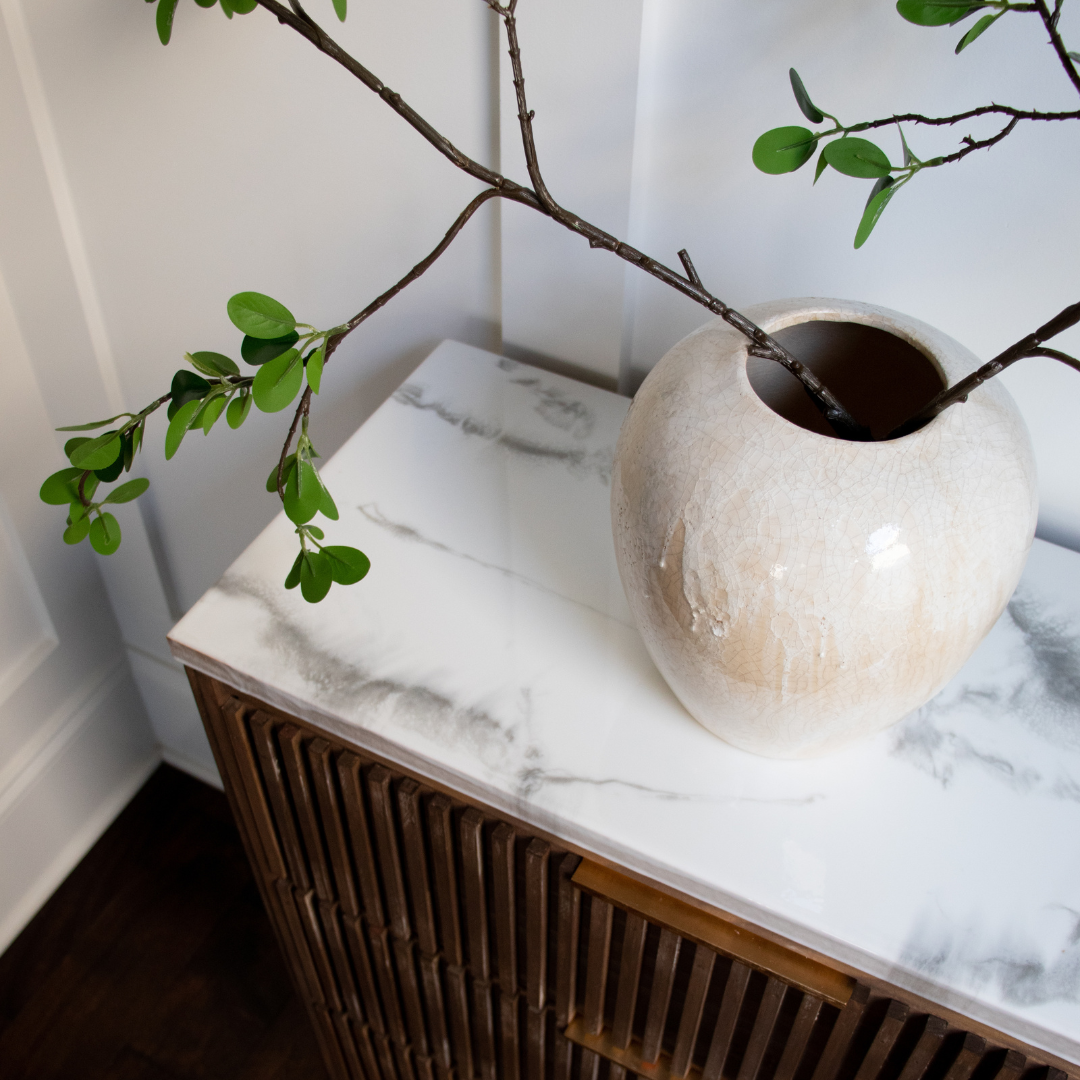
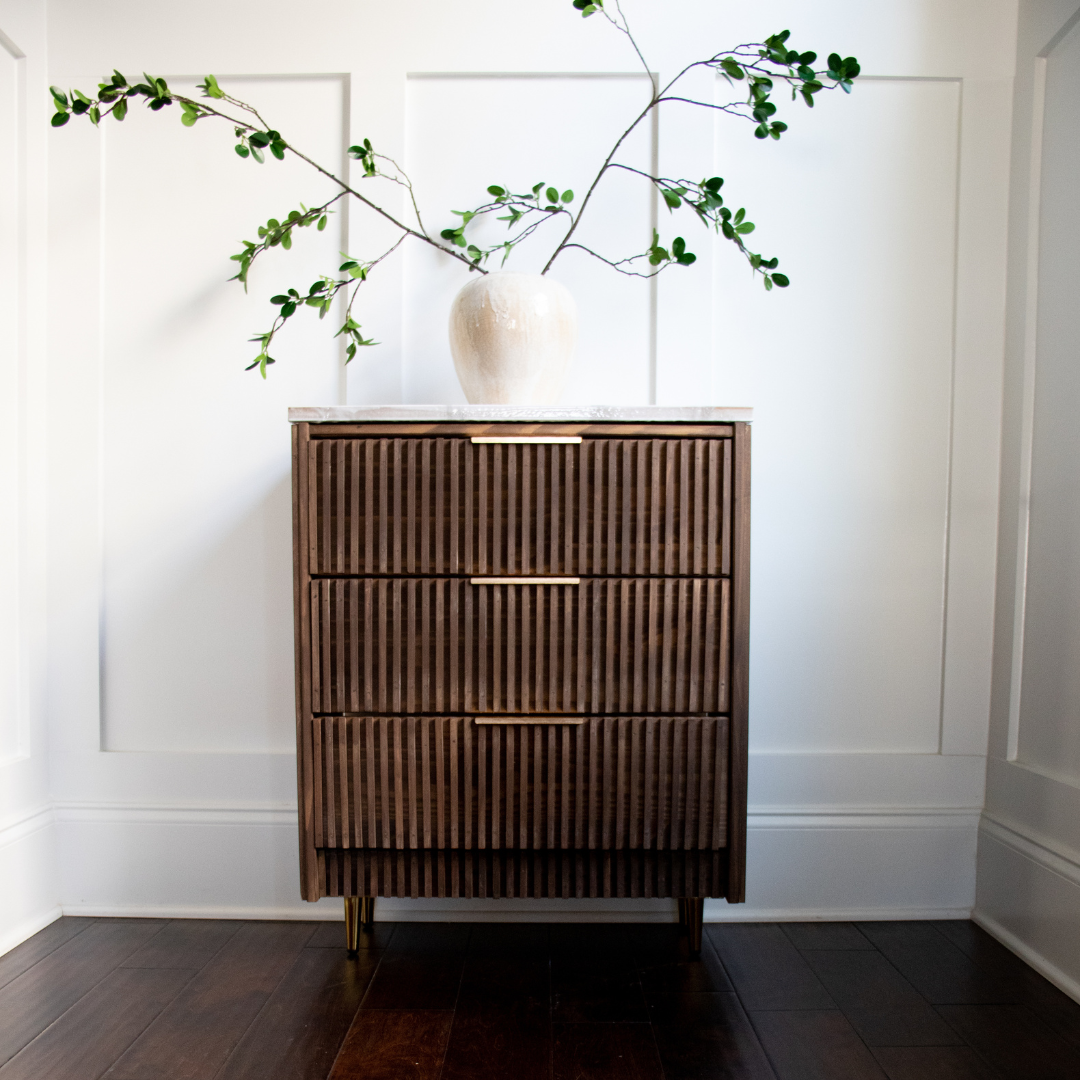
Marble Epoxy Countertop Reveal!
I loved playing with the epoxy. I'm shocked at how well that turned out for my first time. I've learned lots of lessons for next time and I can see tons of ways that I can use this on other projects.
Sometimes working on a piece of furniture isn’t all about having the perfect finished product. It’s about learning new techniques and pushing yourself outside of your comfort zone. Thanks for coming along on this furniture makeover journey! Remember, you can always go watch it all come to life on my full YouTube tutorial!
But for the moment we’ve been waiting for, here check out the high end look I got out of this IKEA RAST nightstand!