
Milk Paint Makeover: Transforming an Antique Dresser
Disclosure: This blog contains affiliate links. I will receive a commission for items purchased through these links at no extra cost to you. I appreciate your support. Please read all labels and follow all manufacturer safety recommendations when working with paints, stains, and other equipment
In today's post, I'll take you through the exciting journey of milk painting an antique dresser using Shackteau Interiors Milk Paint. Get ready for a transformation that's not only visually stunning but also environmentally friendly.
Today marks my second time using milk paint, and I'm diving into the world of antique restoration for a friend's dresser.
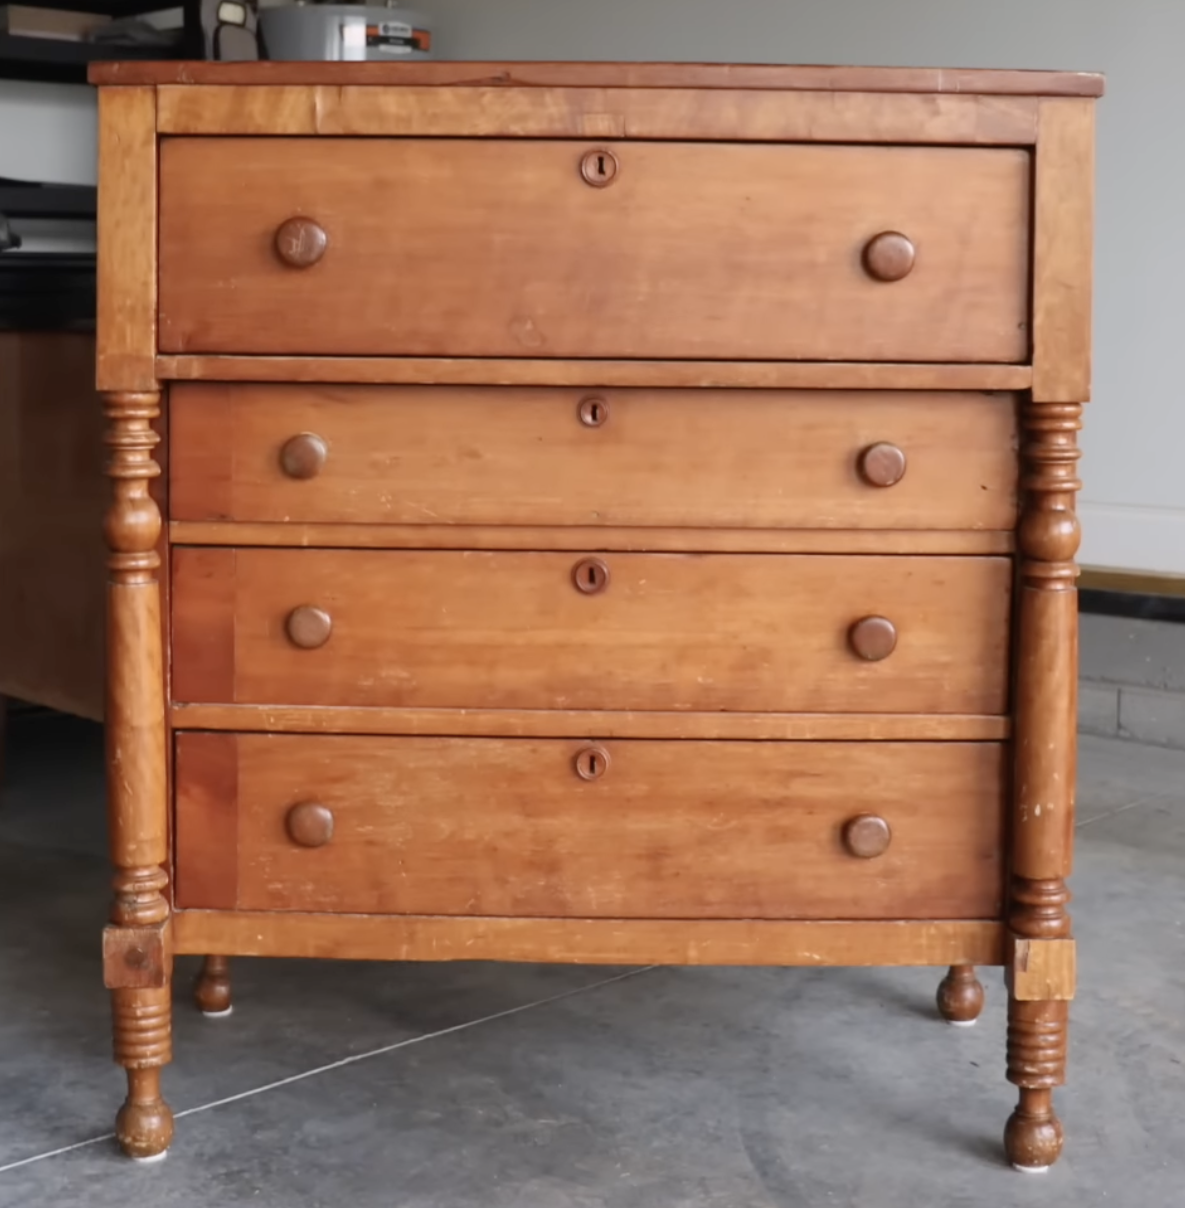
This solid wood piece, sourced from a flea market, is the perfect canvas for milk paint. Milk Paint is generally associated with a farmhouse style chippy finish, but for this dresser I am going to be using a bonding agent along with the milk paint for a smooth chip-free finish. Follow along as I share my thoughts on the process and the incredible results.
Supplies
All my favorite furniture refinishing supplies can be found here.
Shackteau Interiors Milk Paint (Black Beach)
Shackteau Interiors Extra Bond
Prepping the Dresser
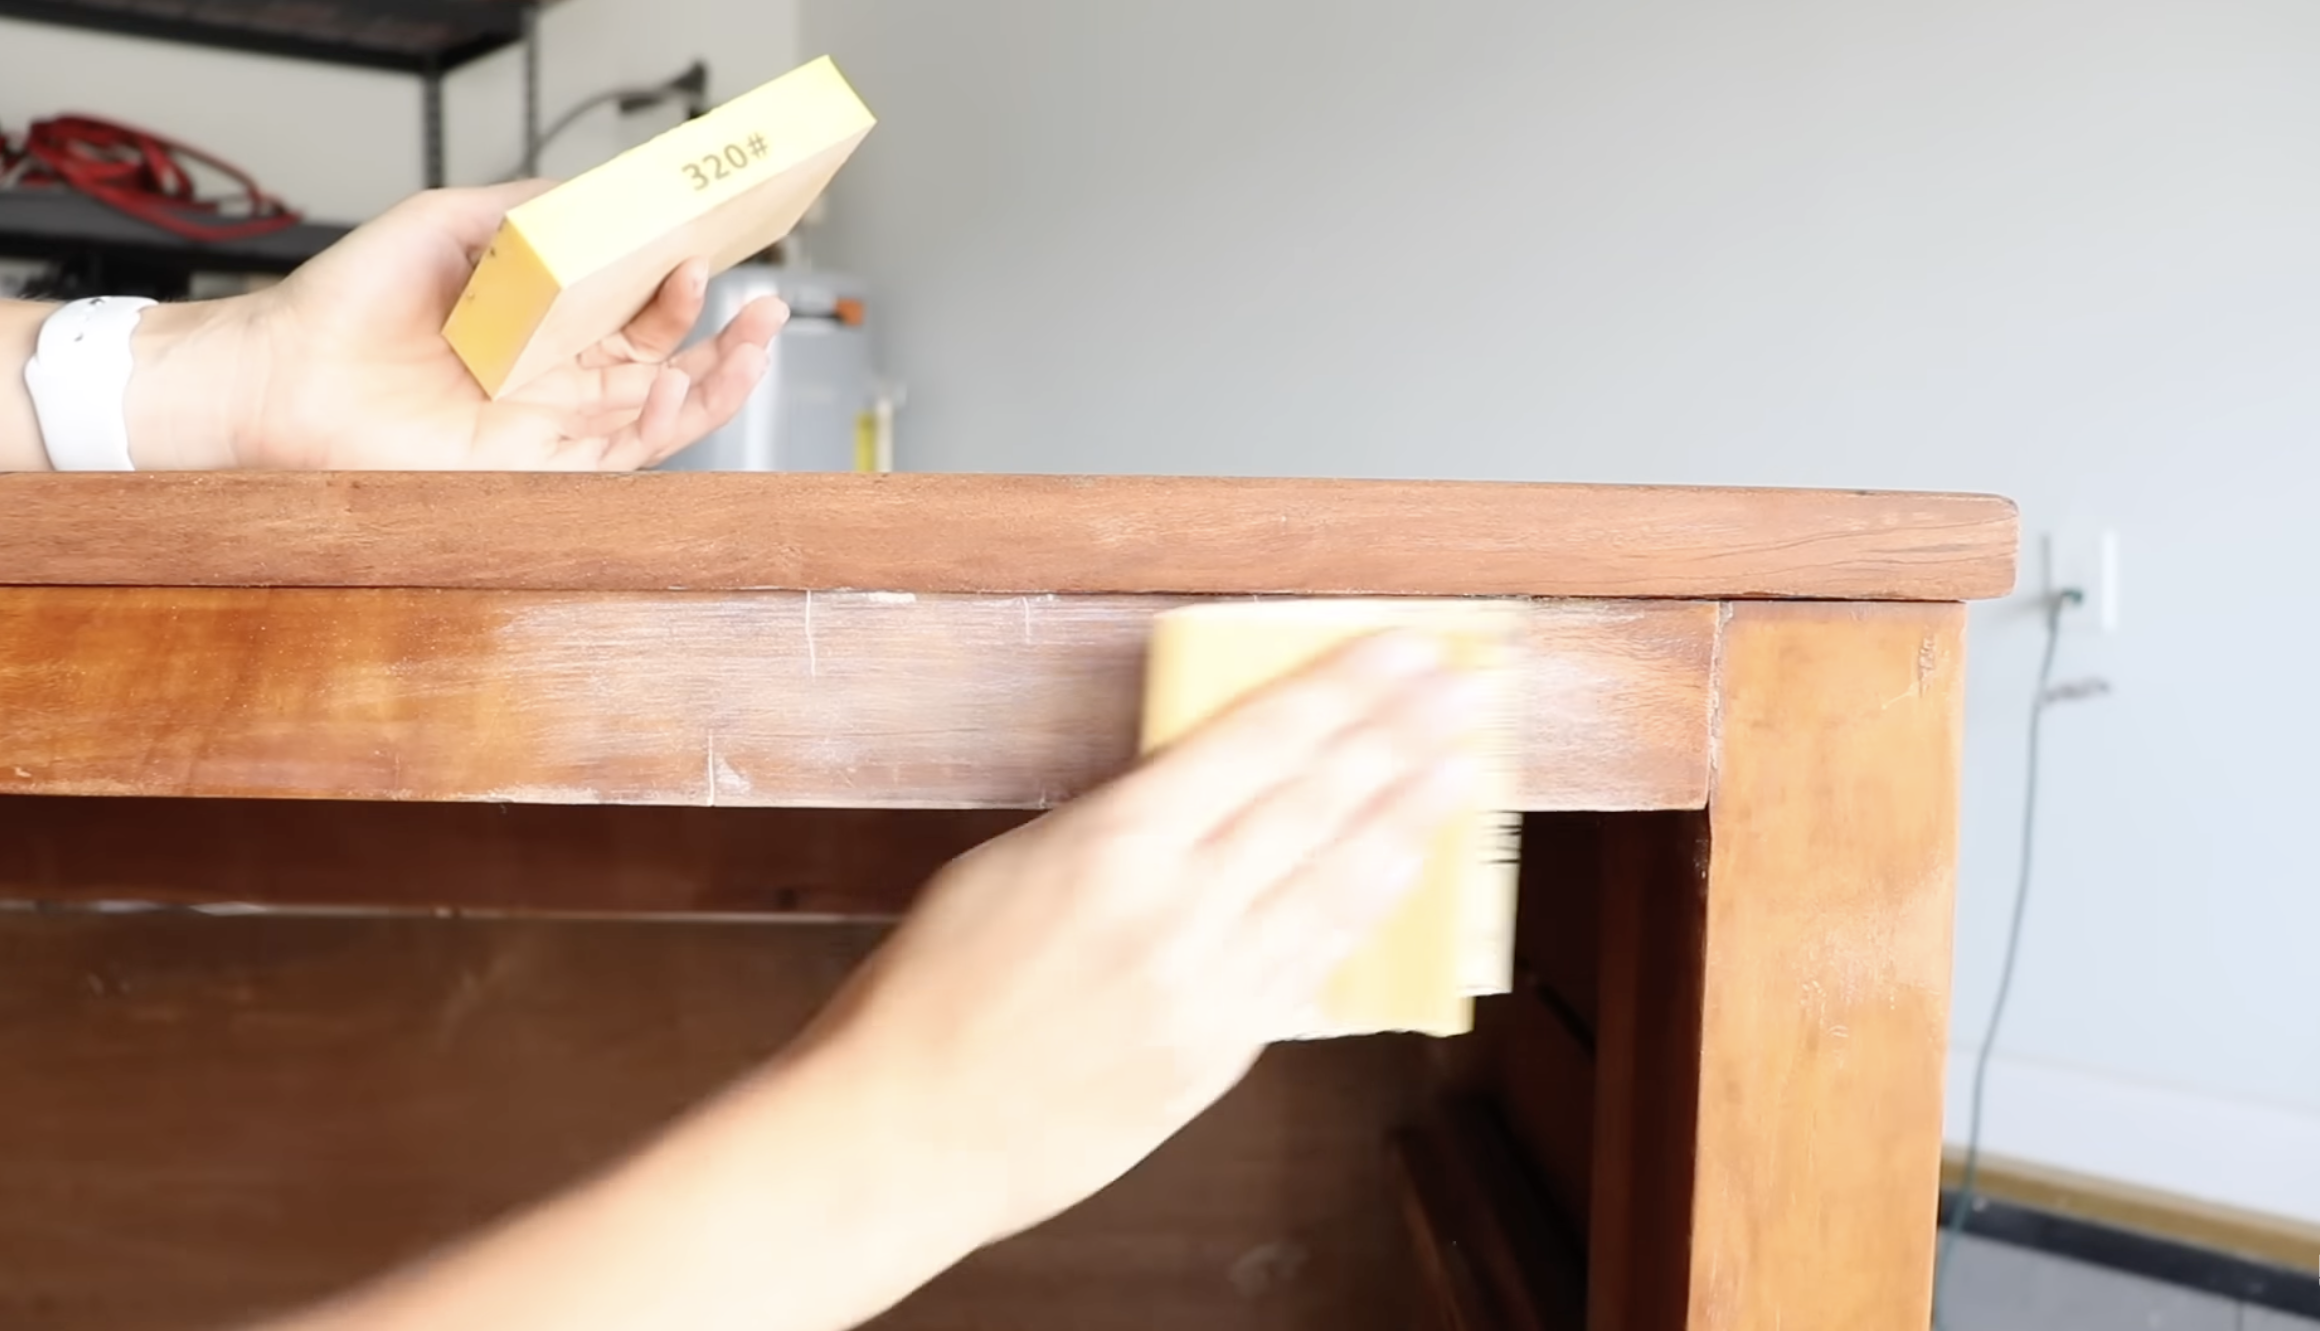
Before starting the milk painting process, I stripped the existing top coat using an orbital sander to prepare the piece for paint. As you can see, the top of this dresser is pretty dinged up and needed some minor repairs before I could paint.


After removing hardware I gave the dresser a thorough cleaning using denatured alcohol. This got rid of all the grease and grime that had accumulated over the years. Cleaning your furniture before painting helps the paint to adhere better and stand the test of time.

I used wood glue to address some lifting veneer and then clamped it while the glue set to dry. Next, I took my wood filler and applied it to some of the cracks you see here. After the wood filler was dry, I sanded dit smooth with a sanding block for a seamless repair.


Mixing Milk Paint

Shackteau Interiors Milk Paint in the color Black Beech is my paint of choice for this project. The organic and non-toxic nature of milk paint makes it an eco-friendly option, and its powder form allows for easy mixing and storage. Using a one-to-one ratio of water and paint powder, I created the perfect mix.


Milk Paint is known for giving a chippy and rustic finish, however, by adding in a bonding agent, it can also give you a smooth and chip free modern finish. It is a very versatile paint! I am wanting a chip free finish with this dresser so I went ahead and added the bonding agent to my milk paint.

I used my Zibra Brushes for this project. The angled mini and the triangle were perfect for applying the first coat. These brushes, especially the Triangle Brush with its pointy tip, proved to be ideal for the detail work on this dresser. The consistency of milk paint, which is thinner than traditional furniture paint, blended seamlessly with the use of Zibra brushes, providing excellent coverage.

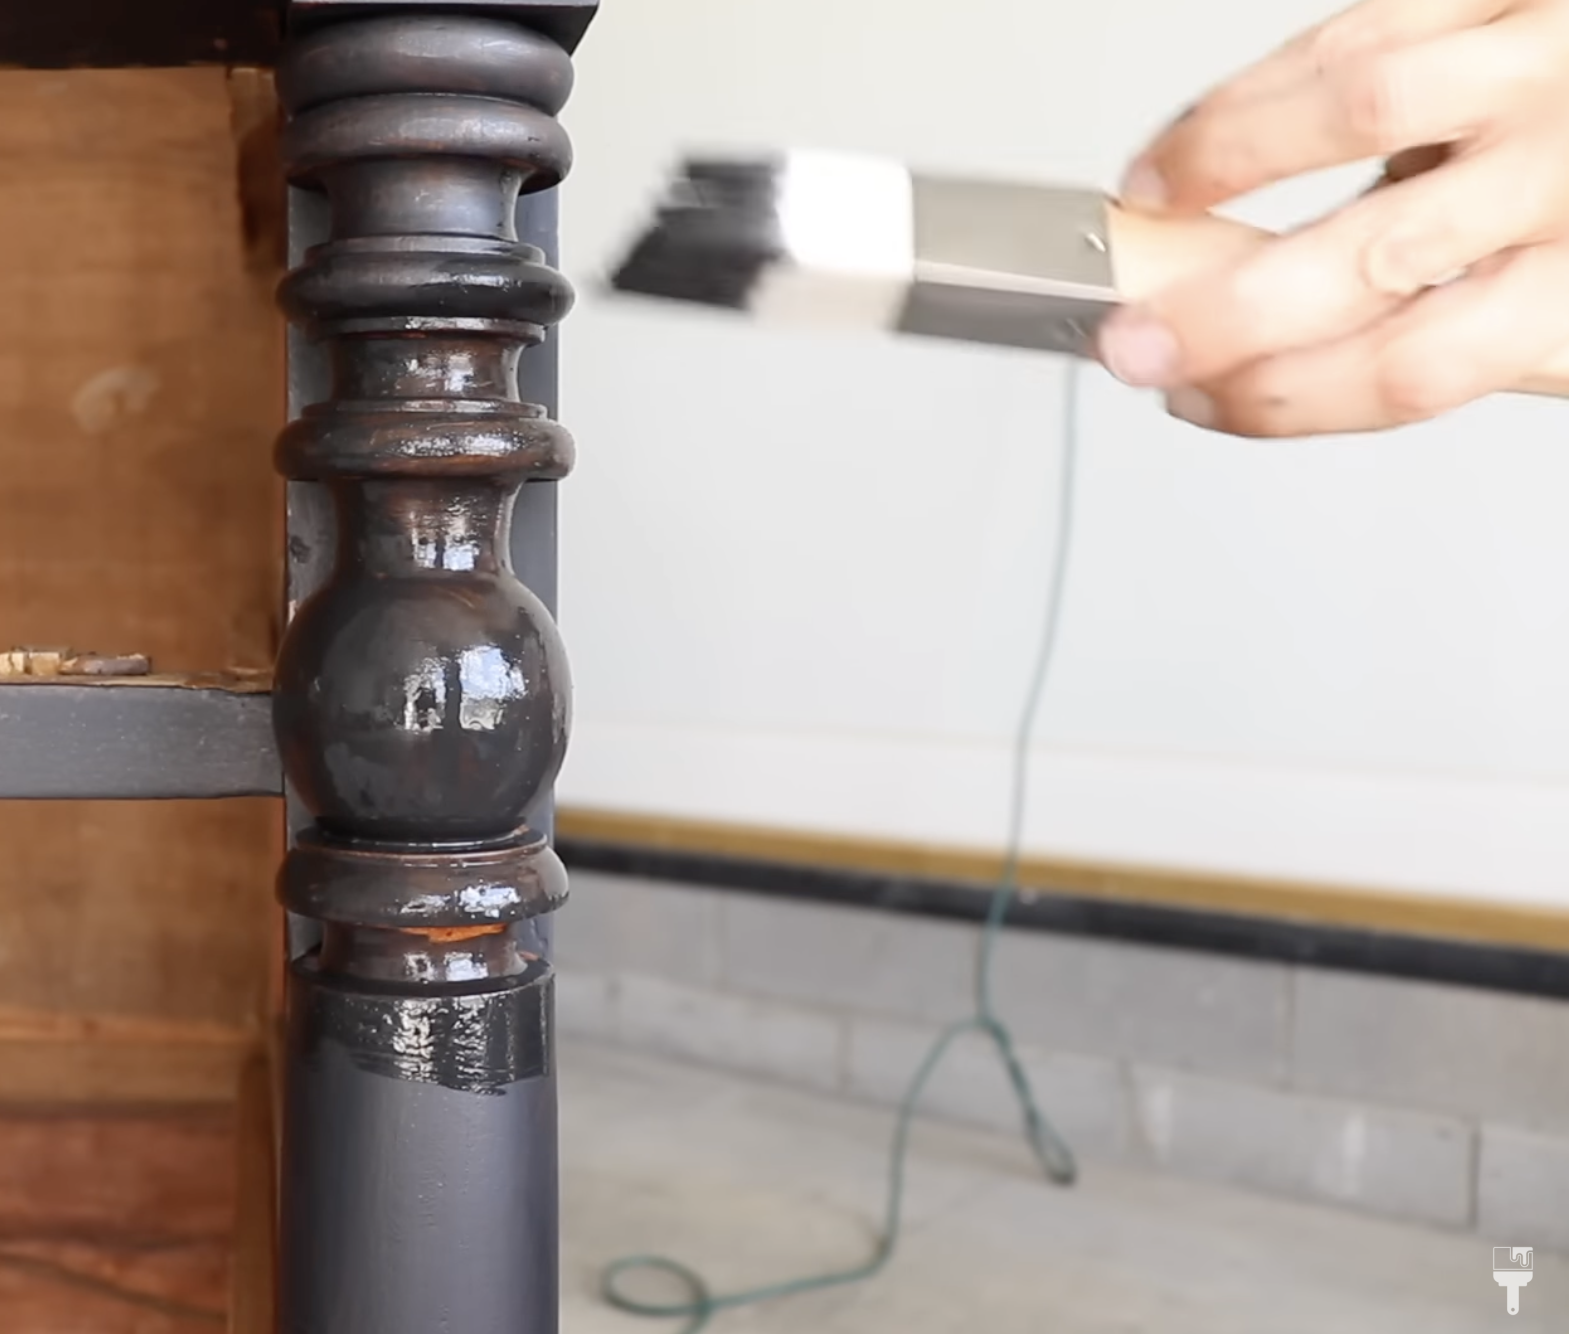
To get the look I was going for with this shade of black, I applied two coats of milk paint using my Zibra brushes. Milk Paint dries pretty quickly so I was able to paint both coats in one day.

Sealing the Deal

After two coats of milk paint, it was time to seal the deal. I decided to use for Shackteau Interiors hemp oil for its natural finish. This is also an eco friendly and non-toxic product. I applied it with a lint-free cloth, ensuring it absorbed into the paint. The hemp oil not only seals but enhances the natural beauty of the piece. Multiple coats can be applied with a waiting period of two hours between each.

Finishing Touches

To address any spots that absorbed the hemp oil unevenly, I turned to natural wax, specifically Dixie Belle Big Mama's Butta. Buffing it onto the surface with a clean cloth provided added protection and a flawless finish.

Old-World Charm with Glass Knobs
To complete the look, I added antique-looking glass knobs from Hobby Lobby, giving the dresser a touch of vintage charm. These knobs are affordable and add the perfect finishing touch to this antique dresser. The transformation from start to finish is truly remarkable.


Isn’t this dresser stunning?! I love the combination of black with the wood top. This piece is now a beautiful addition to my friends home decor.
Whether you're a seasoned painter or a newbie, the versatility of milk paint opens doors to creative possibilities. If you're considering a furniture makeover, explore the world of milk paint and witness the magic unfold. If you would like to watch the entire milk paint tutorial you can do that here.
Thanks for joining me on this milk painting adventure.
I'll catch you in the next project!