Washstand Modern Classic Makeover
Disclosure: This blog contains affiliate links. I will receive a commission for items purchased through these links at no extra cost to you. I appreciate your support. Please read all labels and follow all manufacturer safety recommendations when working with paints, stains, and other equipment.
I’m so excited for today’s blog because it’s actually a throwback makeover! I did this washstand modern classic makeover over a year ago, and it was really fun revisiting it and writing the steps down for you all! This was a piece that I madeover for a friend of mine. We took an old, classic piece, and gave it a modern Restoration Hardware™ look.
So get ready for lots of sanding! And don’t worry wood lovers … I did my best to keep the natural beauty of this piece as possible. ;)
Before we get started, let’s take a look at how this piece started.

Materials Used in This Washstand Modern Classic Makeover
Country Chic Paint Pop the Bubbly (Use Code Christina10 for 10% off through 11/30)
Dixie Belle Blue Sponge Applicator
Zibra 2.5" Angle (Use Code Christina10 for 10% off through 8/22)
Sanding, Sanding, and More Sanding

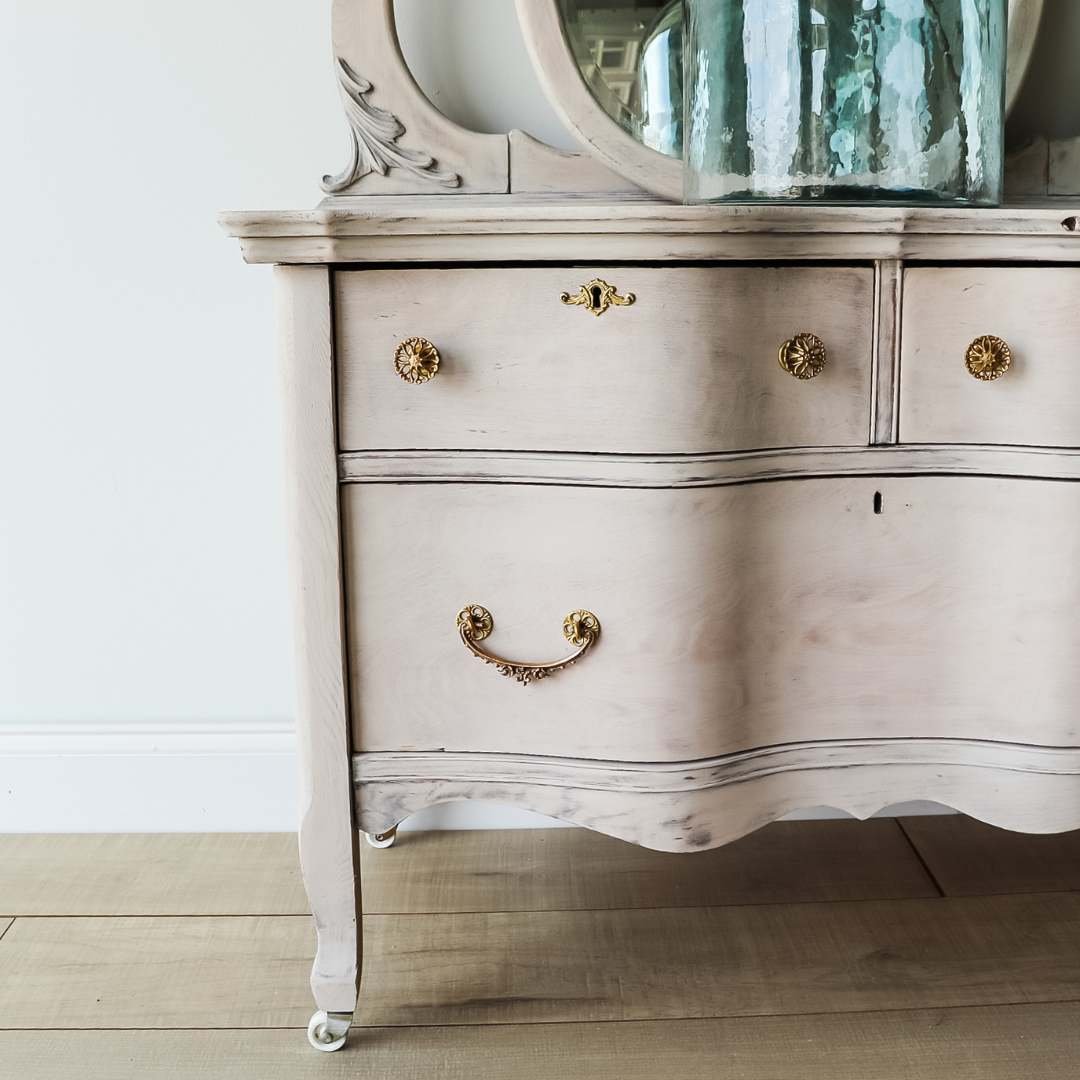
Before getting started on A LOT of sanding, I removed the hardware from the piece and set it aside because I’ll be reinstalling them later. My friend trusted me with this project, but she was pretty adamant about keeping the classic keyholes.
More about Festool.
I know that getting a heavy duty sanding set is a pretty big investment. I’m here to tell you that if you’re in the furniture flipping business, definitely make this a goal of yours!
The Festool Rotex 90 has three functions: orbital sander mode, a Rotex mode which is going to eat through wood and existing finish, and a delta feature for detail sanding.
I will also be using my Festool MIDI Dust Extractor for dust-free sanding. One of the things I love about this is that my Festool container fits right on top of the dust extractor which makes it easy to move around.
Remove the finish.
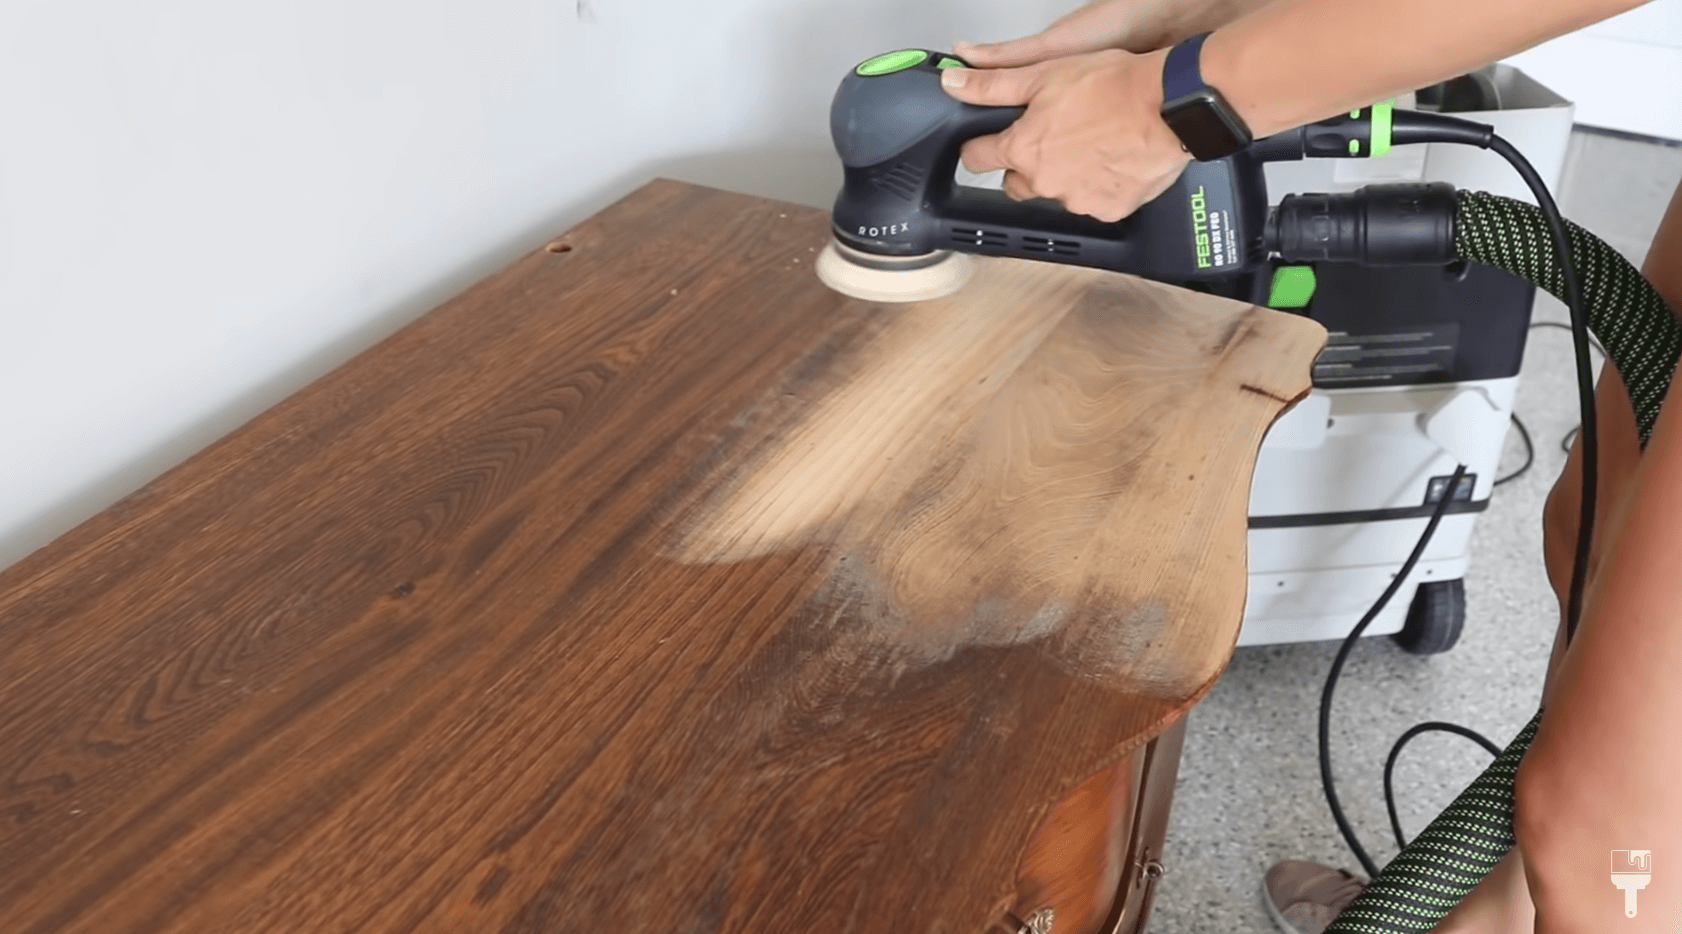
Okay, this piece was in pretty rough shape, so I used my 120-grit sandpaper to strip back the finish. You could use a 60 if you needed, but a 120 worked for me.
I wanted to be a bit more careful with the drawers to keep the integrity of the shape. So I used a foam attachment to sand those back. I also sanded off as much of the finish I could on the frame of the mirror.
Finally, I took advantage of the delta feature with the triangle attachment to get into all of the little details of the frame.
Smooth it out.
The last bit of sanding was to smooth everything out, so I got my 220-grit sandpaper and buffed the entire piece.
I told you there was a lot of sanding! But now that the whole piece was prepped, I was able to get to my whitewash.
Create Whitewash with Country Chic Paint

I went to my stash to see what I had on hand, and I found a Country Chic Paint in Pop the Bubbly which was going to be perfect for my whitewashed washstand makeover.
To create a whitewash, I like to mix 1 part water to 1 part paint. Stir well, and you’re ready to go.
Apply and Wipe Back the Excess
I used my big Zibra Angle 2 ½” brush to cover a lot of area. And if you’re following along, make sure to have an absorbent cloth nearby to wipe back the excess paint.
Sometimes I do put a slip coat of water on first, but because I wanted this wash to be more concentrated, I skipped that step. I have some darker stain to cover up, so this was the right choice for me. Just know that it’s an option for you!

I started with the top flat surface. I applied my wash on the entire surface and wiped it back with the cloth before it dried down. It revealed the perfect amount of the beautiful wood grain underneath! I loved the way it was looking, so I continued on with this process for the entire body of the piece.
When I moved onto the mirror frame, I covered the mirror with a big piece of butcher paper to protect it. I changed it up a bit and did more of a dry brush motion and wasn’t taking too much off with the cloth. I had much more finish to cover up, so I left it a bit more concentrated here.
Restore the Hardware

While my piece was drying, it was time to grab the old, rusty hardware and give them some life back.
I’ve done this process before here, but it amazes me every time how well it works! Here are the steps to restore worn hardware:
Pour white vinegar into a sauce pan and bring it to a boil.
Place your hardware in it and let it lightly boil for 10 minutes.
Remove it with tongs and let it cool.
Grab some fine steel wool and buff each piece of hardware until it’s nice and shiny.
Note: make sure you don’t do that step in the kitchen because it can be pretty messy. I learned that the hard way.

Seal with Dixie Belle Clear Coat in Flat & Finishing Touches
My last step was to seal the piece. I wanted it to be beautiful and raw, so I used my trusty Dixie Belle Clear Coat in Flat.
My favorite way to apply top coat is with the Dixie Bell blue sponge. You can dampen it by spraying it with a bit of water first. Next you’ll dip the sponge in the top coat and wipe off the excess.

Apply by dragging the sponge in one long stroke, and repeat until you’ve sealed your piece!
Feel free to use a brush to apply to the detailed parts of your piece.
All right, after letting it dry for a couple of hours I was ready to put it all back together. I reinstalled my beautifully rejuvenated hardware, and voila! She was finished!

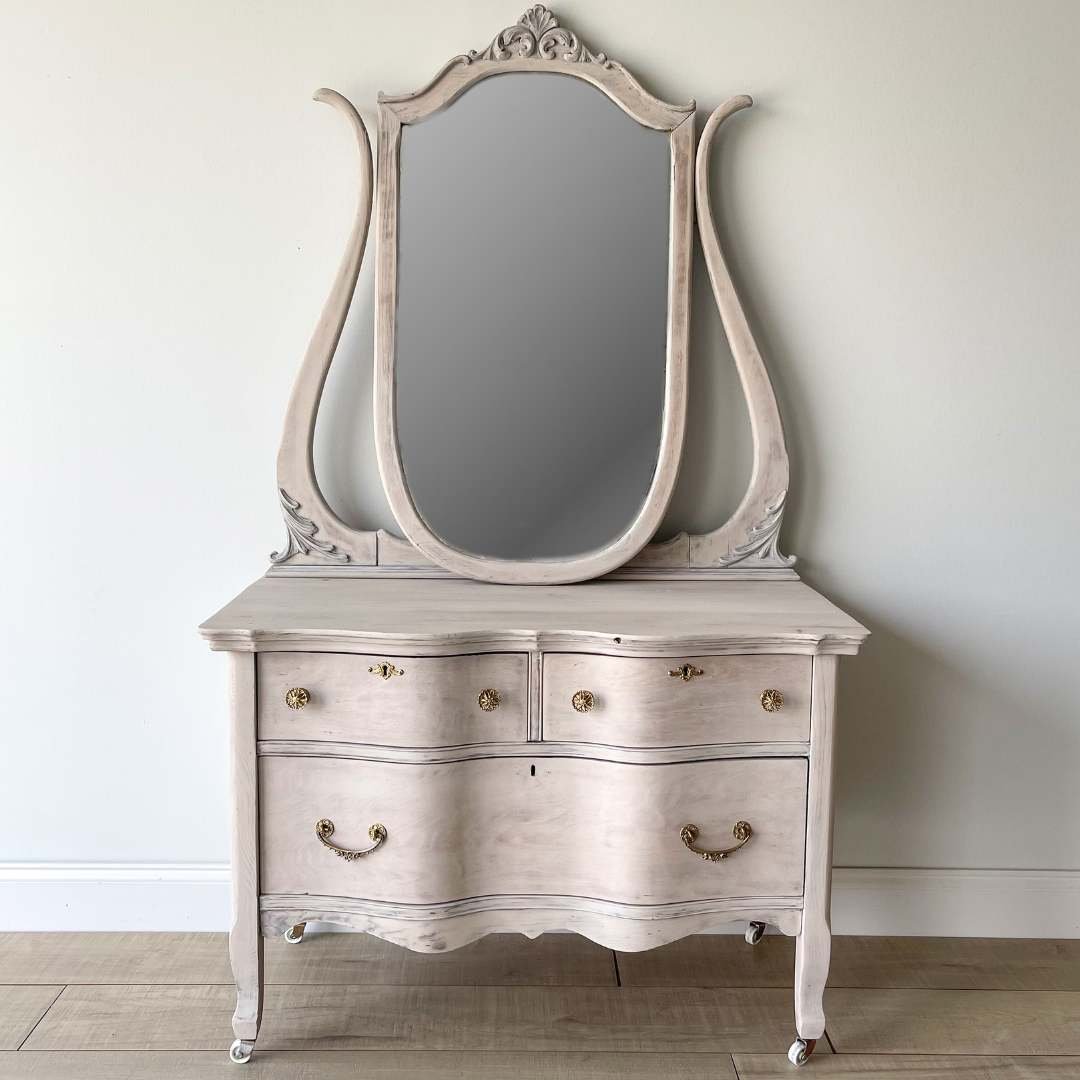
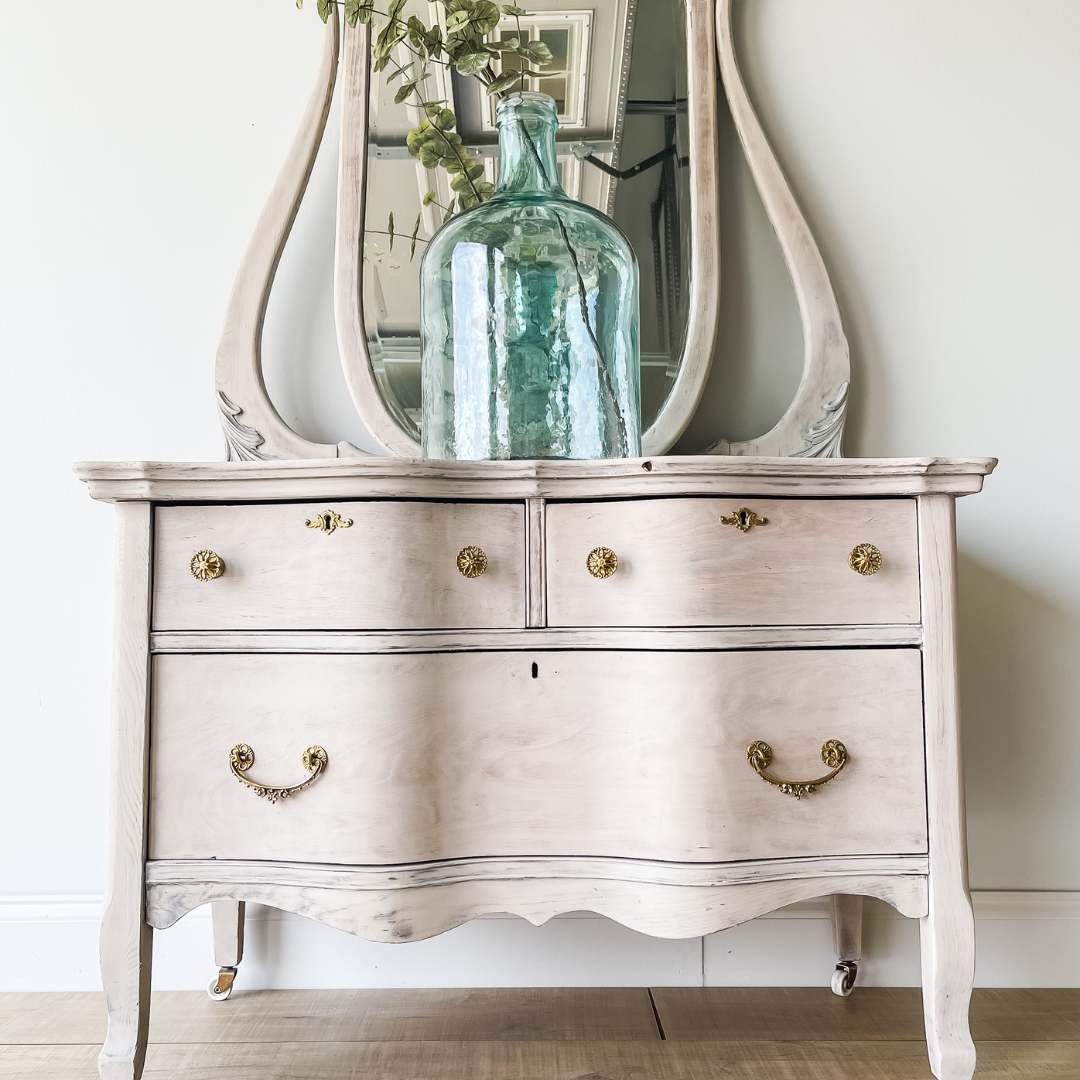
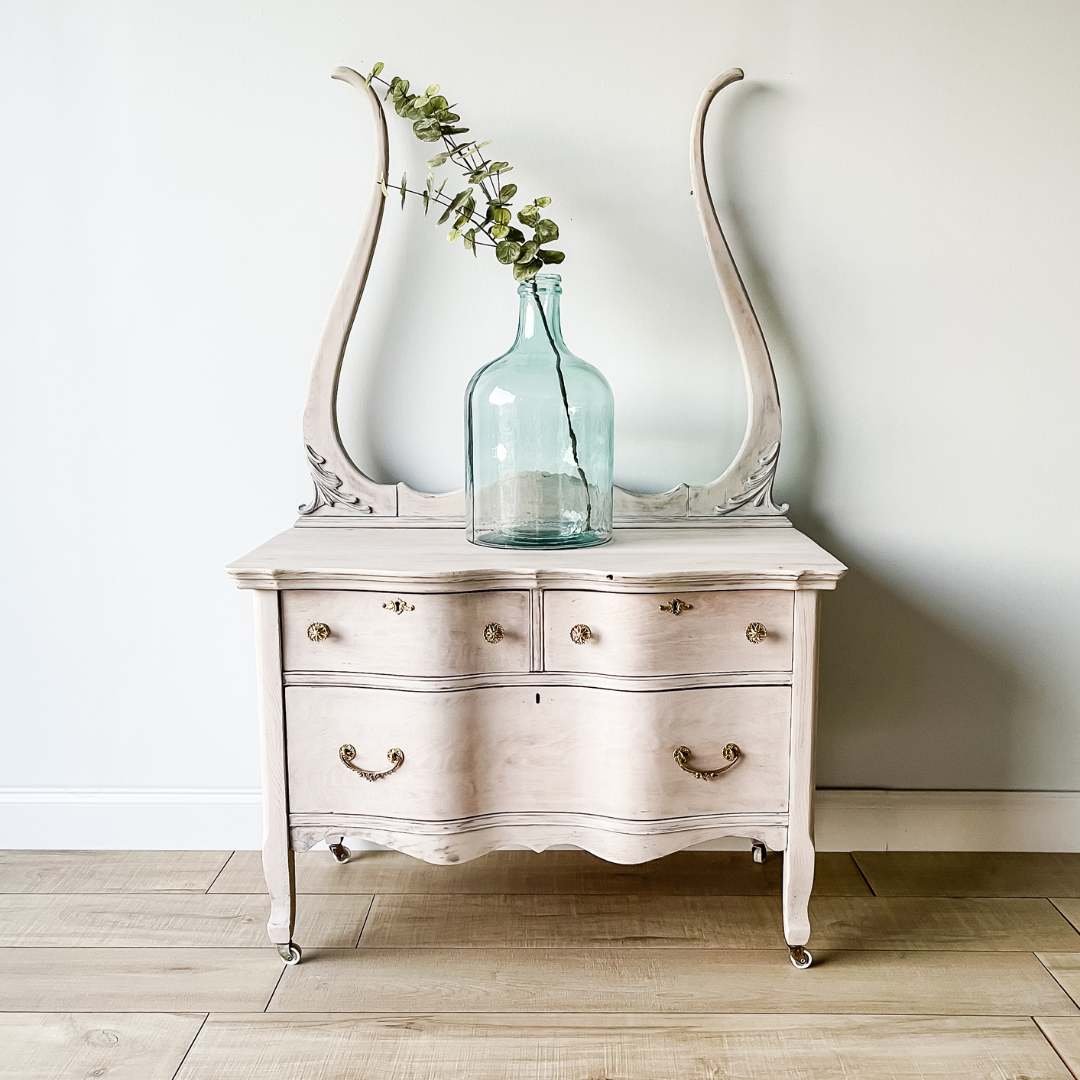
Washstand Modern Classic Makeover Reveal
I love the way this washstand modern classic makeover turned out. I know that it has become a showpiece in my friend’s home, and I couldn’t have been happier with the results.
I hope this furniture flip breakdown was helpful for you! If you’d like to watch this piece come together step by step, head on over to my YouTube™ channel!