IKEA IVAR Hack: DIY Bar Cabinet
Disclosure: This blog contains affiliate links. I will receive a commission for items purchased through these links at no extra cost to you. I appreciate your support. Please read all labels and follow all manufacturer safety recommendations when working with paints, stains, and other equipment.

I’m loving all of the IKEA hack projects that I’ve been seeing in the furniture flipping world! And my last IKEA TARVA hack was so much fun that I decided to do another one. So today I’ll be showing you the IKEA IVAR hack that I recently completed! I turned this basic IKEA IVAR cabinet into a DIY drink or coffee cabinet, and I’m in love with the results.
I purchased the IVAR cabinet back in February when it was only $85, and although the price has gone up a bit, it’s still a pretty affordable DIY project given that my inspiration pieces are priced at about $1,000!

Products Used for IKEA IVAR Hack
Lilly Moon Vintage Gel Stain (Old Fashioned) **Use code PRETTYDISTRESSED10 for 10% off
Prepping the IVAR Cabinet
The IVAR cabinet is a full system where you can purchase frames and other things to make it more unique, but I have my own fun idea for this hack.
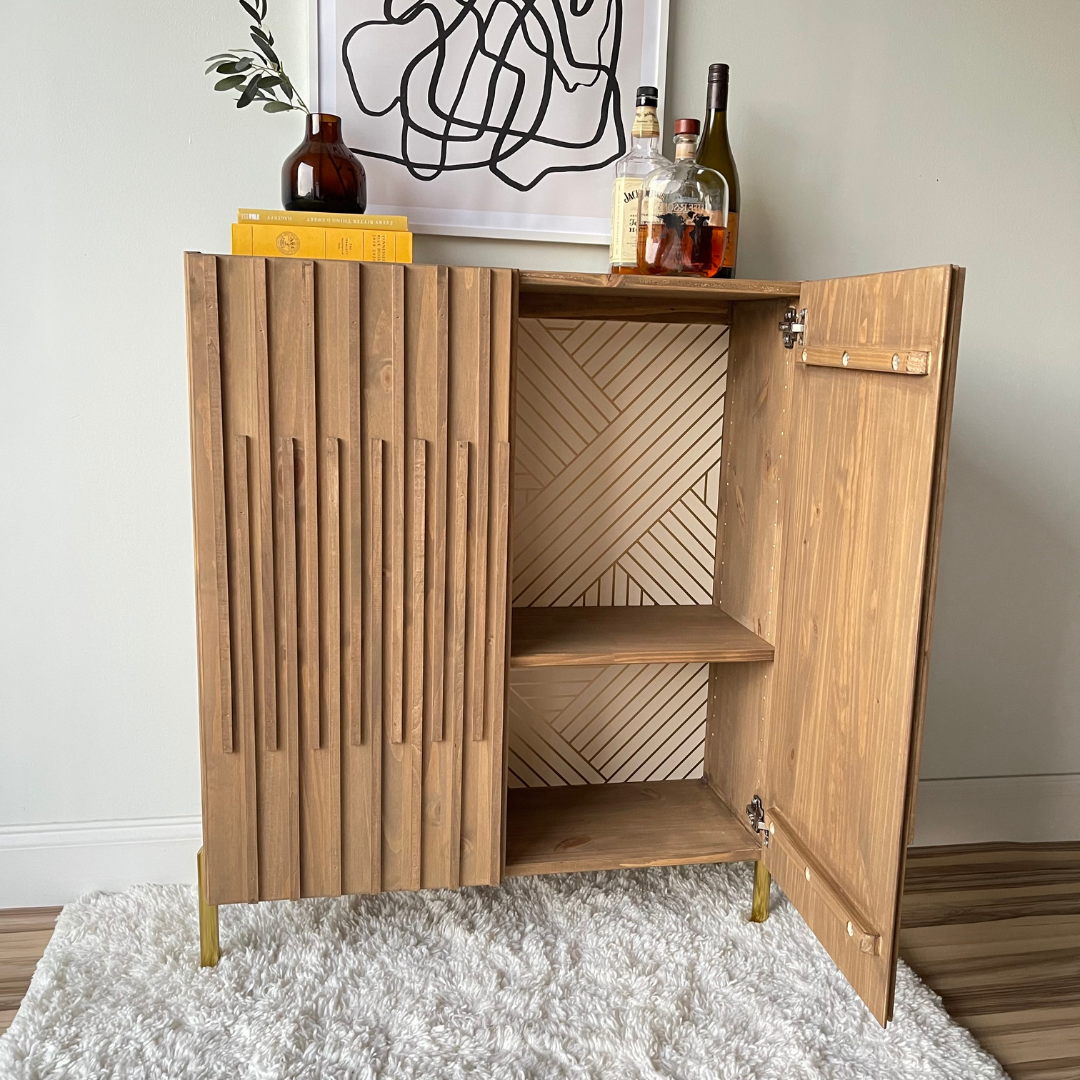
The first thing I did before assembling the cabinet was applied some geometric Wallpaper on the back panel. I loved the idea of adding some fun design on the inside of the cabinet so that it doesn’t feel so boring.

Assembling the IVAR cabinet was actually pretty easy. The hardest part was getting the doors to hang right. The hinges are adjustable, so you are able to move them up and down to get them to hang evenly.
Now that everything looks good assembled, I went ahead and took off the doors to that I could start with step one of this hack!
IKEA IVAR Hack Step 1: Stain
I’m going to be using Lilly Moon Vintage Gel Stain in the color Old Fashion for this project. This is a dark warm brown stain, and I love that it’s water-based because it’s safer, it doesn’t smell, and it dries really quickly. I also prefer it over oil-based stains because you get really great coverage, especially around the knots. These stains also have topcoat built into it. You could definitely choose to get more protection and add a top coat, but you don’t have to.

Before starting with my stain, I did a quick slip coat of water to help with the open time of this stain. I used an applicator pad to apply the stain.
In real life, I waited to stain the inside of my cabinet toward the end as I was reassembling, but if you know which stain you’re going with, I would stain the insides and shelves at this time.
It only takes 20-30 minutes to dry, so while it was drying, I moved on to step 2.

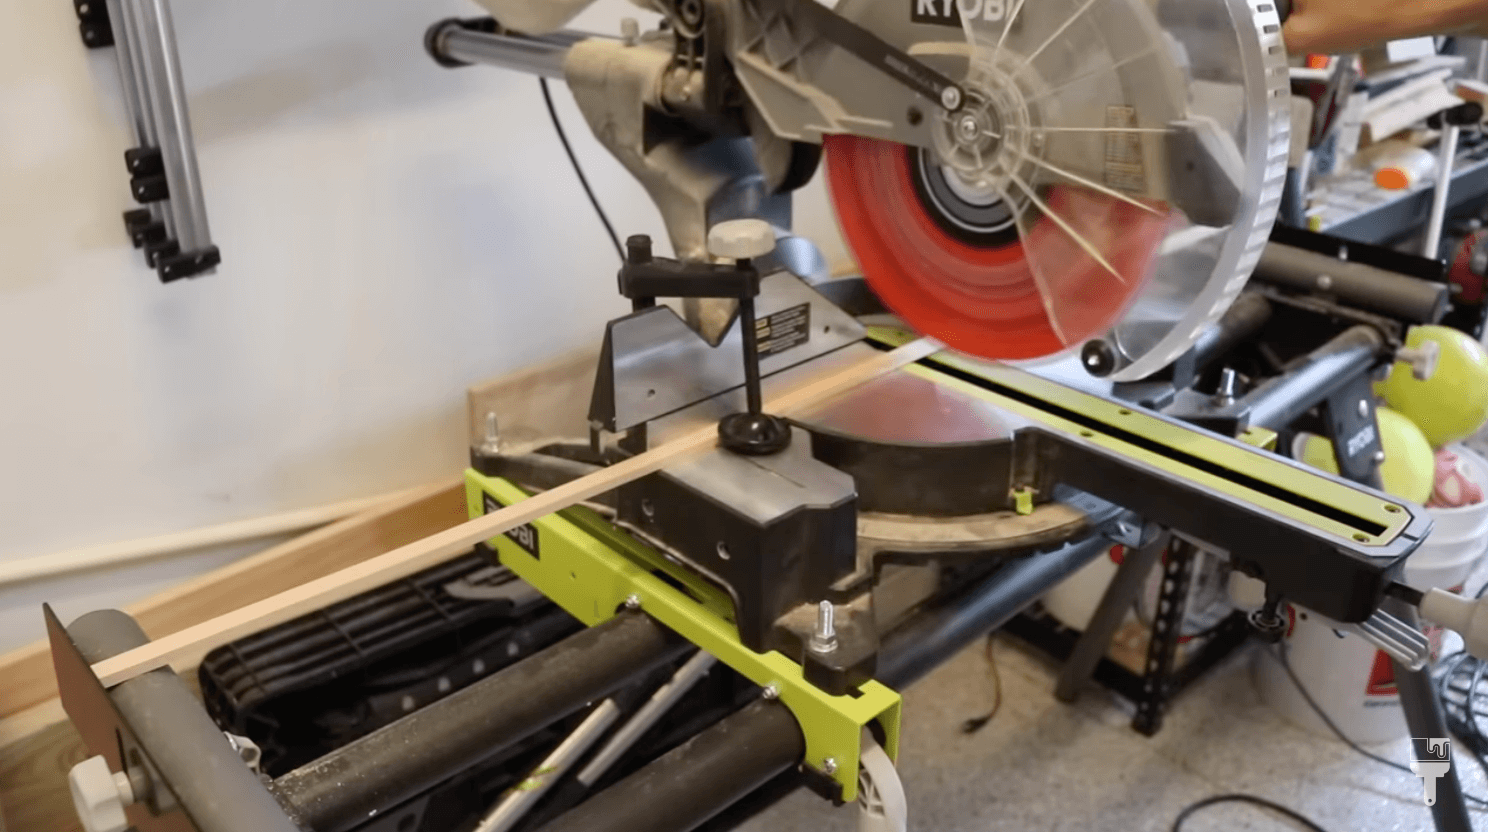
Okay, this was honestly the longest part of the entire makeover. I had enough stick to cover the front of the doors with a cool pattern I came up with. But I did have to stain each of these trim pieces individually to be sure they were nice and even. It’s worth doing this step before attaching them to the doors because you could get an uneven finish trying to stain them after the fact.

IKEA IVAR Hack Step 3: Apply Decorative Pattern
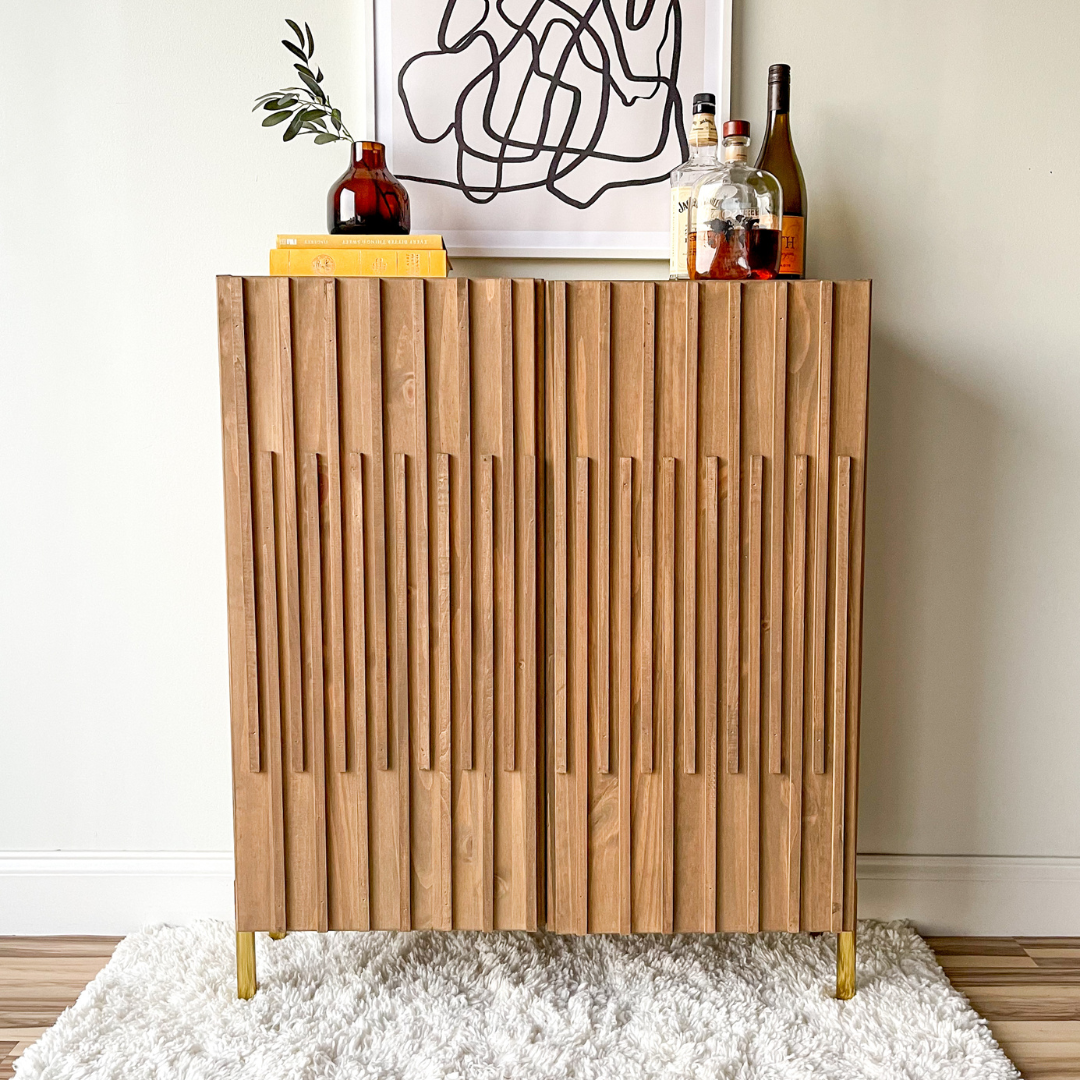
I decided on a fun stagger pattern for the doors using the cut trim. I used a scrap piece of trim for my spacer, so that made the process quick and easy. I just leveled off the first piece and used the scrap piece for the rest of the spacing.
I used my RYOBI 18 Gauge Brad Nailer that I used in my RYOBI tools makeover to attach the trim to the doors. Side note… I’m really loving this brad nail gun. It’s becoming one of my favorite go-to tools.
The nail gun does leave little sinkholes, but I didn’t mind the look of it on this project. I actually think it looks nice and uniformed, so I decided not to fill them. I didn’t want to risk getting an

IKEA IVAR Hack Step 4: Install New Feet
The last customization I’m making to this IKEA IVAR hack is to add some feet to it to raise it up to counter height because I pictured this as a drink or coffee bar.
I measure where I wanted the fee and marked it so I could drill some pilot holes before I screw the hardware in.

I did come across a little oops moment here. I bought these furniture feet before I realized that the bottom of this cabinet is not completely flush, so I had to add some washers to level out my foot. So in hindsight, I probably would have ordered different feet. So if you’re thinking of doing this project, be aware of that. :)
But I made these washers work, and it all turned out fine. I did grab some ¾” screws because the ones that came with the feet would have poked through the cabinet floor.

IKEA IVAR Hack Step 5: Reassemble
It’s time to reassemble! We are getting close. The IKEA IVAR cabinet comes with two shelves, but I ended up liking the way it looked with just one shelf in. I thought it was more functional for a drink cabinet, and I liked that I could see the decorative wallpaper more with just one shelf.

Now I was down to my last step which was putting my cabinet doors back on. I originally thought I was going to add some gold hardware to the front of them, but the doors have a built-in handle on them, and I really loved keeping the pattern the focal point of this design.

Important Note
This 100% needs to be anchored to the wall. They have holes that you can do that with really easily on the back. It's very front heavy and really skinny. So it definitely needs to be anchored.
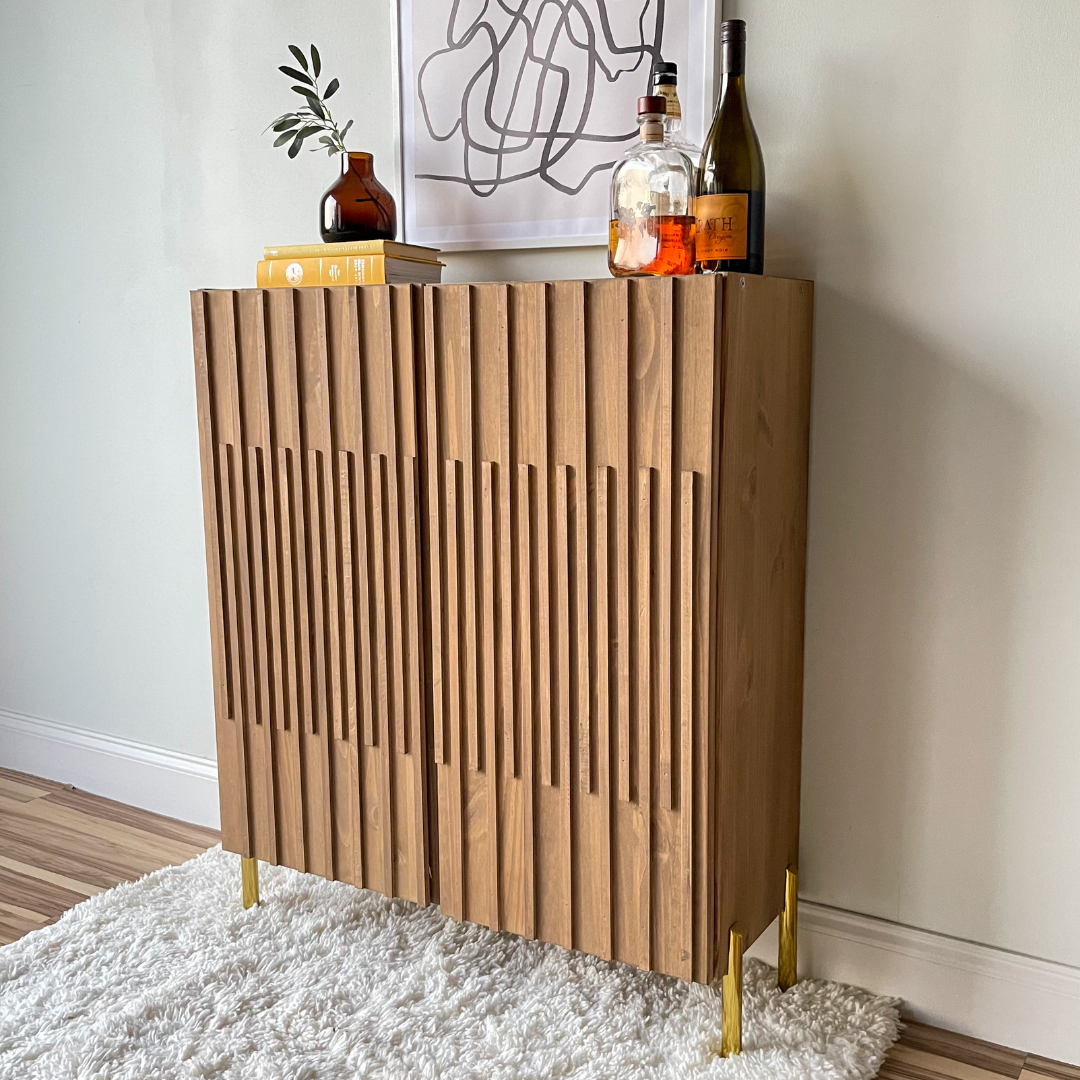
The Reveal
And there you have it, friends! This IKEA IVAR hack is complete. I started off with a very basic cabinet and turned it into a customized high-end piece! I love the idea of using it as a drink or coffee bar or even as an entryway table.

My all-in for this project was a little under $200. It’s a little bit expensive for a hack, but material costs are going up, so there isn’t any way around it right now. Even the IVAR cabinet is $15 more than what I purchased it for 6 months ago. Regardless, it’s still way less than my $1,000 inspo pieces!
Thanks for hanging out with me today, and remember that you can watch this project come to life on my YouTube tutorial!