Ryobi Tools Extreme Furniture Makeover
Disclosure: This blog contains affiliate links. I will receive a commission for items purchased through these links at no extra cost to you. I appreciate your support. Please read all labels and follow all manufacturer safety recommendations when working with paints, stains, and other equipment.
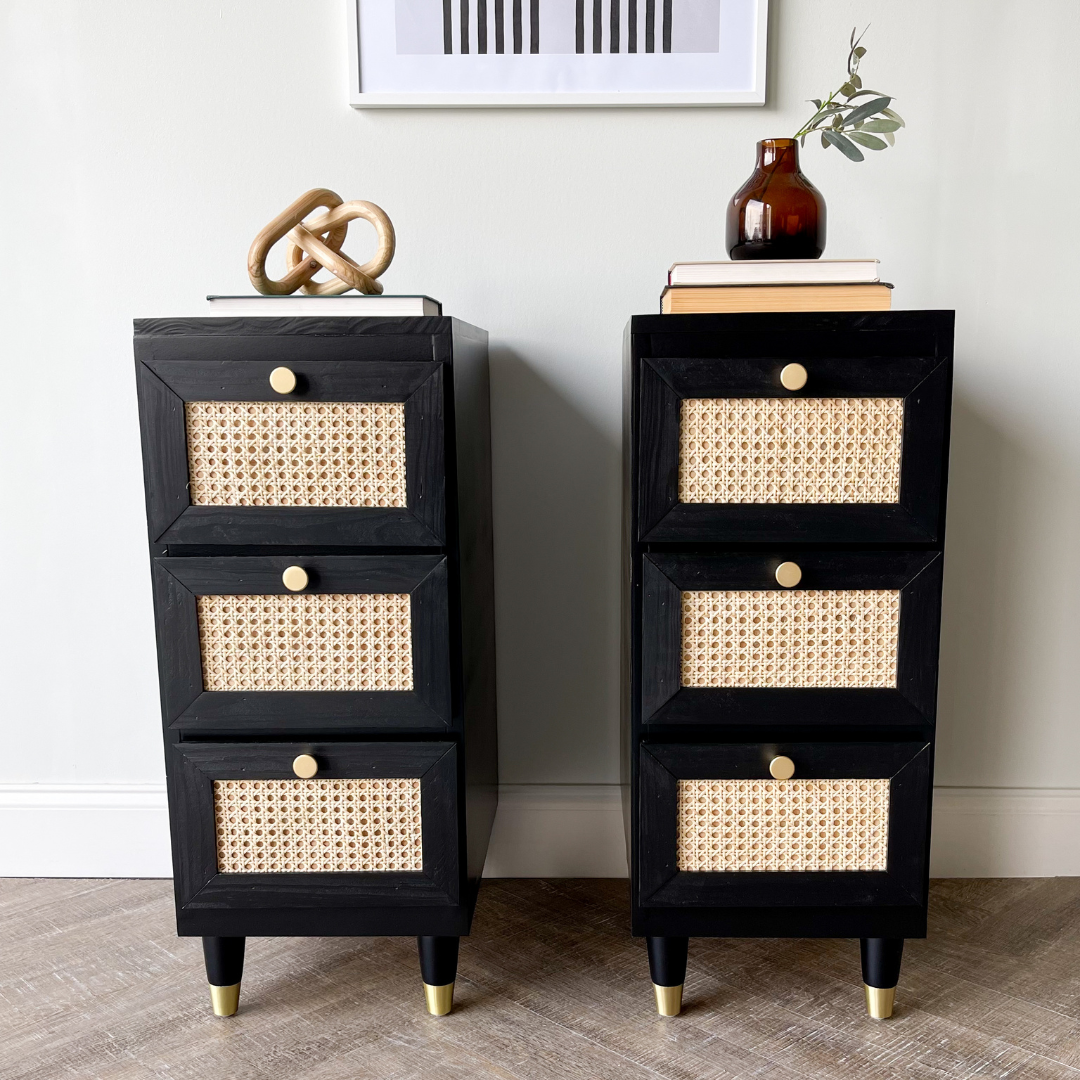
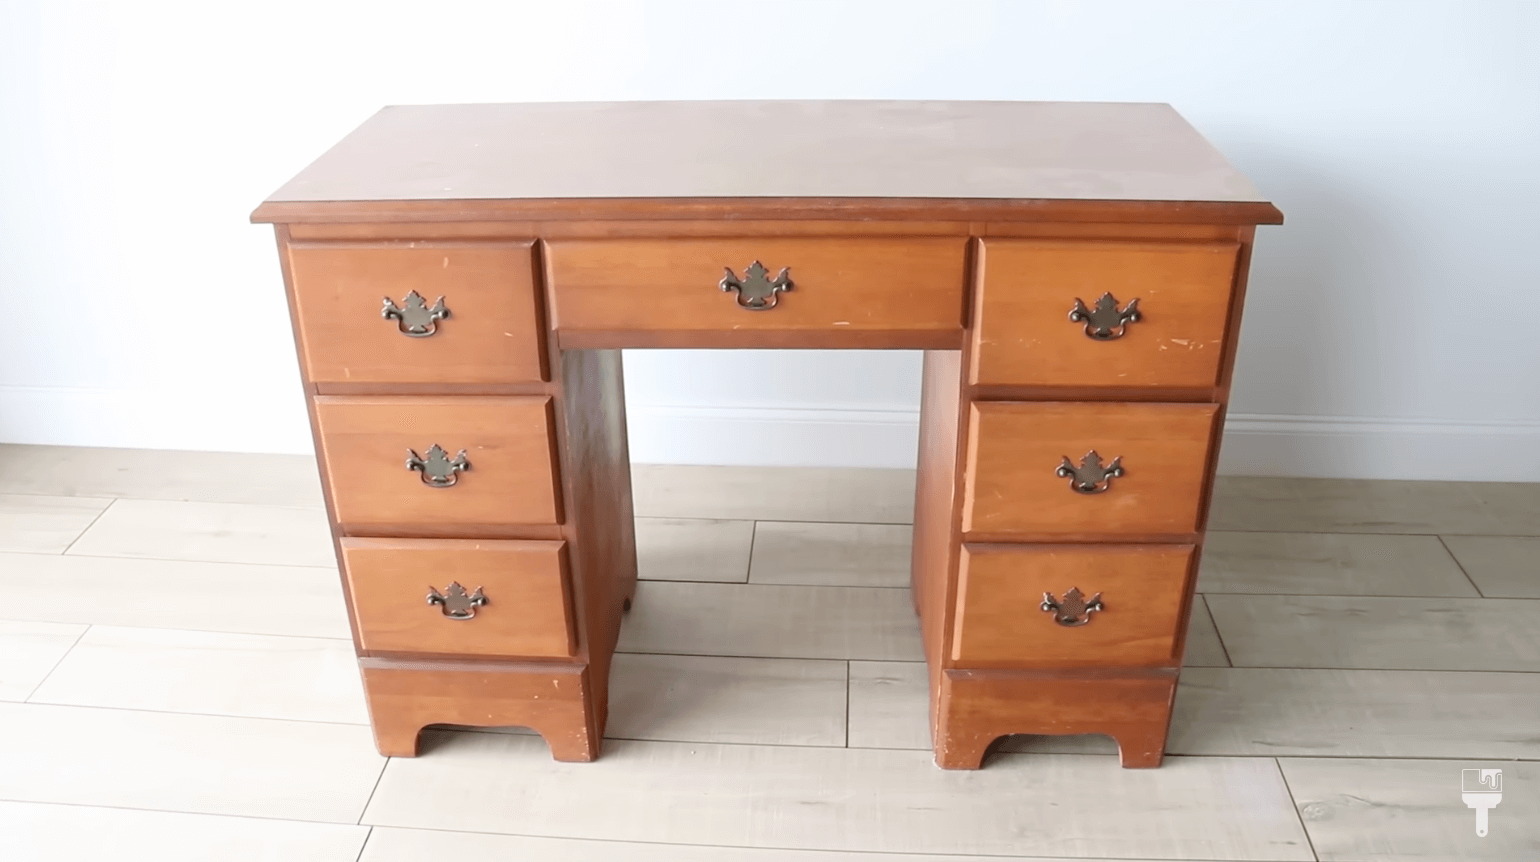
You wouldn’t believe that my two modern night stands came from and old tradition desk! But I’m going to show you how I accomplished this extreme furniture makeover using all Ryobi tools. So get read for a lot of power tool fun in this tutorial.
I got this desk for free from a neighbor and from the moment I saw it, I just knew that it needed to be two nightstands. It's been sitting in my garage forever, and I'm finally tackling it.
Products Used for Ryobi Tools Extreme Furniture Makeover
18V ONE+ HP Brushless Reciprocating Saw (New Model)
18V ONE+ HP Brushless 7-1/4” Circular Saw
18V ONE+ HP Compact Brushless ½” Drill/Driver Kit
18V ONE+ HP Brushless Airstrike 18GA Brad Nailer Kit
18V ONE+ HP Brushless Sliding Compound Miter Saw Kit (New Model)
18V ONE+ 5” Random Orbit Sander
Deconstruct with Ryobi Tools
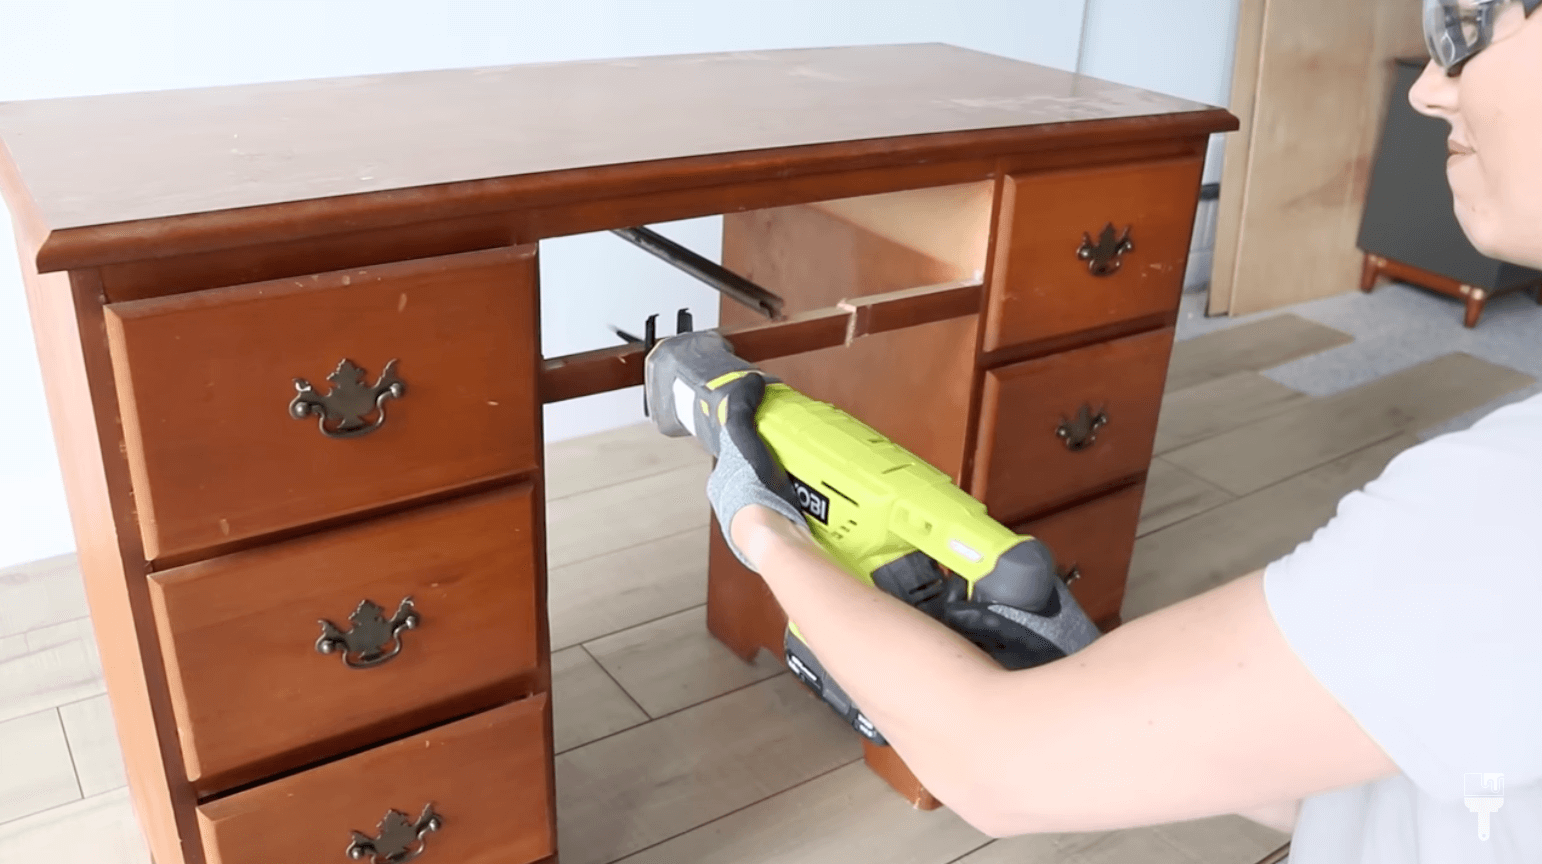
The first thing we have to do when chopping a desk in half is deconstruct it. This was definitely a time-consuming project, and it definitely gave me some surprises, but I can’t wait for you to see the result. The first thing I did was pry the back paneling off so I could see how everything was constructed.
Remove bars
I saw that I needed to remove two wooden bars that were connecting the two sides of the desk to separate the pieces. So I grabbed my Reciprocating Saw and sawed through both of those and pried them out.
Saw through the desk to separate
My original plan was to use the existing top and route the side that I'm cutting to match the rest of the trim around the desk. I marked off where I wanted to cut and grabbed my Circular Saw to cut along my mark.

If you follow me on Instagram, you will know this is when this project took a complete turn for me because once I cut through the top, I realized it was a hollow core top and just had wood around the edging. So that was not gonna work. You can’t route that.
So I decided to rip it off. It was pretty easy to pry off once I released some of the screws in the top. Now that I can’t use the original tops, my design is gonna change a little bit. That’s the price of an extreme furniture makeover!

Cut off bases
I wanted to make these nightstands as boxy and modern as possible, so I cut and squared off the bases. I started by prying off the trim on each of these individual boxes, and then I marked it right below each drawer. I used my circular saw again to make the cuts.
Removing hardware

So the nightstands are pretty much down to the basic frame now, but before I start reconstructing, I need to remove my hardware and fill in the holes.
To remove the hardware I grabbed my Lithium USB Screwdriver which is really cool Ryobi tool because you can have it as a straight screwdriver, or you can fold the handle so that it acts like a mini power drill. It charges in a USB port, and I love the flashlight feature so I can see what I’m doing.

Build and Reconstruct
Now it’s time to reconstruct our pieces. I went ahead and measured the opening at the top and the bottom of each nightstand. For the bottom, I decided to use MDF because it’s cheaper than wood, and because I’m going to seal the sides, prime, and paint it, I don’t need wood at the bottom of my nightstands.
I used my Ryobi circular saw to cut this down to size. For the top of the nightstands, I got a laminated spruce panel board, and I cut it down to size as well.

I'm using my orbital sander and a medium grit sandpaper just to smooth everything out. Before I add my new tops and bottoms, I'm starting with the MDF on the bottoms and I'm using my Brushless Airstrike 18GA Brad Nailer. I'm pretty obsessed with this Brad nailer because I don’t have to deal with the hose and air compressor tank. This is just way earlier. And it runs on that ONE+ system, so I’m using the same battery once again.
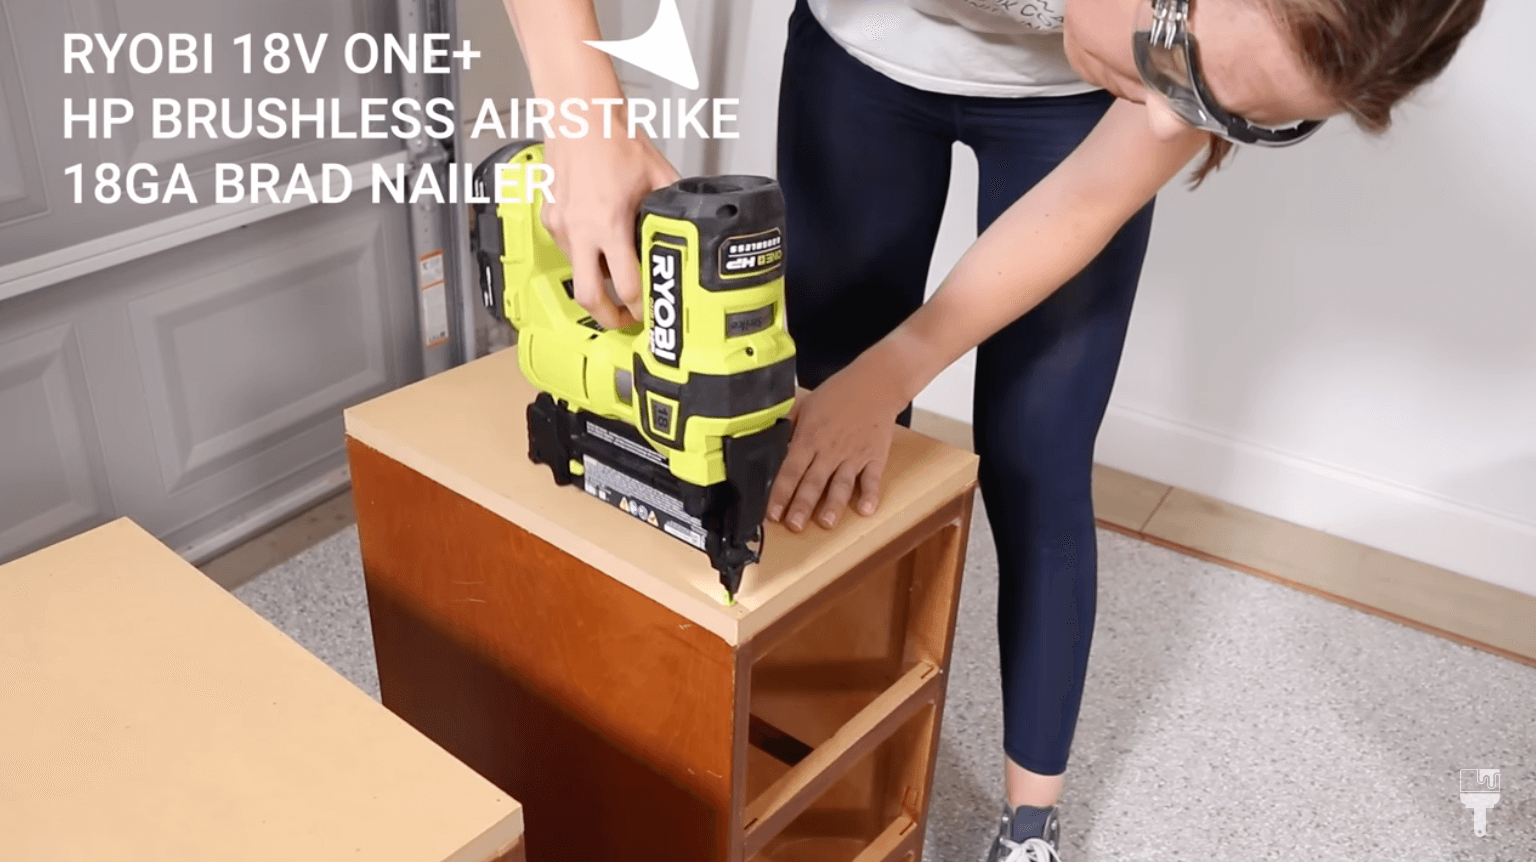
I went ahead and attached the tops the same way after cutting those to size as well.
Now that the tops and bottoms are attached, I used the nail gun to reattach the backing as well.
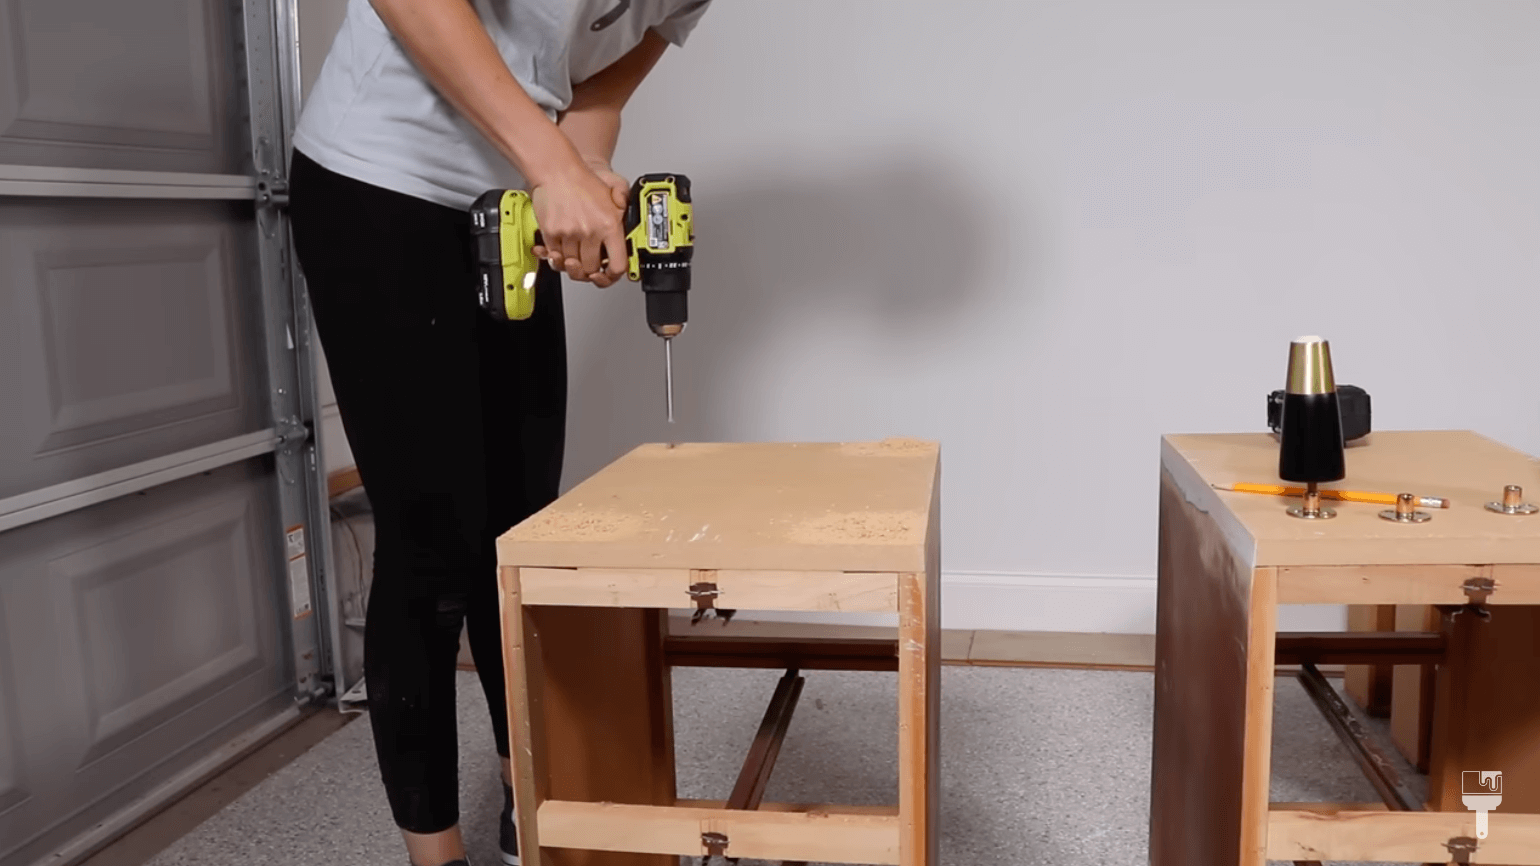
My last bit of reconstruction was installing some new Furniture Feet that I grabbed from Amazon. I decided to install them and mask them off before painting because it would rise my pieces up off the ground and make it easier to paint. I marked off and drilled the holes where each foot was going to go and then attached them using the hardware provided. It was pretty simple!
Clean & Repair
Ryobi Tool - Power Scrubber
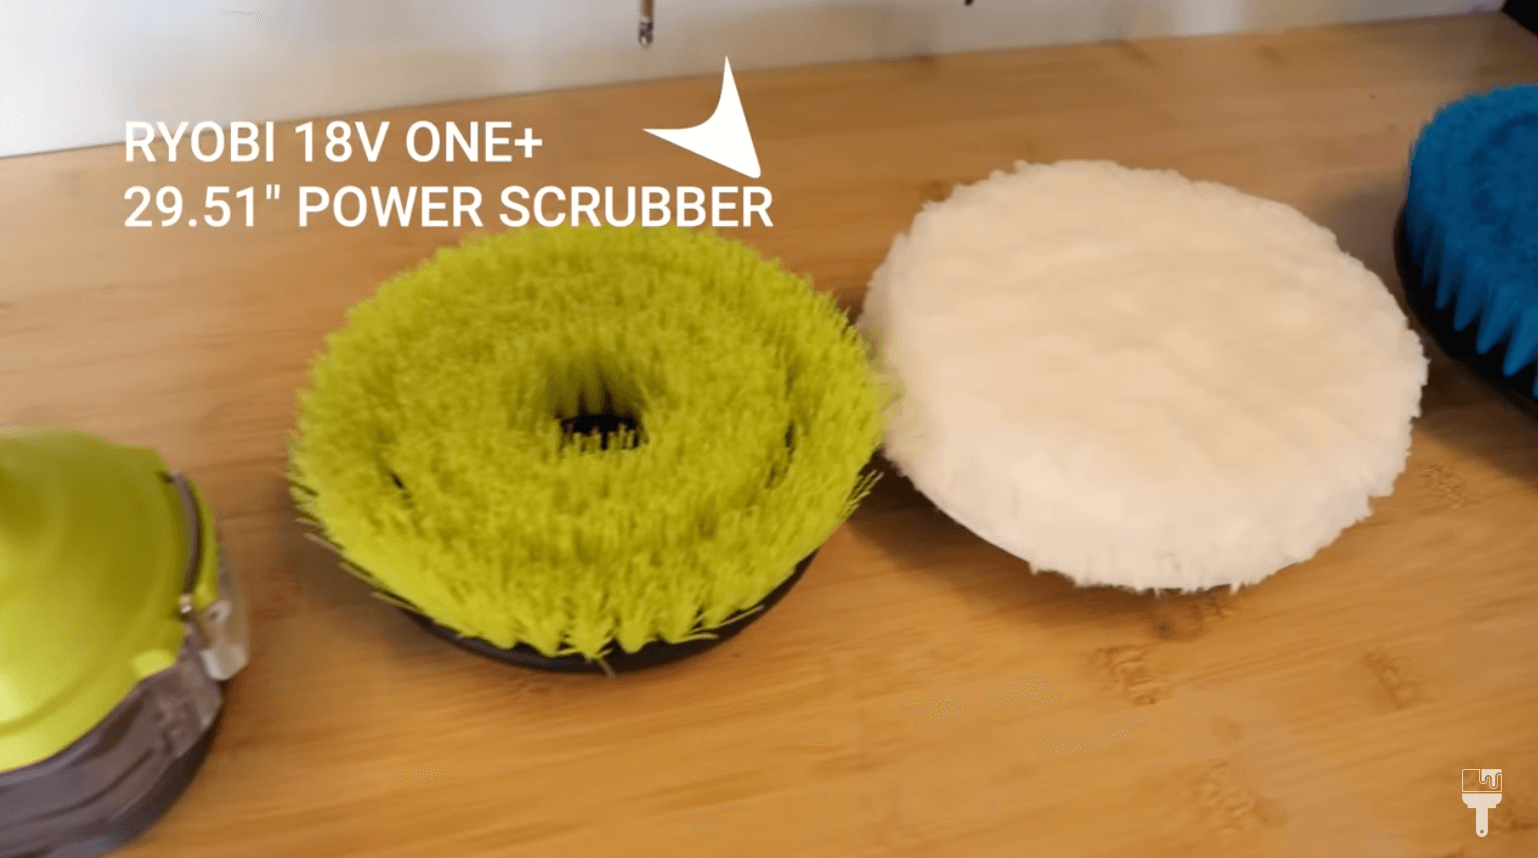
Usually cleaning is the first step I take in my furniture flips, but we had so much prep work to get our nightstands to where they’re at now. So it’s finally time to do some prepping. I used the Ryobi Power Scrubber to clean them. That might have been a bit overkill, but I wanted to try it out. This power scrubber has a bunch of different attachment heads for all sorts of cleaning. I think it would be great for cleaning your car, around the house, your window, etc. So I’ll definitely be using this again.

Once I got these cleaned up with some soap and water, I used some clean water to rinse away any soap residue.
Repair & Sanding
Now it’s time for some repairs. There were a few huge gouaches that were on the side of the desk, so I mixed u some all-purpose putty to fill in the holes. I love this stuff because it hardens quickly and is really effective with big repairs like this.

I also had a little bit of gap in between the MDF and base, so I used some wood filler for that as well as the seams on the tops. I also used it to fill in the nail holes on the top.
I waited for everything to dry and then used my orbital sander to sand everything down smooth including the tops. After a lot of sanding, I used a damp cloth to wipe back all of that dust.
Okay, we're finally looking a little bit more like nightstands!

Seal, Prime & Paint
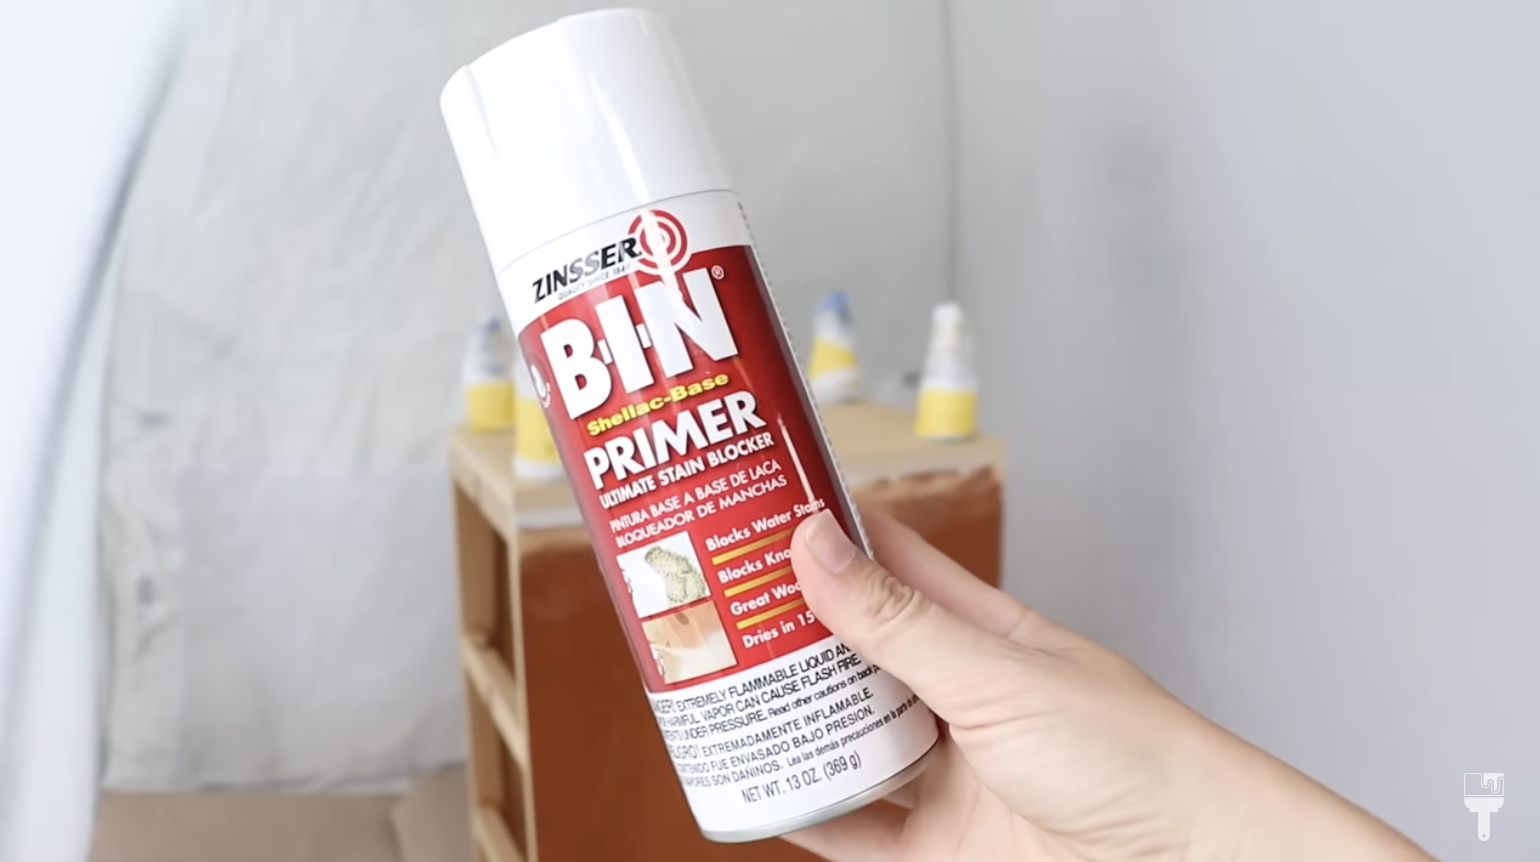
BIN Shellac-Base Primer
Because the bottom is MDF, I do need to seal it before adding any water-based products to it. I grabbed some BIN Shellac-Based Primer and sprayed those portions. It’s also good for wood knots, so I covered those as well.
Bullseye 123 Primer
I’ll be painting these nightstands black, so I’ll be using my Bullseye 123 Primer that is tinted gray because that will work better with a dark color. I thinned this out with some distilled water to the specifications on the can because I like my paint to be a little bit thinner when I'm spraying. To prime and paint this piece, I used my Wagner Flexio 3500 with my fine detail nozzle. I love to use this on furniture, and it’s definitely becoming my go-to!

Now, typically you don't see me prime pieces, but these nightstands are a little different. There is a lot of bare wood showing, MDF, and a lot of Bondo, so priming it will help my paint adhere really well and make everything nice and smooth. And because it’s water-based, it will clean up easily out of my spray gun.
I only ended up doing one coat of primer and when it was dry, I used a 500 grit sandpaper to smooth it out and wipe back the dust.

Wise Owl One Hour Enamel Jet Black
I’ll be using Wise Owl One Hour Enamel in Jet Black to paint my piece. I’ve used this paint before, but this is my first time spraying it. This paint is already a lot thinner than other furniture paints, so you don’t have to add water before putting it in your sprayer.

I also chose the paint for the nightstands because you don’t have to use a top coat. It’s going to dry to a nice satin sheen finish that will be very durable and wipeable. It will be perfect for nightstand needs!
As you spray this paint, it will look pretty textured going on, but don’t worry, it smooths out looking almost like glass. I was so impressed with the way it sprayed.


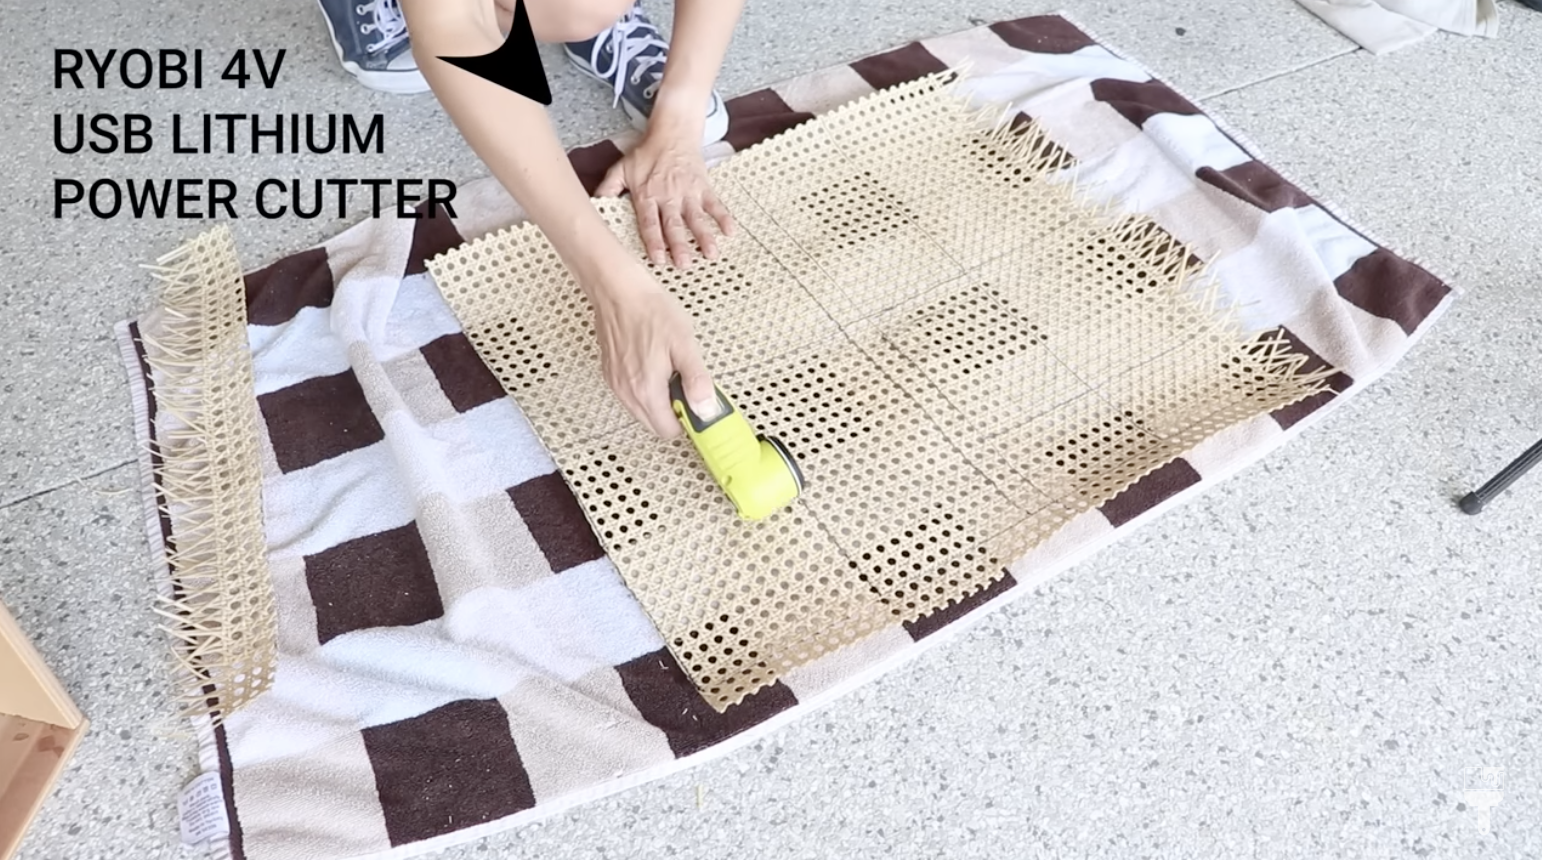
I cut a piece of cane that I had and soaked it for 15 minutes while I was measuring each drawer. After it soaked, I marked the cane with my measurements and cut it to size. And since I’m going to place trim on top, I didn’t need the cane to be exact which was nice.
To cut the cane, I used my power cutter. I’m loving this Ryobi tool because it makes cutting craft materials like this super easy. It used the same USB lithium battery that I used with the screwdriver.
After my cane was cut, I used my brad nailer again to attach the an to each drawer. I’m using ⅝ nails here so that they don’t go through the drawer front.

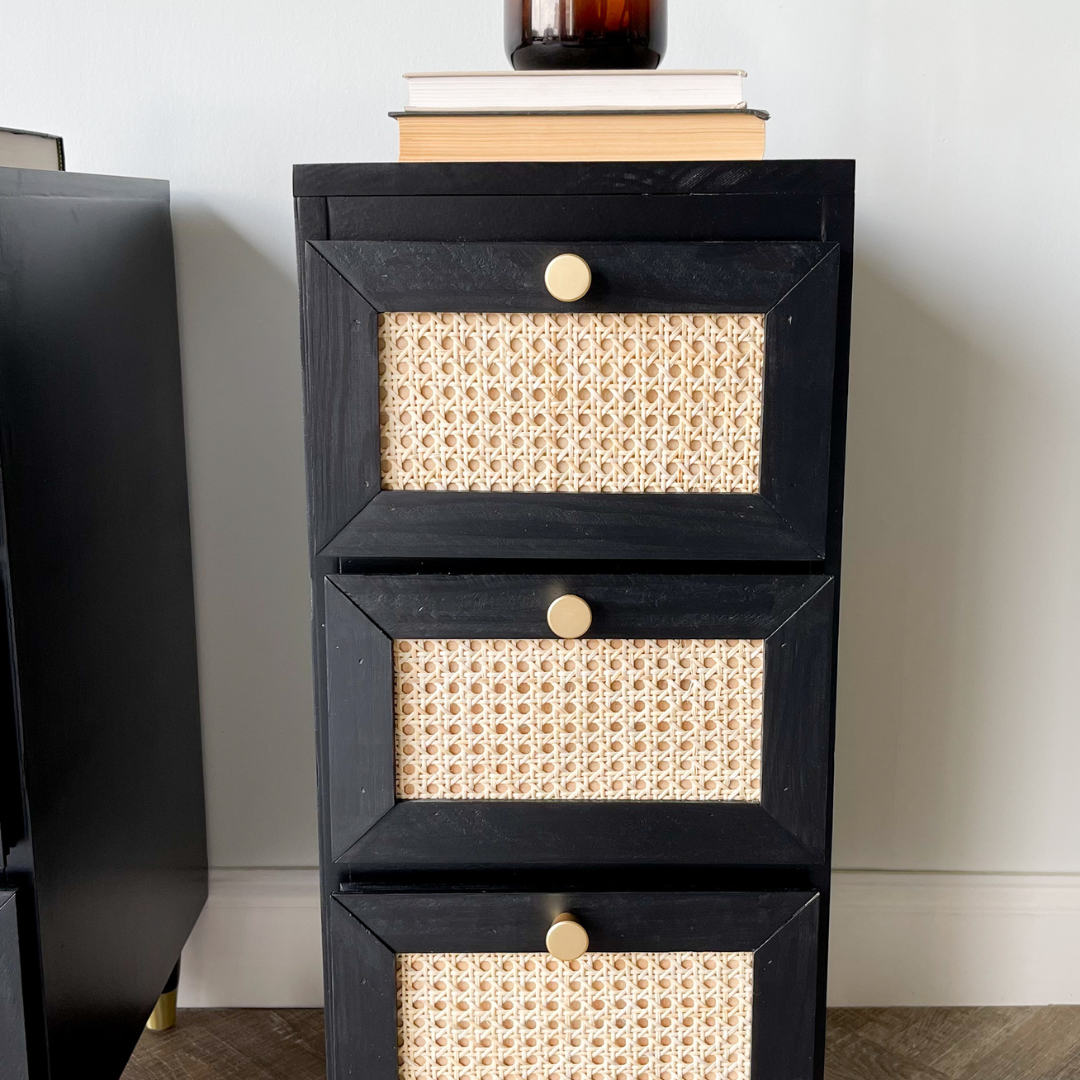
Trim the Drawer Faces
Now that I have the cane attached, I’m going to use some Pine Lattice to create a trim for the drawers. I mitered the corners using my Miter Saw. I measured the two lengths that I needed and set up a stop block so that I could cut all 24 pieces quickly and accurately. I cut them at a 45-degree angle and you want to flip your piece so that both of your angles are pointing toward each other.

Once all my cuts were done, I grabbed the orbital sander and a 220 sandpaper and smoothed them out. I also did a first coat of paint on these before I attached them. I took the pieces and matched them up to make a nice frame around the drawer over the cane.
I clamped the pieces down and used the brad nailer once again. Since the nails were sunk in a bit, I filled the little holes with wood filler and took a damp cloth to wipe back the excess.

Finishing Touches
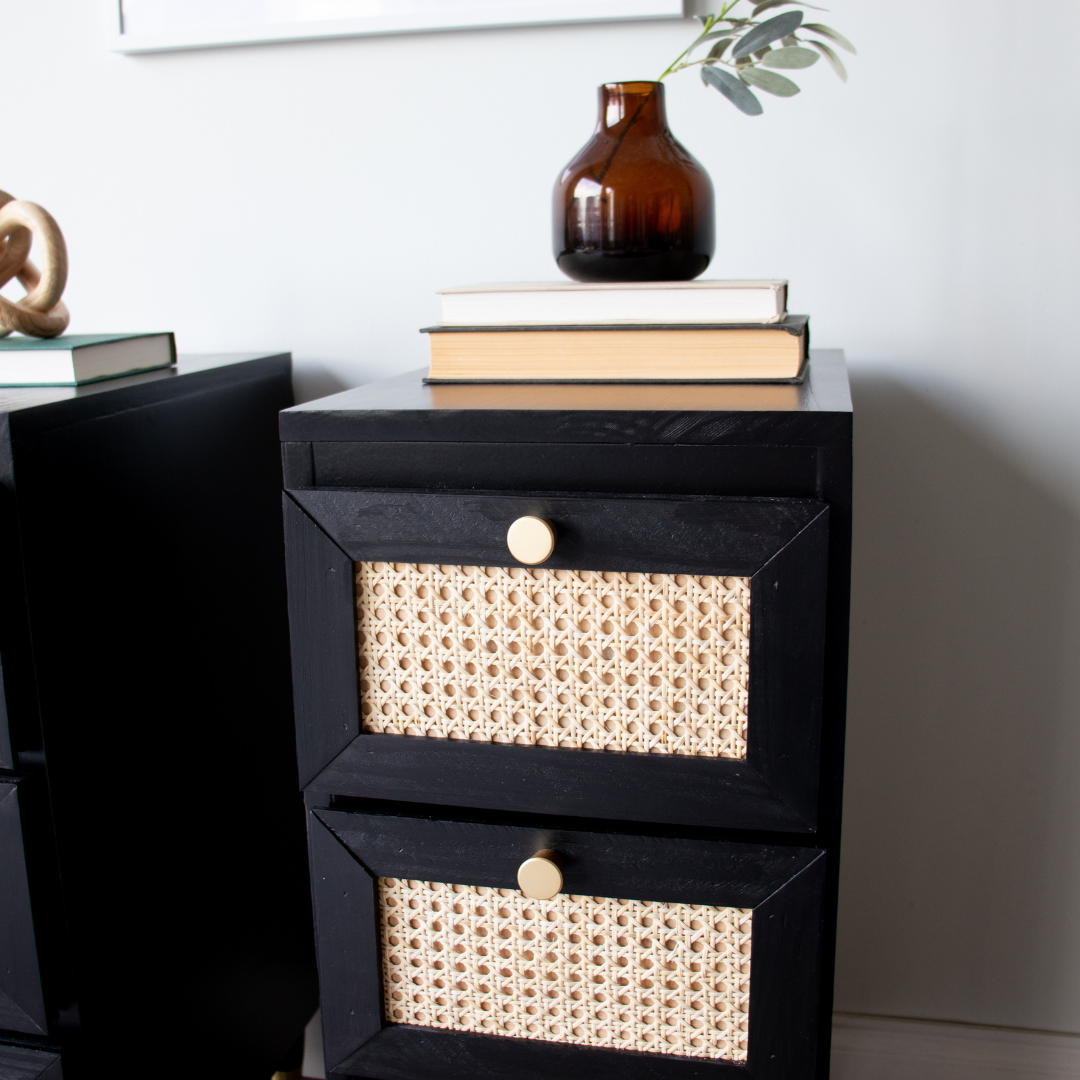
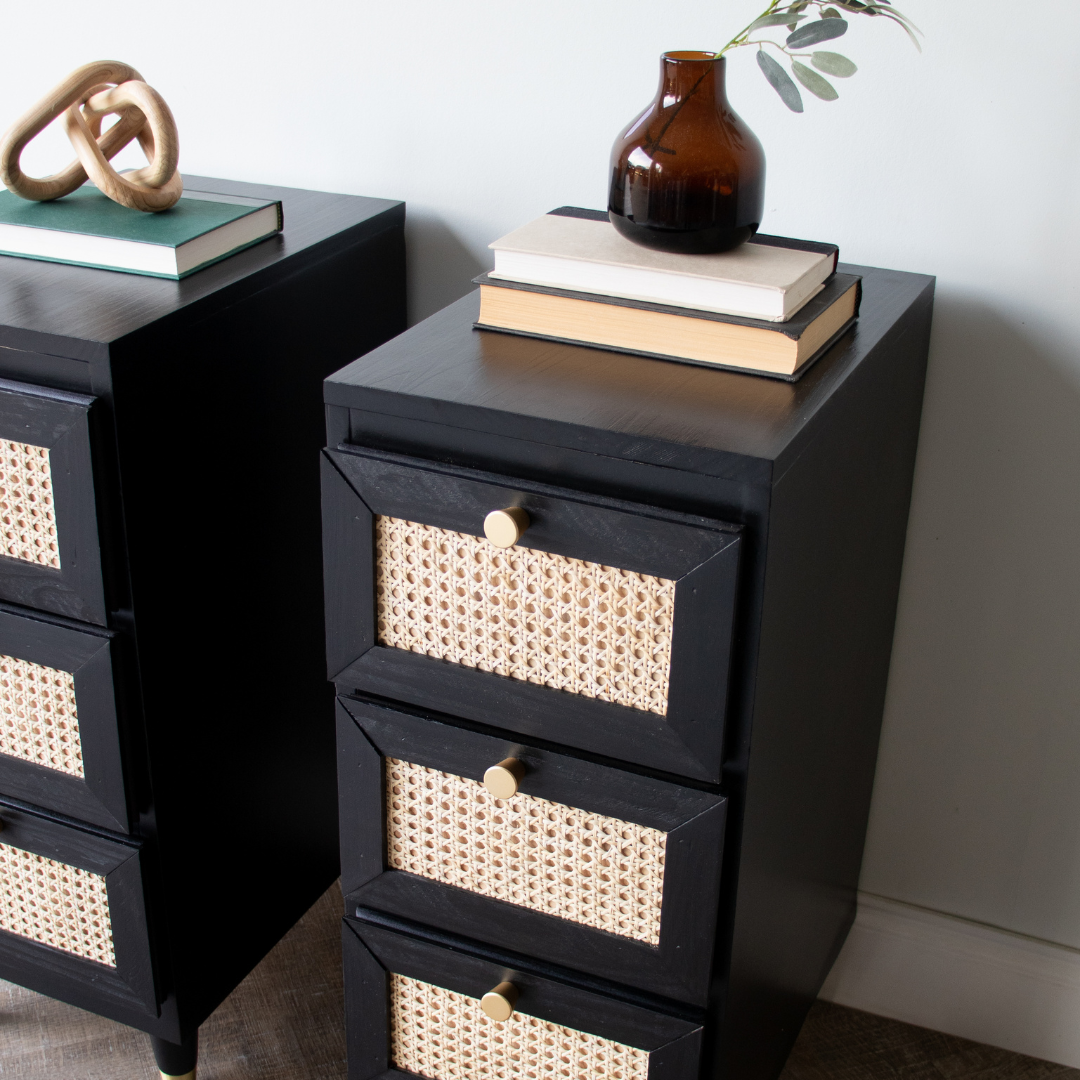
Once the paint dried, I added my hardware. I decided to add it to the top of the frame. I used gold knobs, so I drilled new holes for those.
I removed all of the masking from the feet and was finally finished with this extreme makeover!

Ryobi Tools Extreme Furniture Makeover Reveal
I just have to remind you that today we created two modern nightstands out of a traditional desk! This was such a fun transformation and I had an awesome time using all of my Ryobi tools to accomplish this extreme furniture makeover.
Having an arsenal of power tools can really help you level up your furniture flipping.
Take a look at these super sleek and modern nightstands, and see this makeover in action over on YouTube!