No Paint Furniture Makeover With Cricut Smart Vinyl
Disclosure: This blog contains affiliate links. I will receive a commission for items purchased through these links at no extra cost to you. I appreciate your support. Please read all labels and follow all manufacturer safety recommendations when working with paints, stains, and other equipment.
I’m really excited about today’s furniture flip because it’s definitely different than what you’re used to seeing from me. And it’s a beginner-friendly project which I always love. I’m going to be doing a no-paint furniture makeover using my Cricut Maker 3!
I’ve created this look before. Once with my Boho Furniture Makeover where I bleached wood and painted patterns using stencils. I’ve also created this look with transfers as well. But this time, I’m using some white Cricut Smart Vinyl to get the same look. It’s going to be clean and sharp, and I can't wait to show you the reveal.
But first, let’s take a look at the before image of this cute little MCM end table that I got from a local resaler. This is going to be the perfect piece of furniture to do this natural wood and stencil look.

Materials for a No Paint Furniture Makeover
Lilly Moon Paint Furniture Balm - (Use Code PRETTYDISTRESSED10 for 10% off)
Assess Your Piece
I don’t talk about this a lot, but when you get a piece home to flip, it’s important to take some time to assess it and take some inventory of what’s all going on. This will help you come up with a game plan.
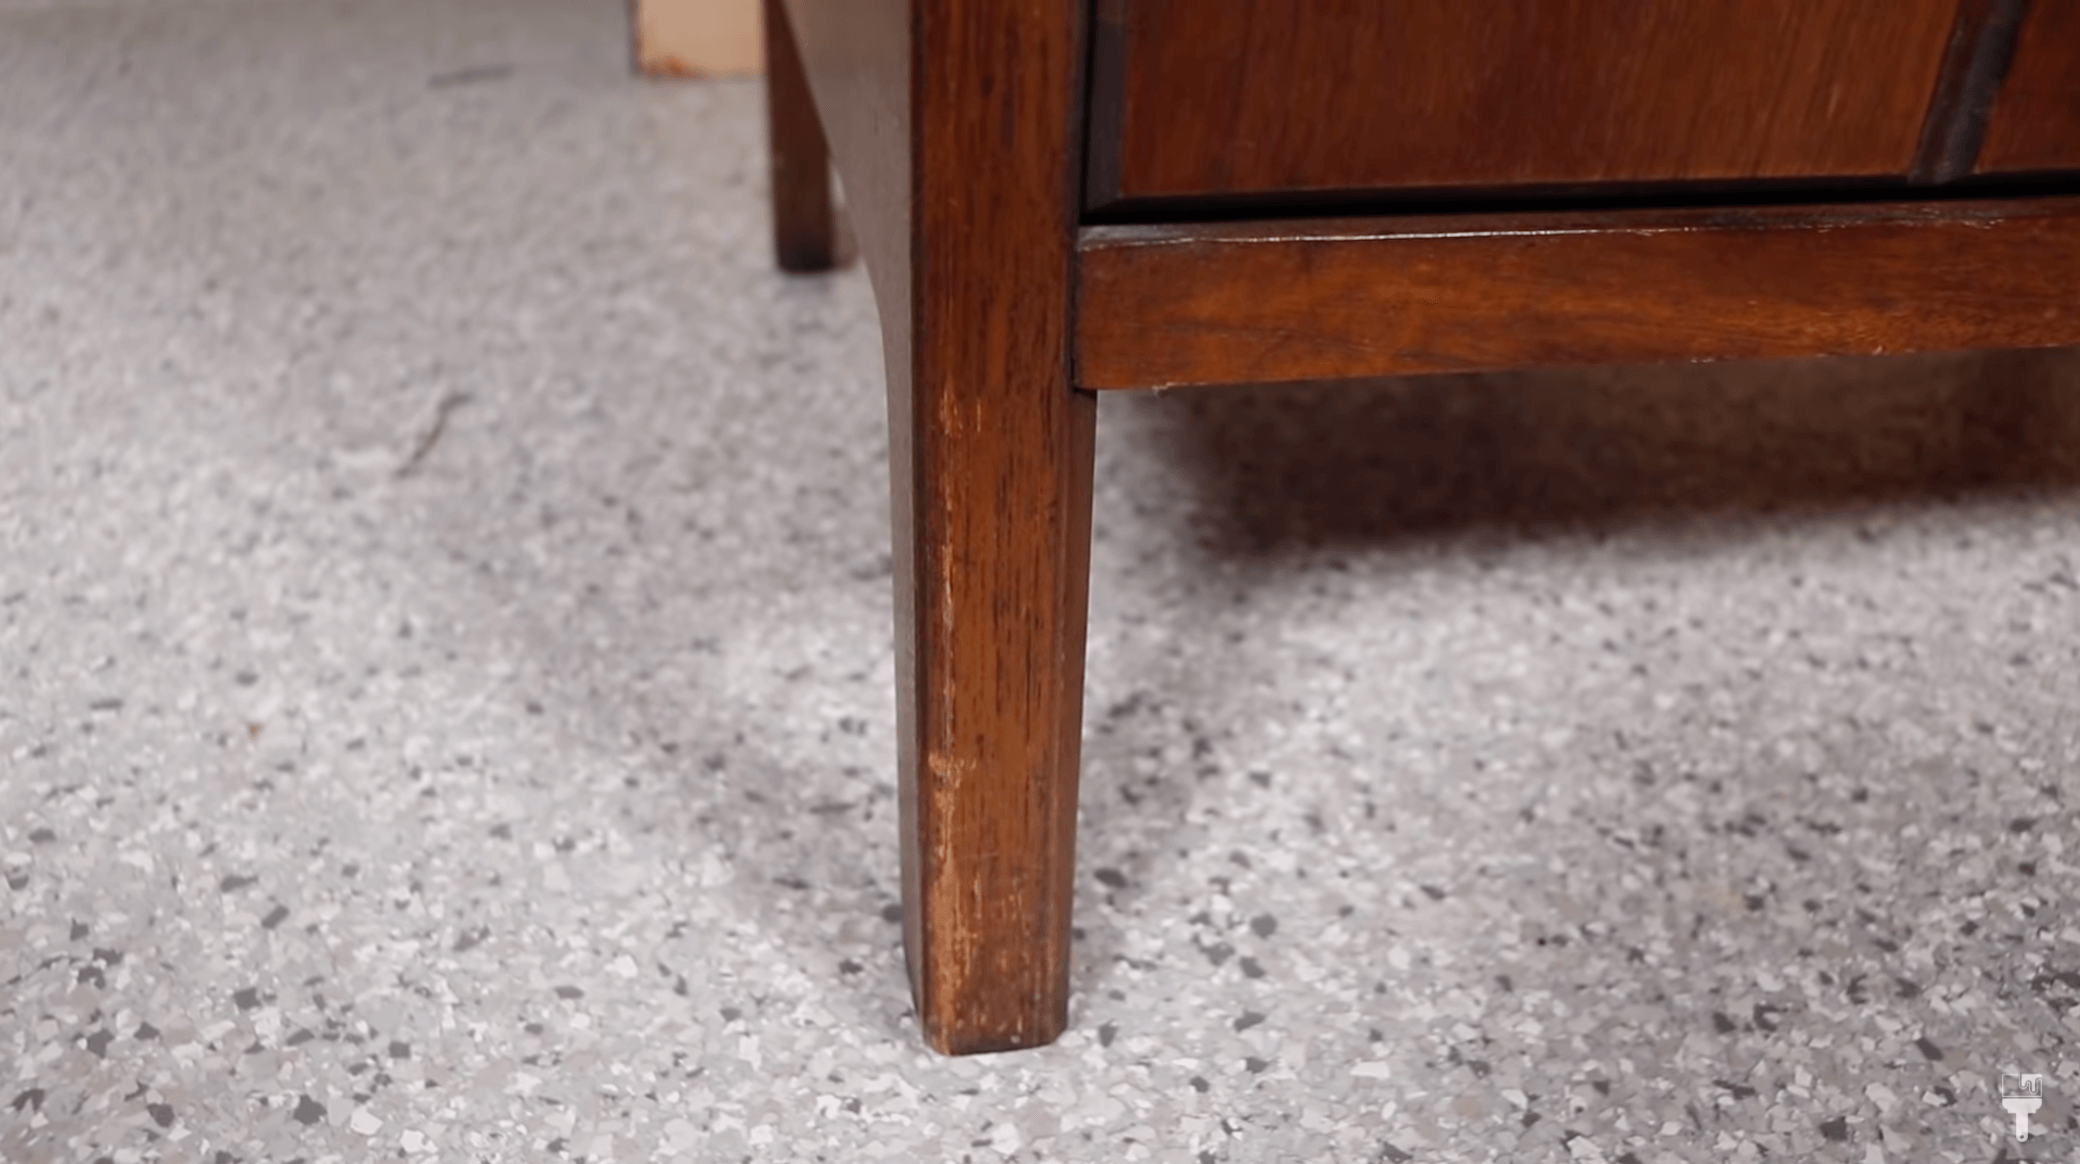
So to start off, I notice that there are a few scuffs and dings, but it’s really not in bad shape for how old this piece is. I imagine it’s from the ’60s or ’70s. I also really like the hardware, so I removed and saved that for later.
The inside looks a little dry, so I’ll need to address that, and the little magnet bracket is broken, so that will be fixed too.
Otherwise, let’s get started!
Cleaning to Prep for this No Paint Furniture Makeover

Usually, there’s quite a bit of prep with my furniture painting flips, but since this is a no paint furniture makeover, cleaning is just about all the prep I need to do. So I cleaned the entire piece with mild dish soap and some warm water. After that, I rinsed it all off with water and dried everything off.
Using Restor-A-Finish to Freshen it Up
Since I really like the color of the piece, and it's not in terrible shape, I am going to use Restor-A-Finish just to rejuvenate the original color of this. I decided it was way easier to make this piece look nicer instead of having to strip the entire thing back. This is a great product that has a bunch of different shades, so you just want to find the one that closest matches your piece. And for me, that was cherry.

So I poured a little bit of this in a container and got a soft rag to wipe it down over the entire piece WITH THE GRAIN. This product does have a little bit of stain in it, so it rejuvenates the finish.
Restor-A-Finish kind of acts like foundation for your face if you think about it, but it's a little bit more of a permanent option. If you have deep scratches like I do, you want to grab really fine wool just to work the product into those areas a little bit more.
You also want to make sure you work in small sections and wipe back any excess immediately with a dry clean cloth.
This product is oil-based and flammable, so make sure you're reading all your safety instructions and wearing your PPE while using it.

I used the Restor-A-Finish on the entire piece of furniture except for the front doors because I'm going to be putting my vinyl on there. I don't want the finish to affect it the application of my vinyl adhering. If you put this on and let it cure for 30 days, you could totally put your vinyl over it, but I don't have time to do that. The doors were in good shape, so I left them alone.
This product needs 30 minutes to dry before I can seal it, so I'm going to hop over to my Cricut Maker 3 and start making my vinyl.
Cut Smart Vinyl with My Cricut Maker 3
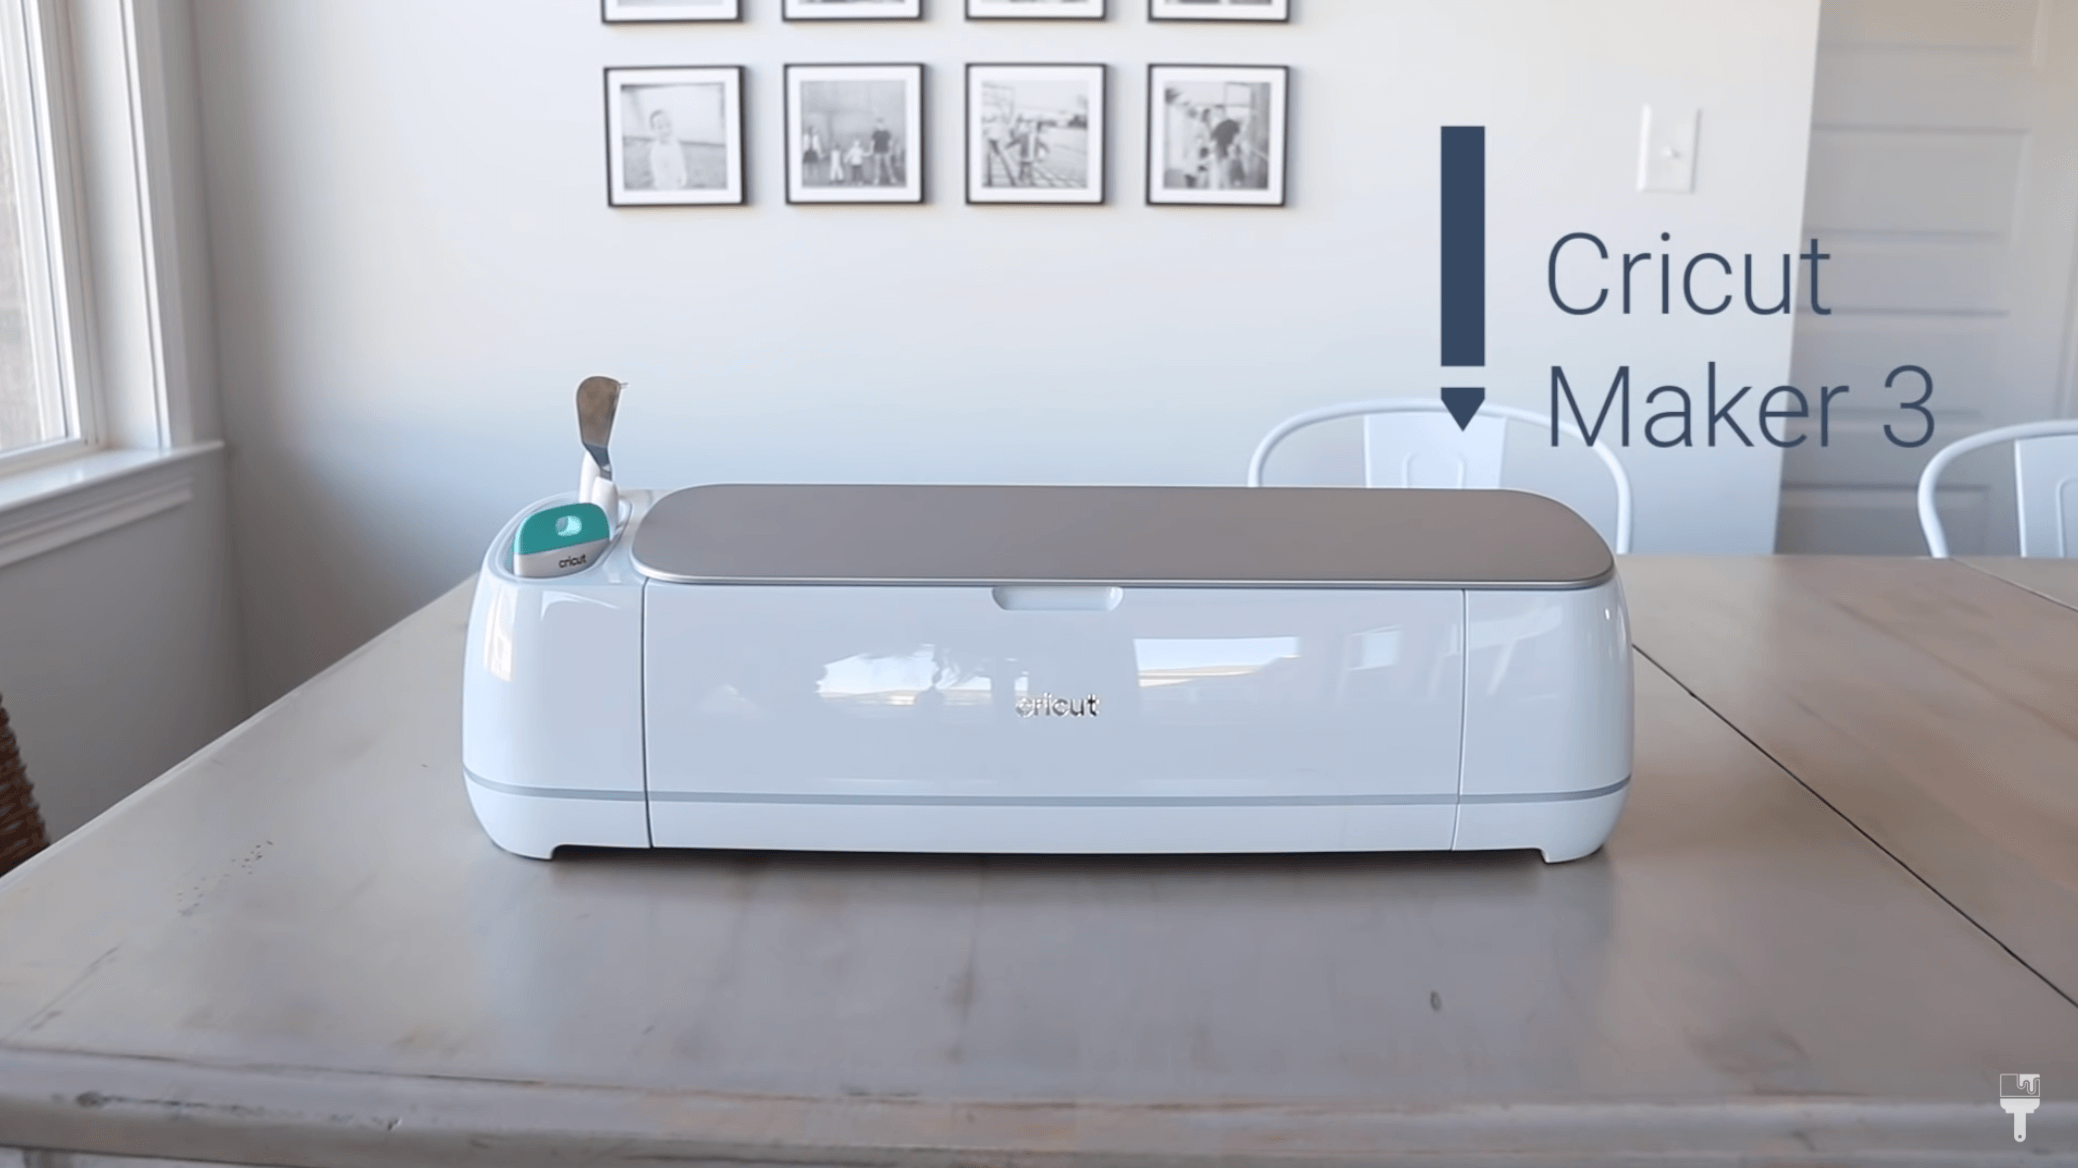
Cricut Maker 3
If you have never seen a Cricut machine before you are in for a treat because this little thing can do ALL THE THINGS. It can cut hundreds of materials, including everything from vinyl to leather.
I have made so many projects with my Cricut on my YouTube Channel. I've made custom artwork, a cute little summer bar cart, and lots of wearables with my logos. And my kids have gotten in on the fun lately too. My son just used it for his epic science project that he completed. We customized my daughter's competition dance bag. And then my little guy had the most epic 100th day of school T-shirt ever.
It’s so much fun!
Cricut Smart Vinyl
One of my favorite things about the Maker 3 is that it works with smart materials. So you don't have to worry about putting your vinyl on a mat. It already comes ready to cut which is so convenient.

For this project, I’ll be using a removal white vinyl to get my no paint stencil look. Removable vinyl is durable, but it comes off without residue. It's perfect for wall transfer, so I thought it would be a great option for furniture too. If you want to change up the look, you can easily remove it and replace it with something else. It's definitely less permanent than doing the stencil paint or the transfer to get the same look.
Cricut Design Space
Now let’s get to work. I'm starting out my project in Design Space, which is Cricut’s free software program that comes with every machine. You can run it on your desktop, tablet, or mobile device.

When you’re in your Design Space, you’ll start a new project and choose a design that you cut. I’m also a subscriber to Cricut Access which gives me even more image options.
I searched for the word “patterns” and I got so many beautiful geometric shapes as options, but one of the first ones really caught my eye. I added it to my canvas and measured out my doors to make sure I set it up to get the length I need. I only needed two strips, but since there was room for a 3rd, I duplicated the design twice just in case I ruined one. Just a little insurance.
Loading & Cutting the Smart Vinyl
And as I mentioned earlier, I'm using Smart Vinyl. So I loaded this into the Cricut machine, and it's ready to cut. Once your machine confirms that you have enough vinyl to cut, it will flash the play button. You'll just push that, and then your machine will start cutting. Another great feature of the Maker 3 is that it can cut up to 12 FEET of vinyl! Once the cutting is done, design space will prompt you to unload your material. You'll hit that flashing button, and it's all done.
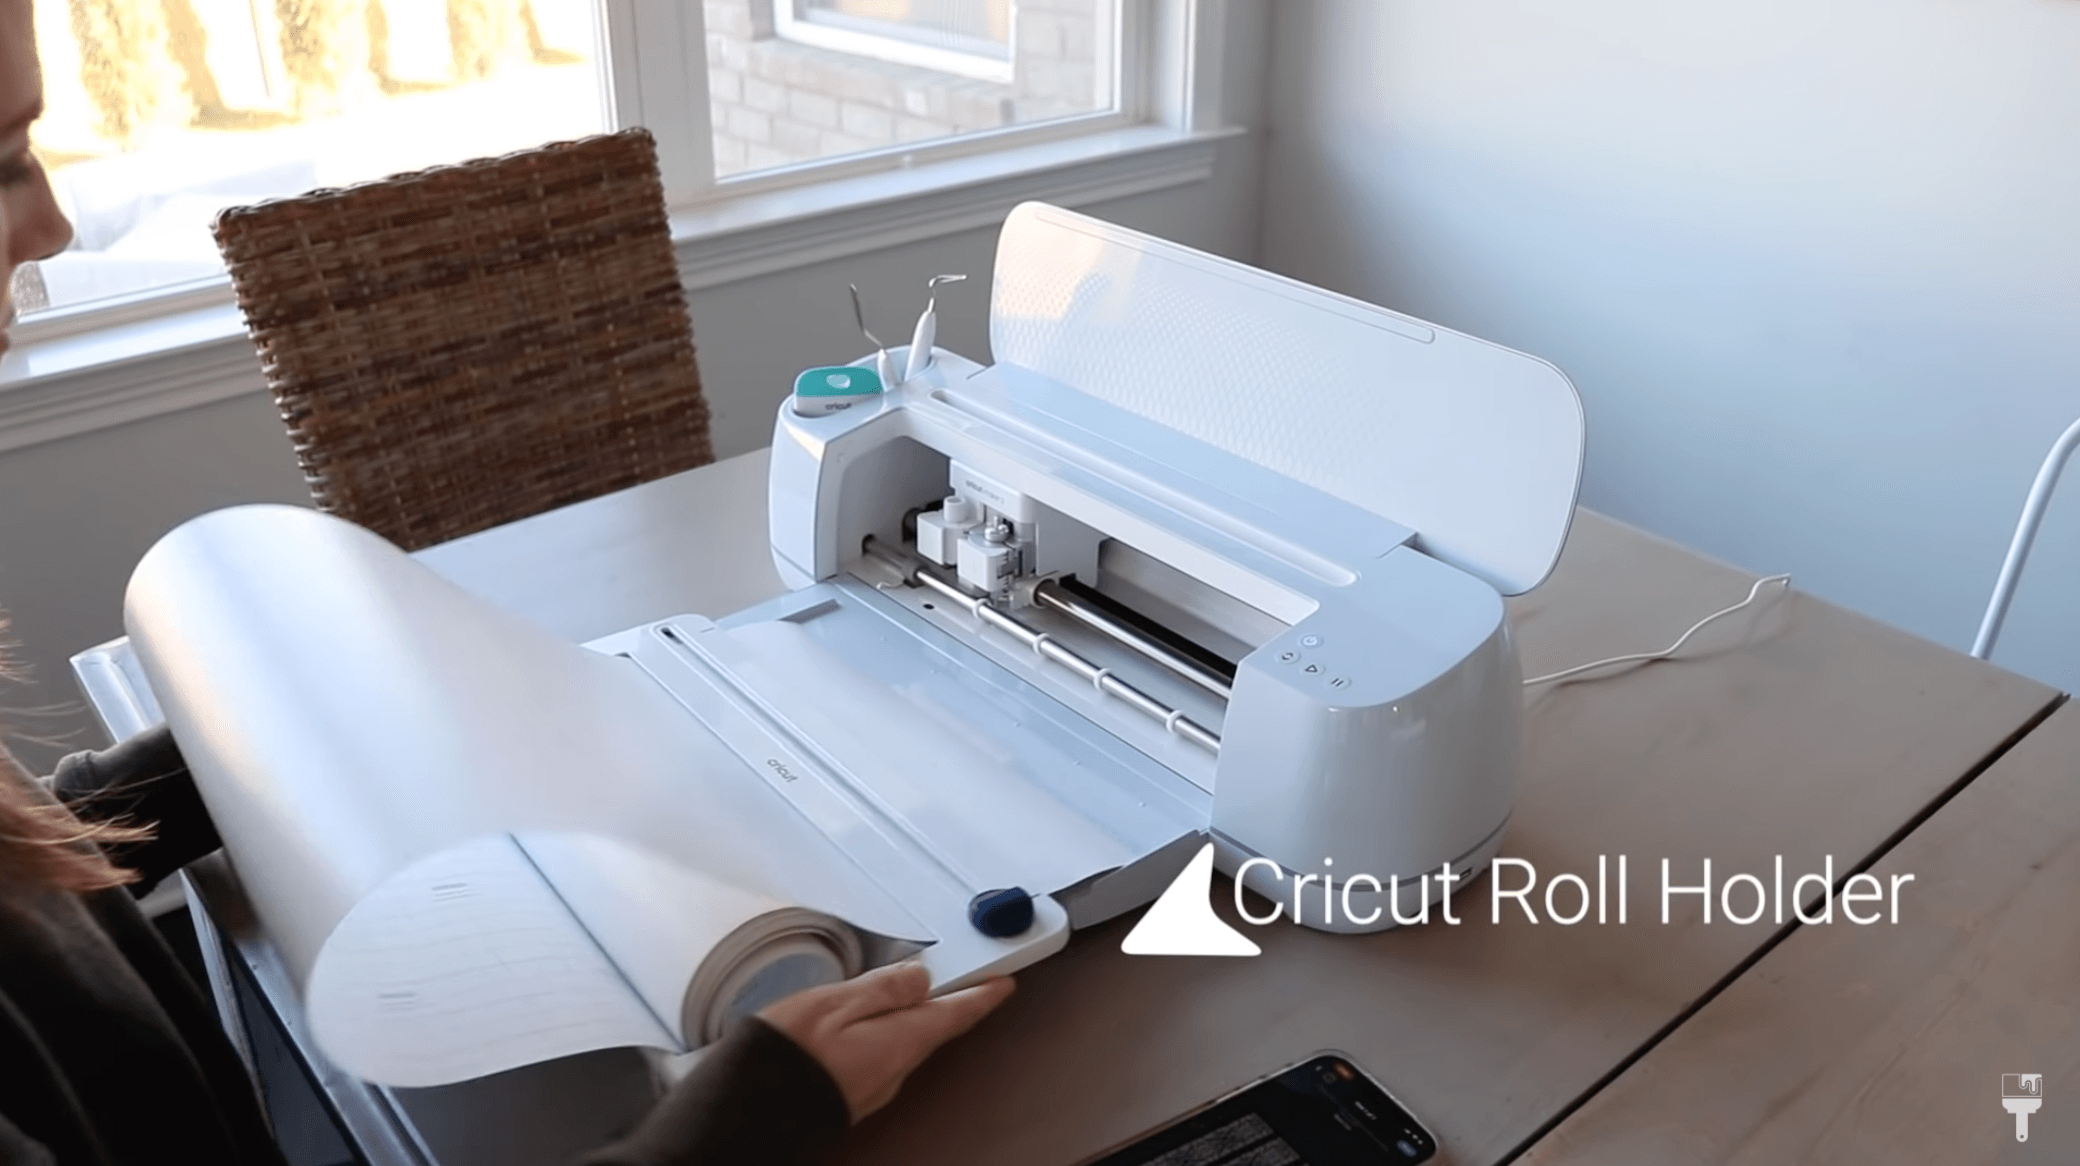
Roll Holder Add-On Feature
This Cricut Roll Holder is such a great add-on for this machine. It keeps your roll nice and tidy, and it also has a blade on it, so you get a nice even cut.
Weeding Smart Vinyl
This design took a long time to weed. It was a very intricate design, so if you’re first starting out, you might want to use a design that’s more simple. I’ve had a bunch of practice weeding vinyl, and I actually find it really therapeutic. I just had to go very slowly to make sure I wasn't ripping any of the delicate cuts.

Applying Cricut Smart Vinyl to My No Paint Furniture Makeover
Transfer Tape

Transfer tape helps keep your design in place and helps prevent you from touching the sticky side of your vinyl. So after I had my vinyl cut, I grabbed some transfer tape and cut it to size.
Measure, Level, and Adhere Vinyl
So I'm ready to adhere my vinyl to my furniture. I measured the door to mark the center and made the mistake of not checking my first attempt with a level… so don’t make that same mistake. Haha.
The doors are already prepped, so I went for it! I placed the vinyl side of the transfer tape onto the surface and burnished it with a scraper. Then I just pulled back the transfer tape at an angle very slowly making sure that my vinyl was sticking.

During this process, if you see any vinyl lifting off of your surface, just set it back down with the transfer tape and burnish it some more.
I wanted to make sure my hardware didn’t mess up the vinyl, so I used a little razor blade to cut out the hardware holes.
And voila!
Seal Piece with Lilly Moon Paint Furniture Balm
After waiting 30 minutes, it’s time to seal my piece. I used Lilly Moon Paint Furniture Balm. This balm has beeswax, hemp seed oil, and food grade mineral oil in it, which are the same components in the sealer that the Restor-A-Finish recommends.
And it smells amazing!

This is going to seal the piece up and protect it after it cures up after 30 days. It gives it some rejuvenation for the wood. Remember how dry the inside of the cabinets was? This balm gave it new life!
I just applied it with my Wise Owl Palm Brush making sure to keep it away from my vinyl.
Wait about 30 minutes again before wiping any excess balm off of the piece with a clean, dry lint-free cloth. Be careful with your piece as it takes 30 days to cure completely.
How to Refurbish Old Hardware
We’re almost done! I still have to refurbish my old antique hardware.
If you have metal hardware that has seen better days, giving it a vinegar bath is the trick. To make a vinegar bath, pour some vinegar in a pot on the stove making sure that all of the hardware is covered. Then boil for 3 minutes.

Carefully remove the hardware with some tongs and let it sit so that it cools down before buffing it out.
To buff the hardware, grab a fine steel wool pad and scrub all of the grime off. Look at the difference! I got the rejuvenated hardware back on the piece…and it’s done!

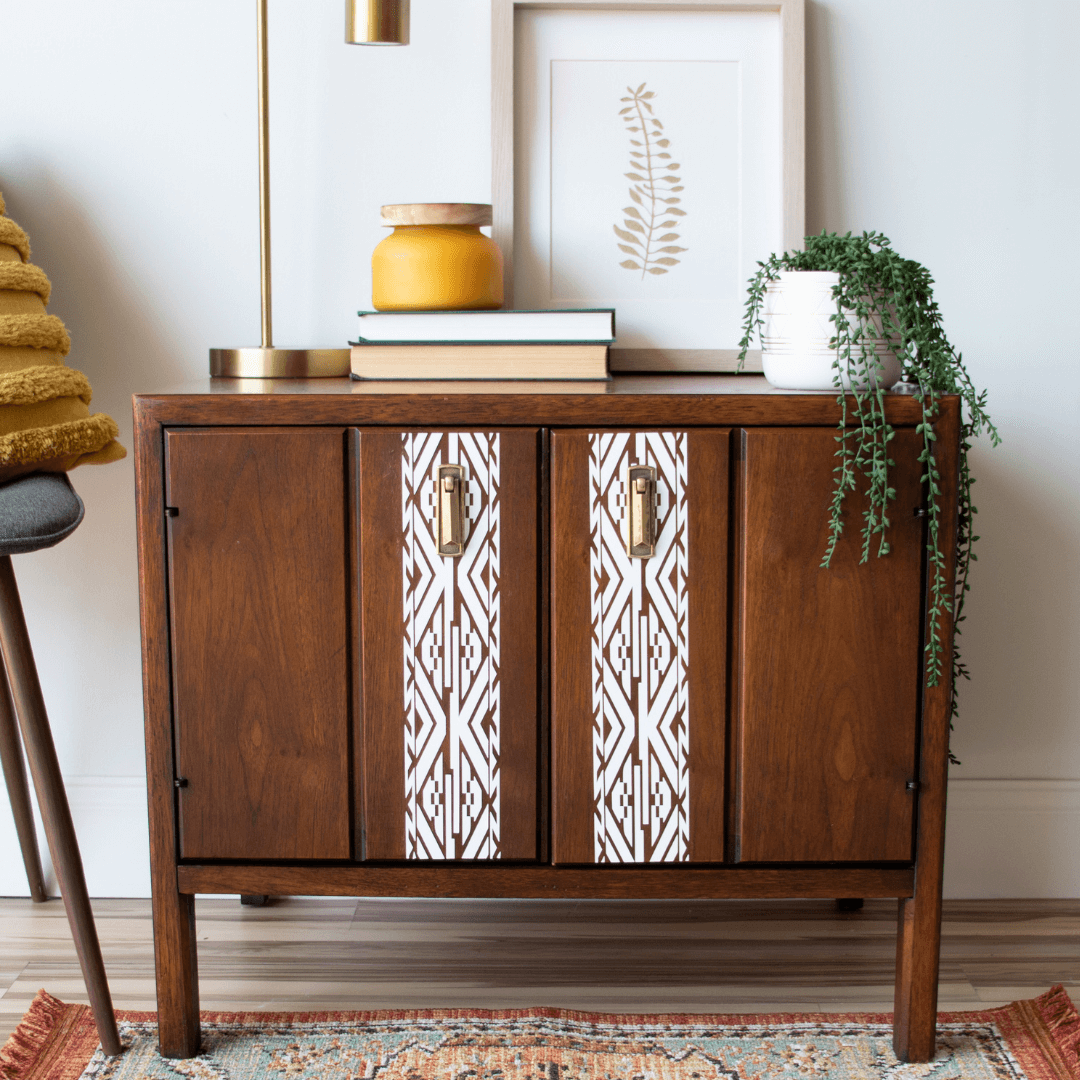
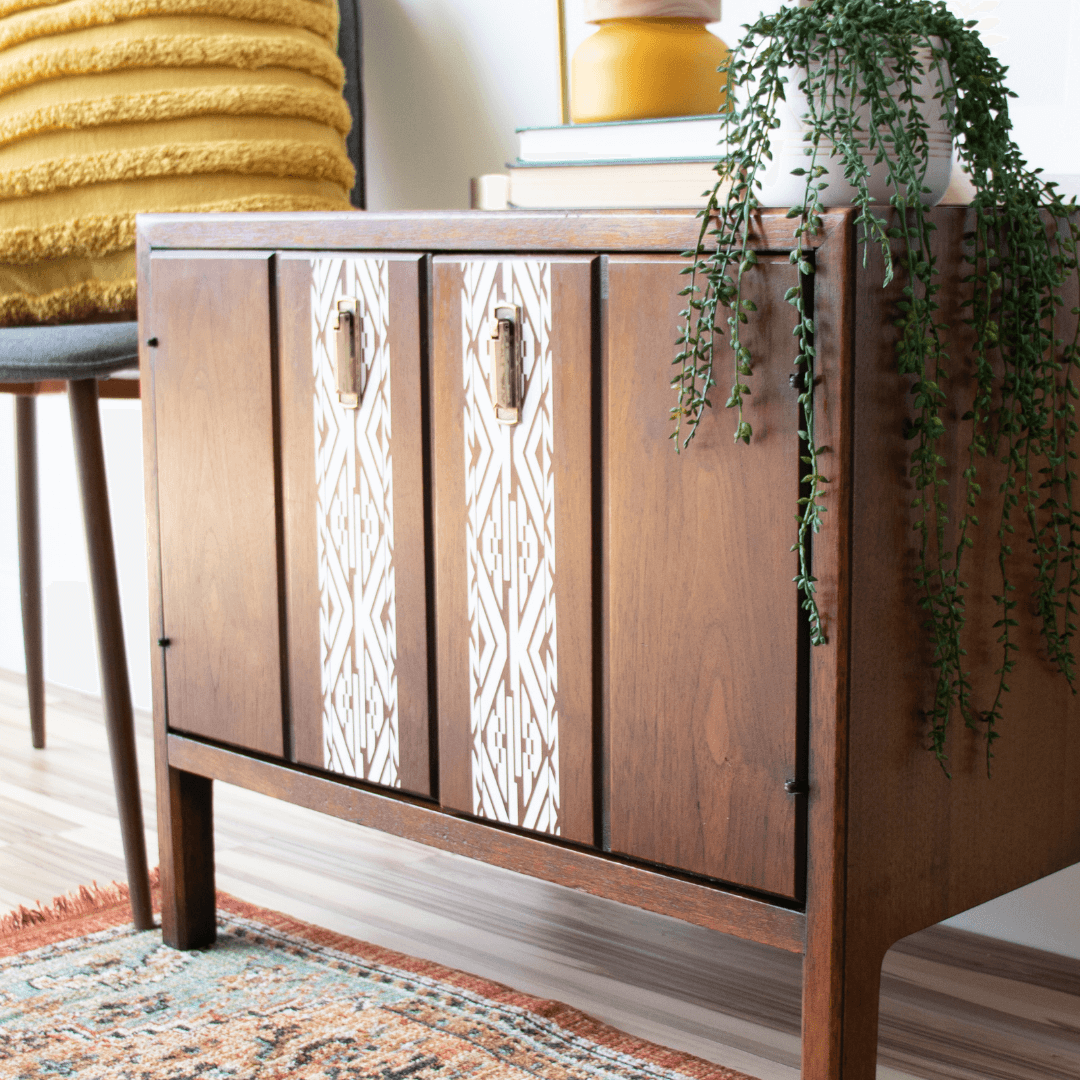
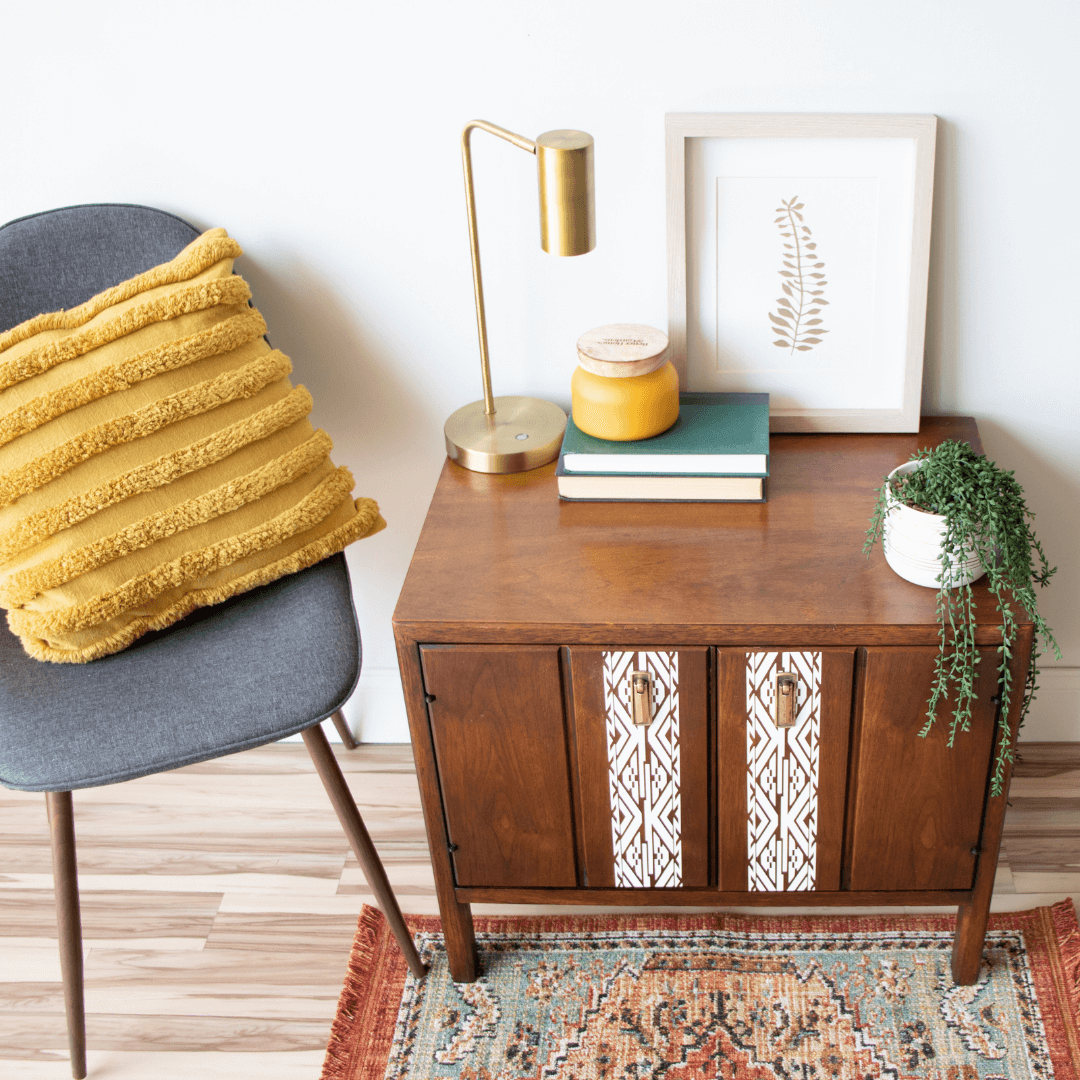
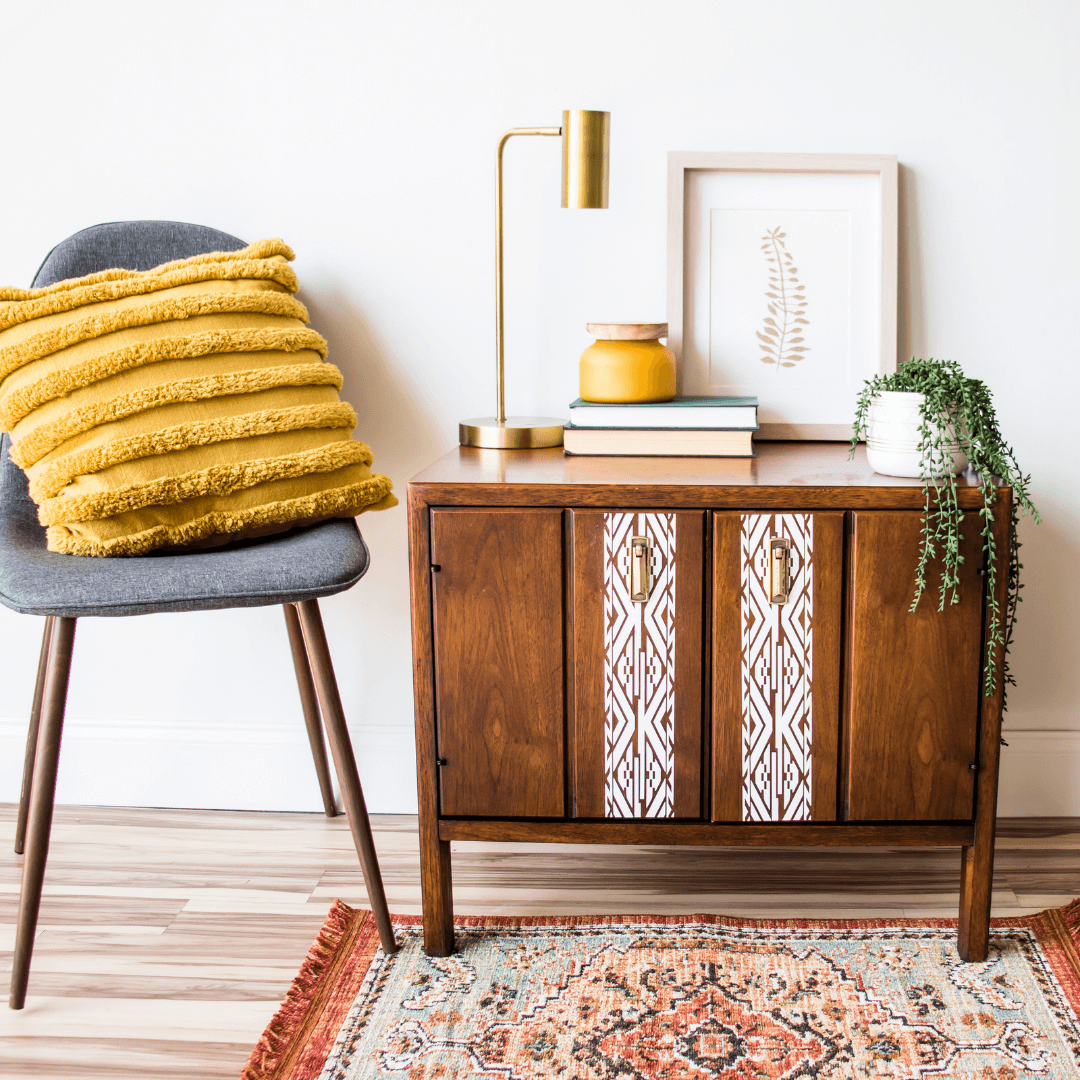
Reveal of the No Paint Furniture Makeover
I just love getting creative with furniture flipping. And I love this no paint furniture makeover because it is so beginner-friendly.
I love this custom vinyl piece! It was easy to prep the piece, easy to create the vinyl, and easy to apply. And the best part of the removable vinyl is that you can remove it with no hard to the furniture surface. , no paint stencil. It was really easy to put on. It looks nice and crisp and clean.
We kept this vintage piece’s integrity but gave it a whole new look!
If you want to see this piece come together step by step, head over to the YouTube video here to watch!