Thrift Store Furniture Makeover With Lilly Moon Paint
Disclosure: This blog contains affiliate links. I will receive a commission for items purchased through these links at no extra cost to you. I appreciate your support. Please read all labels and follow all manufacturer safety recommendations when working with paints, stains, and other equipment.
I’m trying a lot of NEW PRODUCTS today! I’m excited to share with you this extreme makeover of this $40 Goodwill dresser. I’m going to be building a new base for it and have new products and techniques that I’ll be testing out today.
Do you remember the DIY Wife’s Base that I tried out in my Modern Makeover? If you want some more details on that process, head over to that blog post. I’ll be sharing some changes I made to the process in this post.
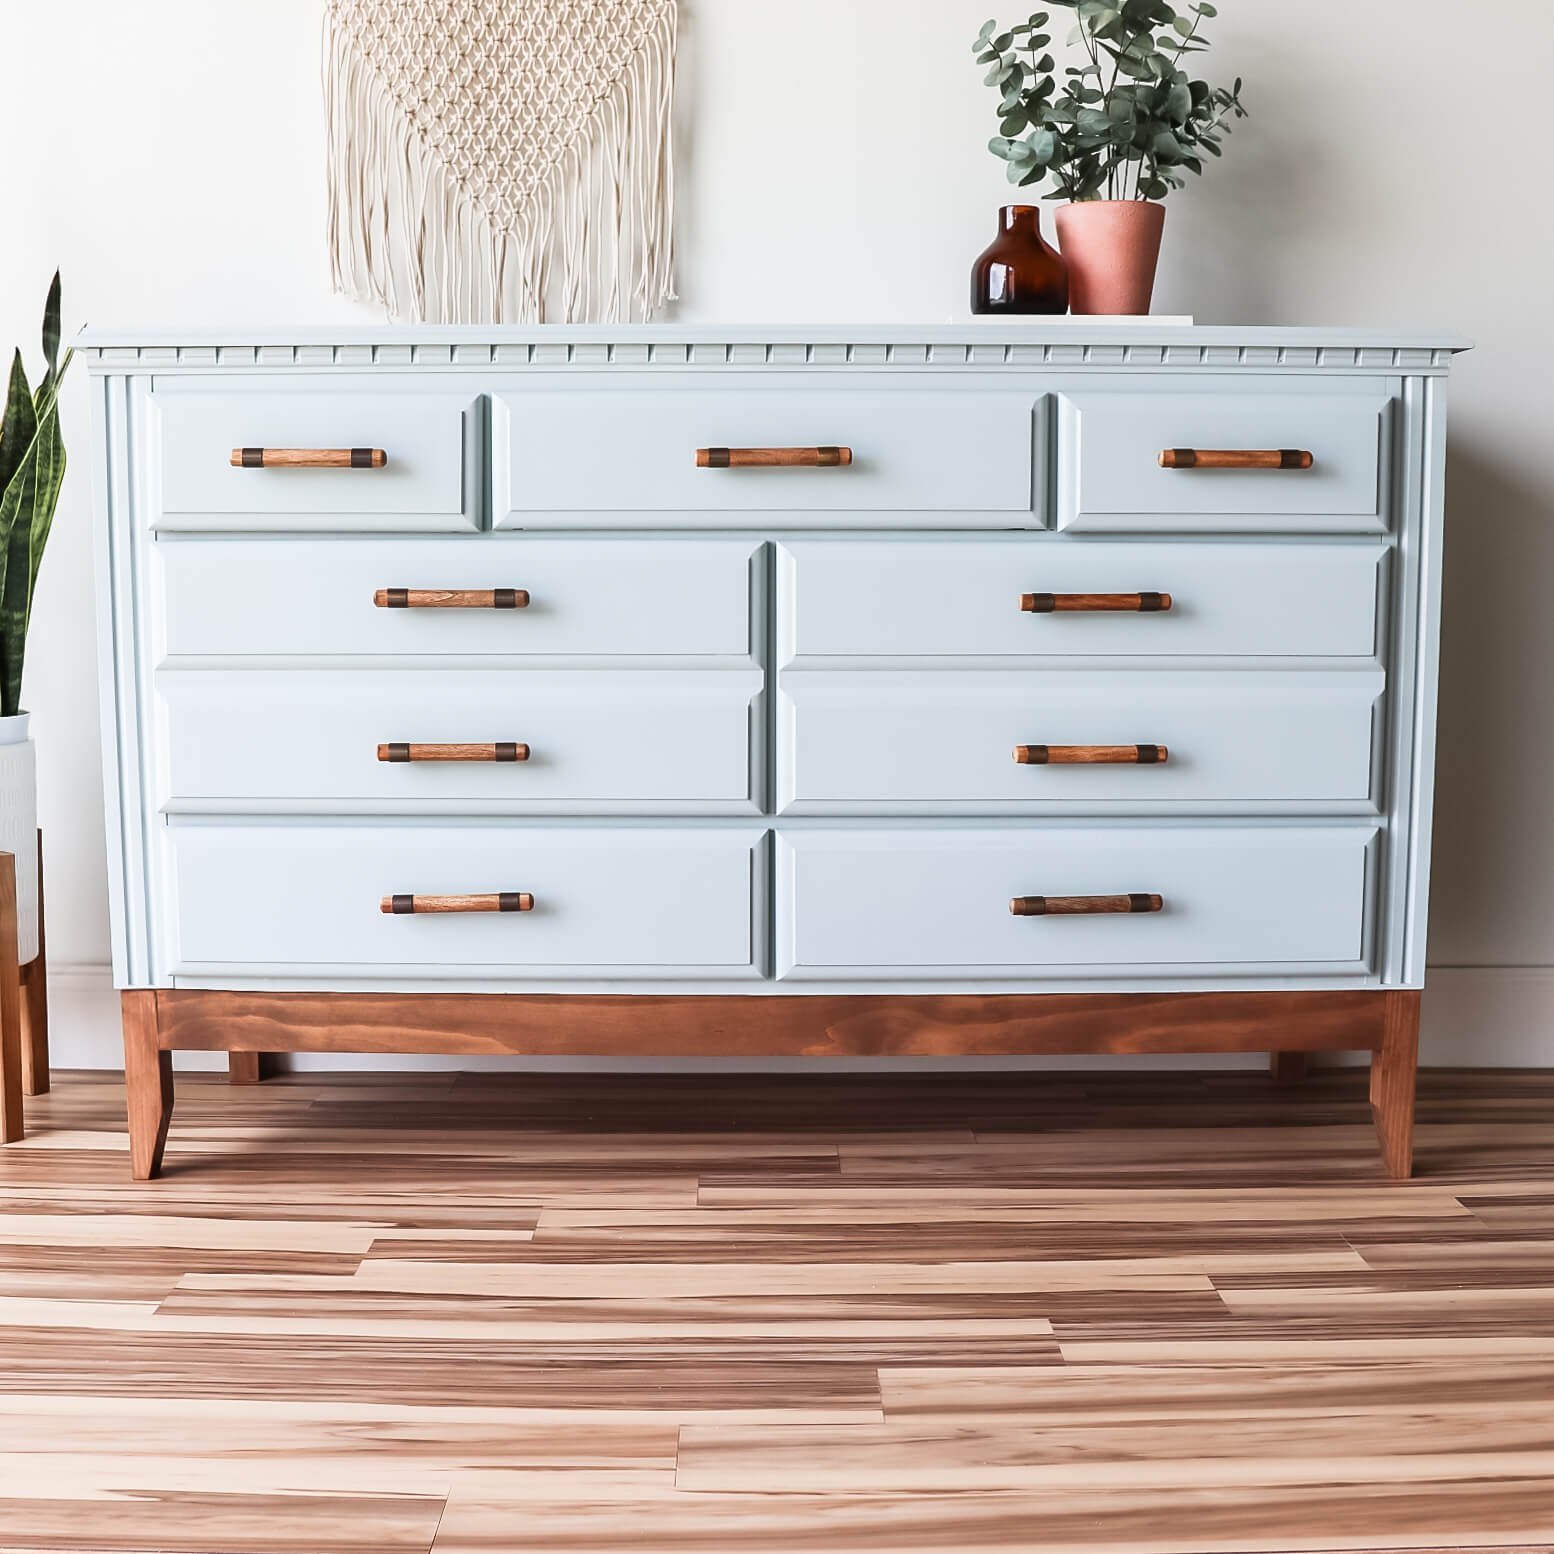
So here it is...this Goodwill beauty. Only $40 and pretty outdated. I can’t wait to show you the finished result.

Materials Used for this Thrift Store Furniture Flip
Select Pine 2" x 2"
Select Pine 1" x 3"
Kreg screws
Ryobi Jig Saw
Kreg Jig (this link is to a newer model than I use)
Ryobi Drill
Ryobi Miter Saw
Lilly Moon Paint Heavenly (code PRETTYDISTRESSED10 for 10% off) -
Zibra Palm Pro (code CHRISTINA10 for 10% off)
Zibra Topcoat Brush Kit (code CHRISTINA10 for 10% off) -
Dixie Belle VooDoo Gel Stain Tabacco Road
Hobby Lobby Wooden Hardware (wait for a 50% off sale!)
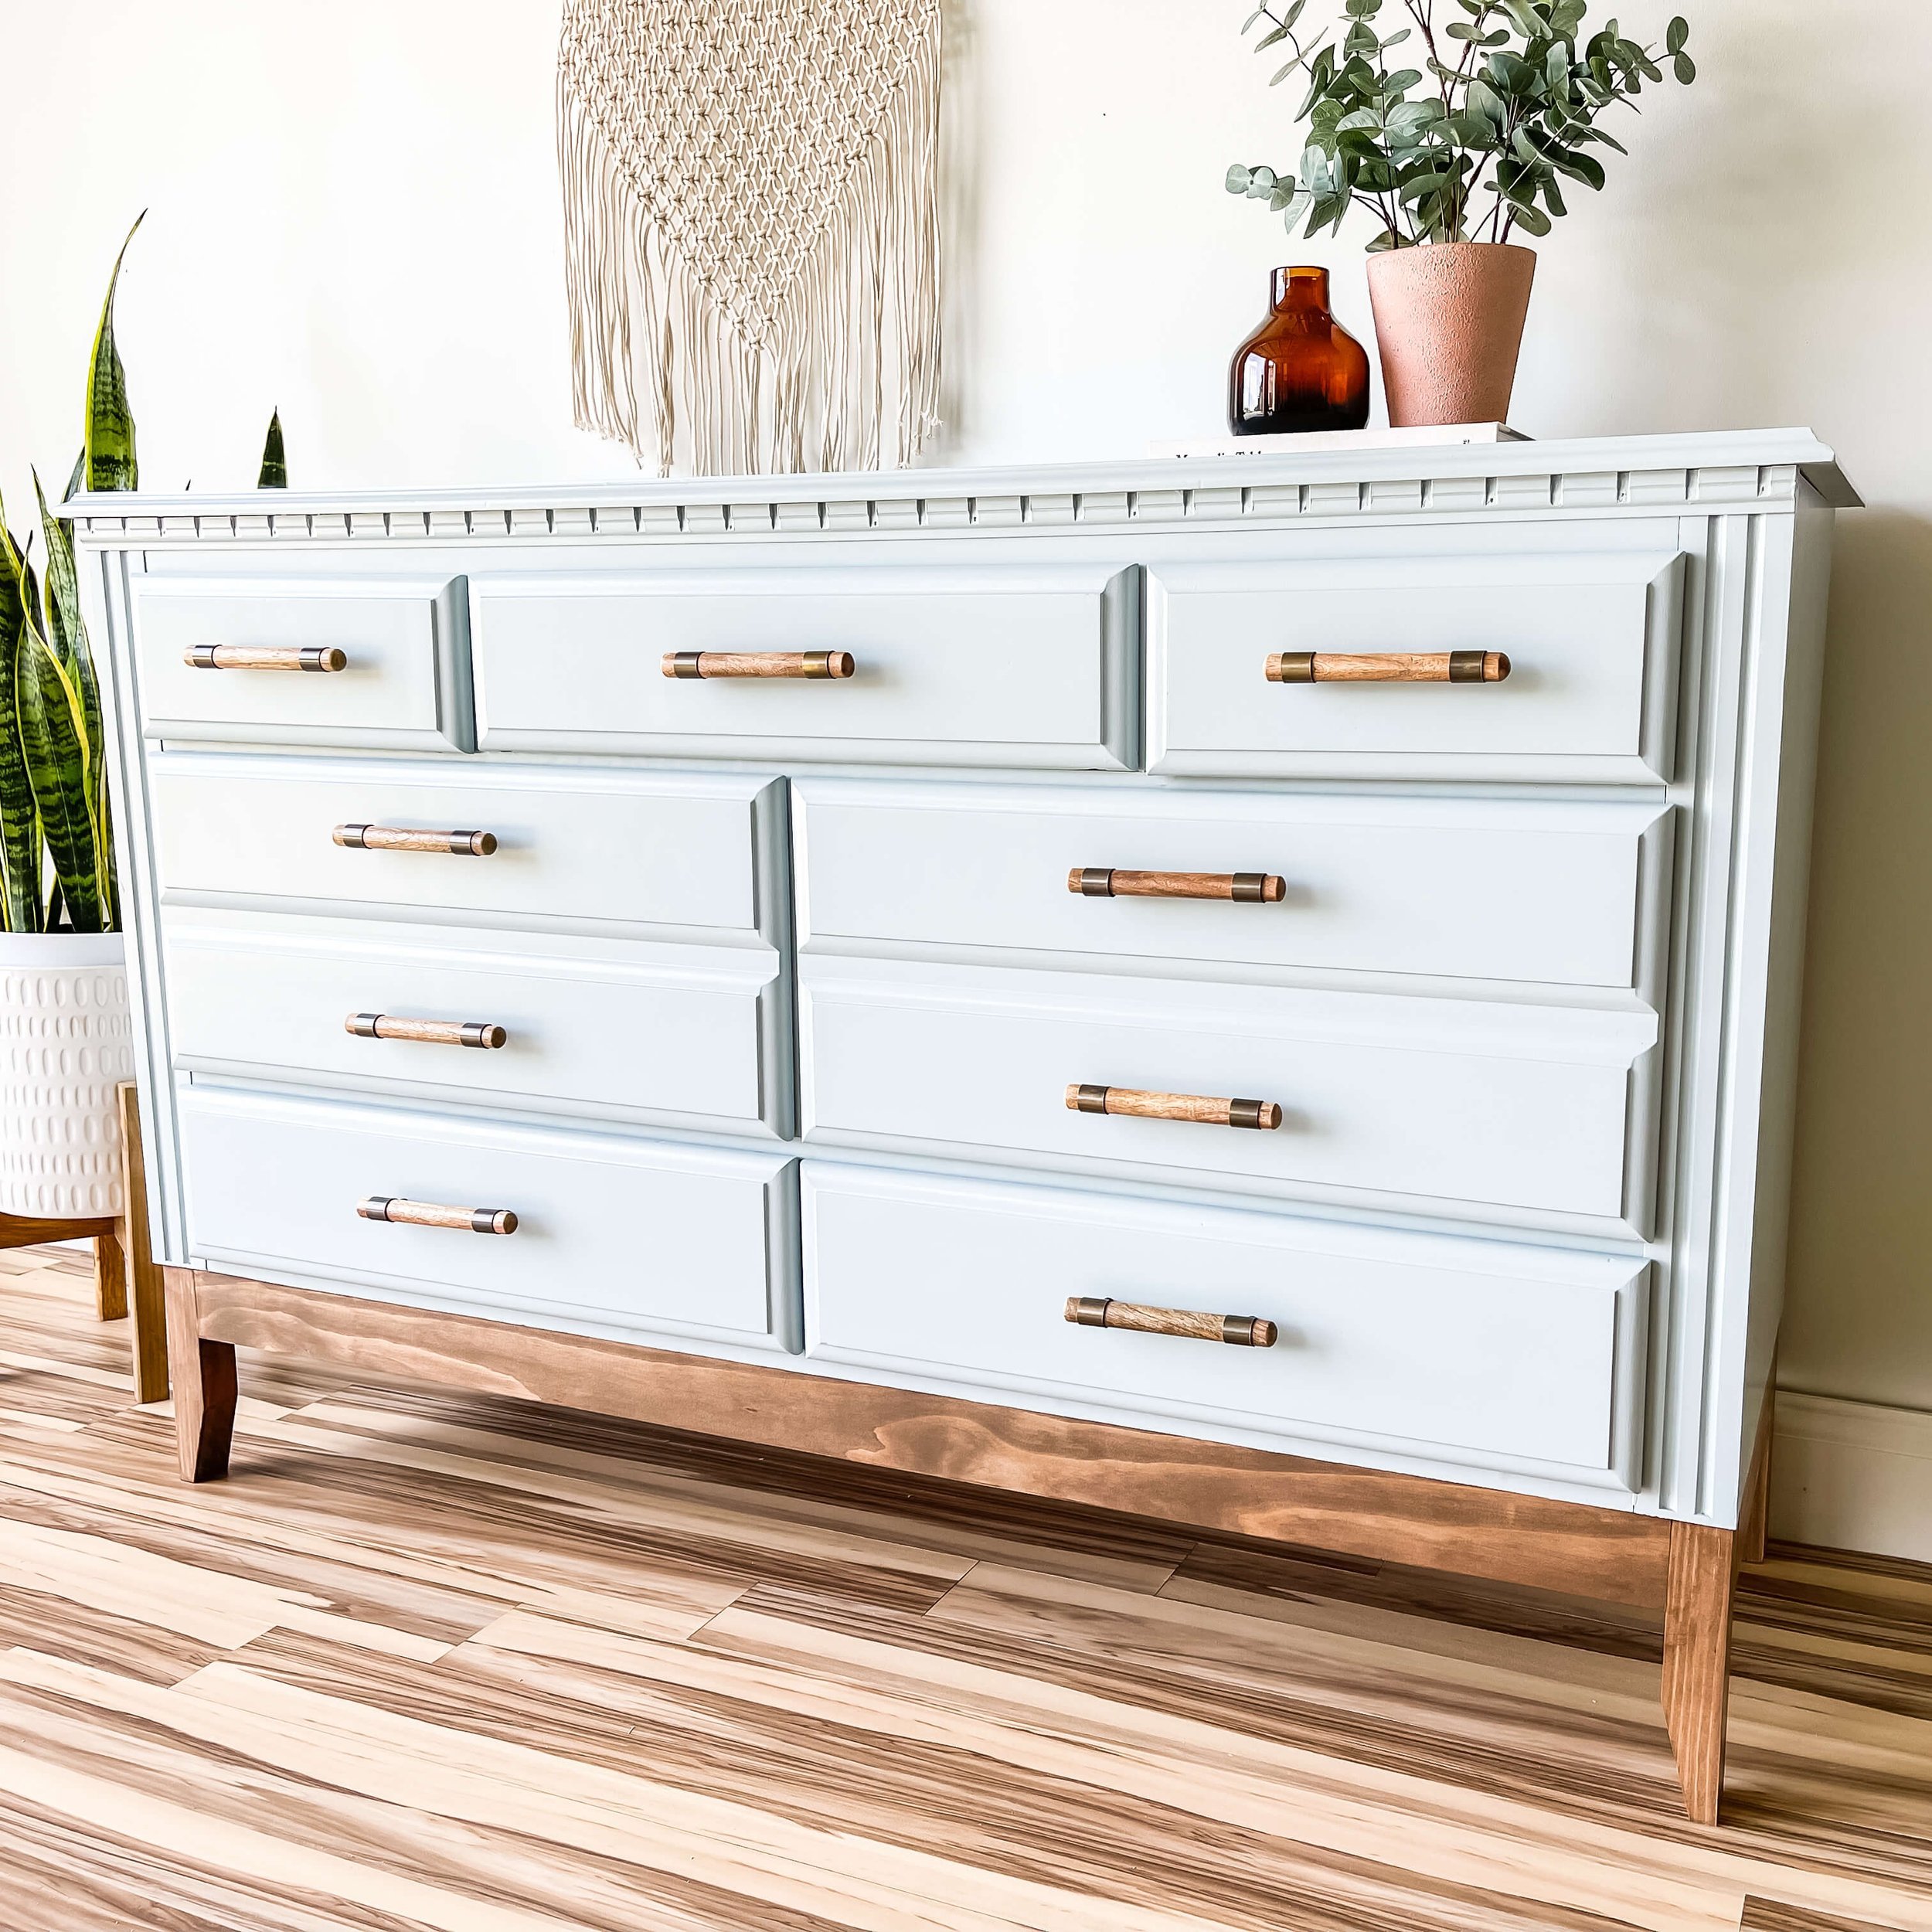
Create the Custom Modern Base
I started by flipping the dresser on its back and removed as much of the trim base as I could. I'm going to replace this with a more modern wood base. I'm going to be building it on my own just like I did for the Modern Makeover using the DIY Wife’s tutorial.

Here are just a couple of changes I made considering things I learned with my first experience and the uniqueness of this piece compared to my last one:
I had to do a little more prep with this one because after I removed the front trim, there were panels on the side. I just took a T-square and marked where I needed to cut. Then I used my jigsaw and a clean cut blade to cut those sides off.
In this project, I wanted my base to be a bit smaller than the dresser, so I took my measurements and deducted ¼ of an inch.
When cutting the legs, you can decide how high you want them. This dresser was much lower to the ground, so I ended up cutting 8 inch legs.
Clamps! This time when cutting my 45 degree angles for the legs, I used a clamp which was a much safer option than my last project.
Another difference in this project was that my lumber is Select Pine, so I used screws specific for softwoods.

If you want more details and a visual on how my base came together on this project, definitely check out the video here. After I got this base on, I realized I didn't cut the sides completely level. So I fixed that with a little wood epoxy and filled in the gap. Once that was dry, I sanded it down and then I was ready to stain the base.
Dixie Belle Voodoo Gel Stain in Tobacco Road
For my base stain, I used Dixie Belle VooDoo Gel Stain and Tobacco Road. This is a water-based stain so you just squeeze it out and then brush everything in wiping back the excess. This is really easy to use, and it matched the hardware that I had in mind for this dresser perfectly.

How to Prep for a Thrift Store Furniture Flip
Ok, now that the base is built, I am ready to start working on the dresser! As you know, most of these furniture flipping projects consist of prepping the piece. And usually, it’s all about cleaning, repairing, and sanding.
Here is a quick breakdown of how I prepped this thrift store dresser for an extreme makeover:

Cleaning
After I removed all of the hardware, I cleaned the drawers with some TSP soap and then rinsed it with clean water. Before cleaning the rest of the dresser, I taped off the bottoms with painter’s tape and plastic wrap so I don’t get any paint or cleaning solution on my newly stained base.

Repairs
I decided to do some new hardware for this piece, so I wanted to get rid of the big ornate fan that is on the top drawer. I mixed up some Bondo to fill that in. I ended up having to do two coats of Bondo to fill all these holes in detail.

Priming
The sides and top are laminate so I'm going to be using a primer just to make sure that my paint is going to stick really well. You technically don't have to scuff sand with this primer, but I have a sander and just for insurance, I did. You normally see me use BIN in my projects, but I wasn't worried about bleed-through on this piece. Just wanted this one for adhesion.
Drill Holes for New Hardware
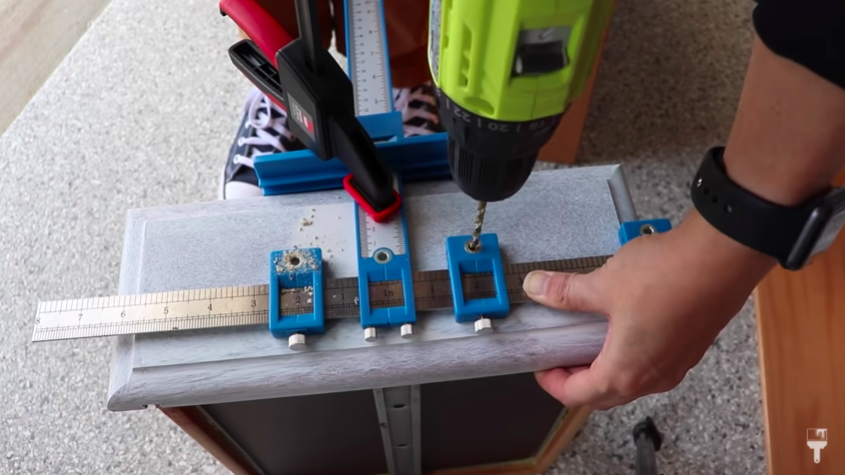
After my first coat was dry, I decided to drill my new hardware holes and I got this cool little contraption (see image) from Amazon, and it worked really well. I was able to set my hardware the exact distance apart that I needed, and this tool really holds it in place so that my drill doesn't jump around.
The biggest I could go with my drill wasn't big enough for my hardware holes. So once I drilled the initial holes, I grabbed my one-fourth drill bit and it made the holes a little bit bigger so that the hardware would fit in.
They were a perfect fit so I went ahead and used my hardware template to drill all the holes. This was so much easier, but it still took me a long time, but I'm glad I invested in this thing and the hardware looked as awesome as I imagined.
Side Note: I did a quick sand with a 220 sandpaper to smooth my primer out and then ahead and added my second coat. This is ready to topcoat in an hour so I sanded it smooth again.
Lilly Moon Paint in Heavenly: Thrift Store Furniture Flip

Now, the star of the show. For this Goodwill extreme makeover, I used Lilly Moon Paint in the color Heavenly for the first time today!

This is a new furniture paint that has just hit the scene that was designed by Miss Yari at the Lilly Moon Vintage. It is a chalk style furniture paint, like the paints you see me use a lot. But I was very intrigued at the thickness (or rather thinness) of this paint. It's a lot thinner than other paints that I typically work with, but it's still that matte chalk style finish and smooths out really beautifully.
I used a Zibra brush to apply it, and I didn't have to add any water or mist my piece at all to get this to the consistency I wanted. I really loved the way the first coat went on and it went on really great over this primer. I'll definitely have to try it out on just a regular piece of furniture and I'd love to use a spray gun with it too.

The coverage is really good on this, and it spreaded out nice and evenly. I'm not surprised that this paint is so great because Yari is a furniture artist and has been doing this for years… she just really knocked it out of the park with this. If you guys are wanting to try this, you can use my code PrettyDistressed10 to save at 10% on your order.
The final touch to the first coat was grabbing a little artist brush to get into the little indents on my trim. I loved the character of this piece and didn’t want to remove it.
Chalk Style Paint Pro Tip: Even though the consistency of this paint was pretty thin, I still like to mist the surface and the brush a little bit before applying the second coat. I just find that it helps spread out the paint because it really wants to sink into that absorbent chalk-style paint during the second coat.
Two coats of coverage worked really well. I only ended up using less than half of this can. So I can definitely do another project!
Why I Love Zibra Brushes

I told you this furniture flip was full of new products. Another product that just hit the market is Zibra's top coat brushes. They are made with natural filaments and are meant to give you an ultra smooth finish.
And may I say, I love this huge top coat brush from Zibra. It is three inches, and it helped me get the flat surfaces fast. I used the Palm Pro 1 on all the trim and smaller areas. That one was great as well.
I really liked the feel of these brushes, and they spread the top coat on super smooth. But you can use them with paint and stains too, not just top coats. It is so exciting to see Zibra come out with some new products. I think you guys are really going to love this. They're selling it in a three piece kit right now.
Varathane Top Coat

So I'm going to be using these with Varathane Water-Based Polyurethane in the satin finish. This is one of Yari's favorite top coats, and I have never used it before.

This Varathane top coat is water-based, so it's milky white and is going to dry crystal clear like other top coats you've seen me use. I really liked it, but it’s a little shiny for me because of the satin finish. I’ll definitely want to try their flat in the future.
After I finished this first top coat, I let it dry for two hours and then came in and did a second coat. I can see why furniture artists really like this top coat. It was really nice to work with.
I ended up doing a third coat on this piece doing the drawers last.

Pro Tip: I decided to use these little felt pads on the inside of my drawers because these drawers do touch the painted frame. When that happens, I use these pads because you're less likely to see chipping from pulling that drawer in and out.
The last thing I'm doing before I add hardware, I cut out a piece of a brown paper grocery bag and I'm just going to buff the entire piece with this. This is something I've learned from Yari and I did it on a piece recently and I really love this. It just makes your top coat buttery smooth.
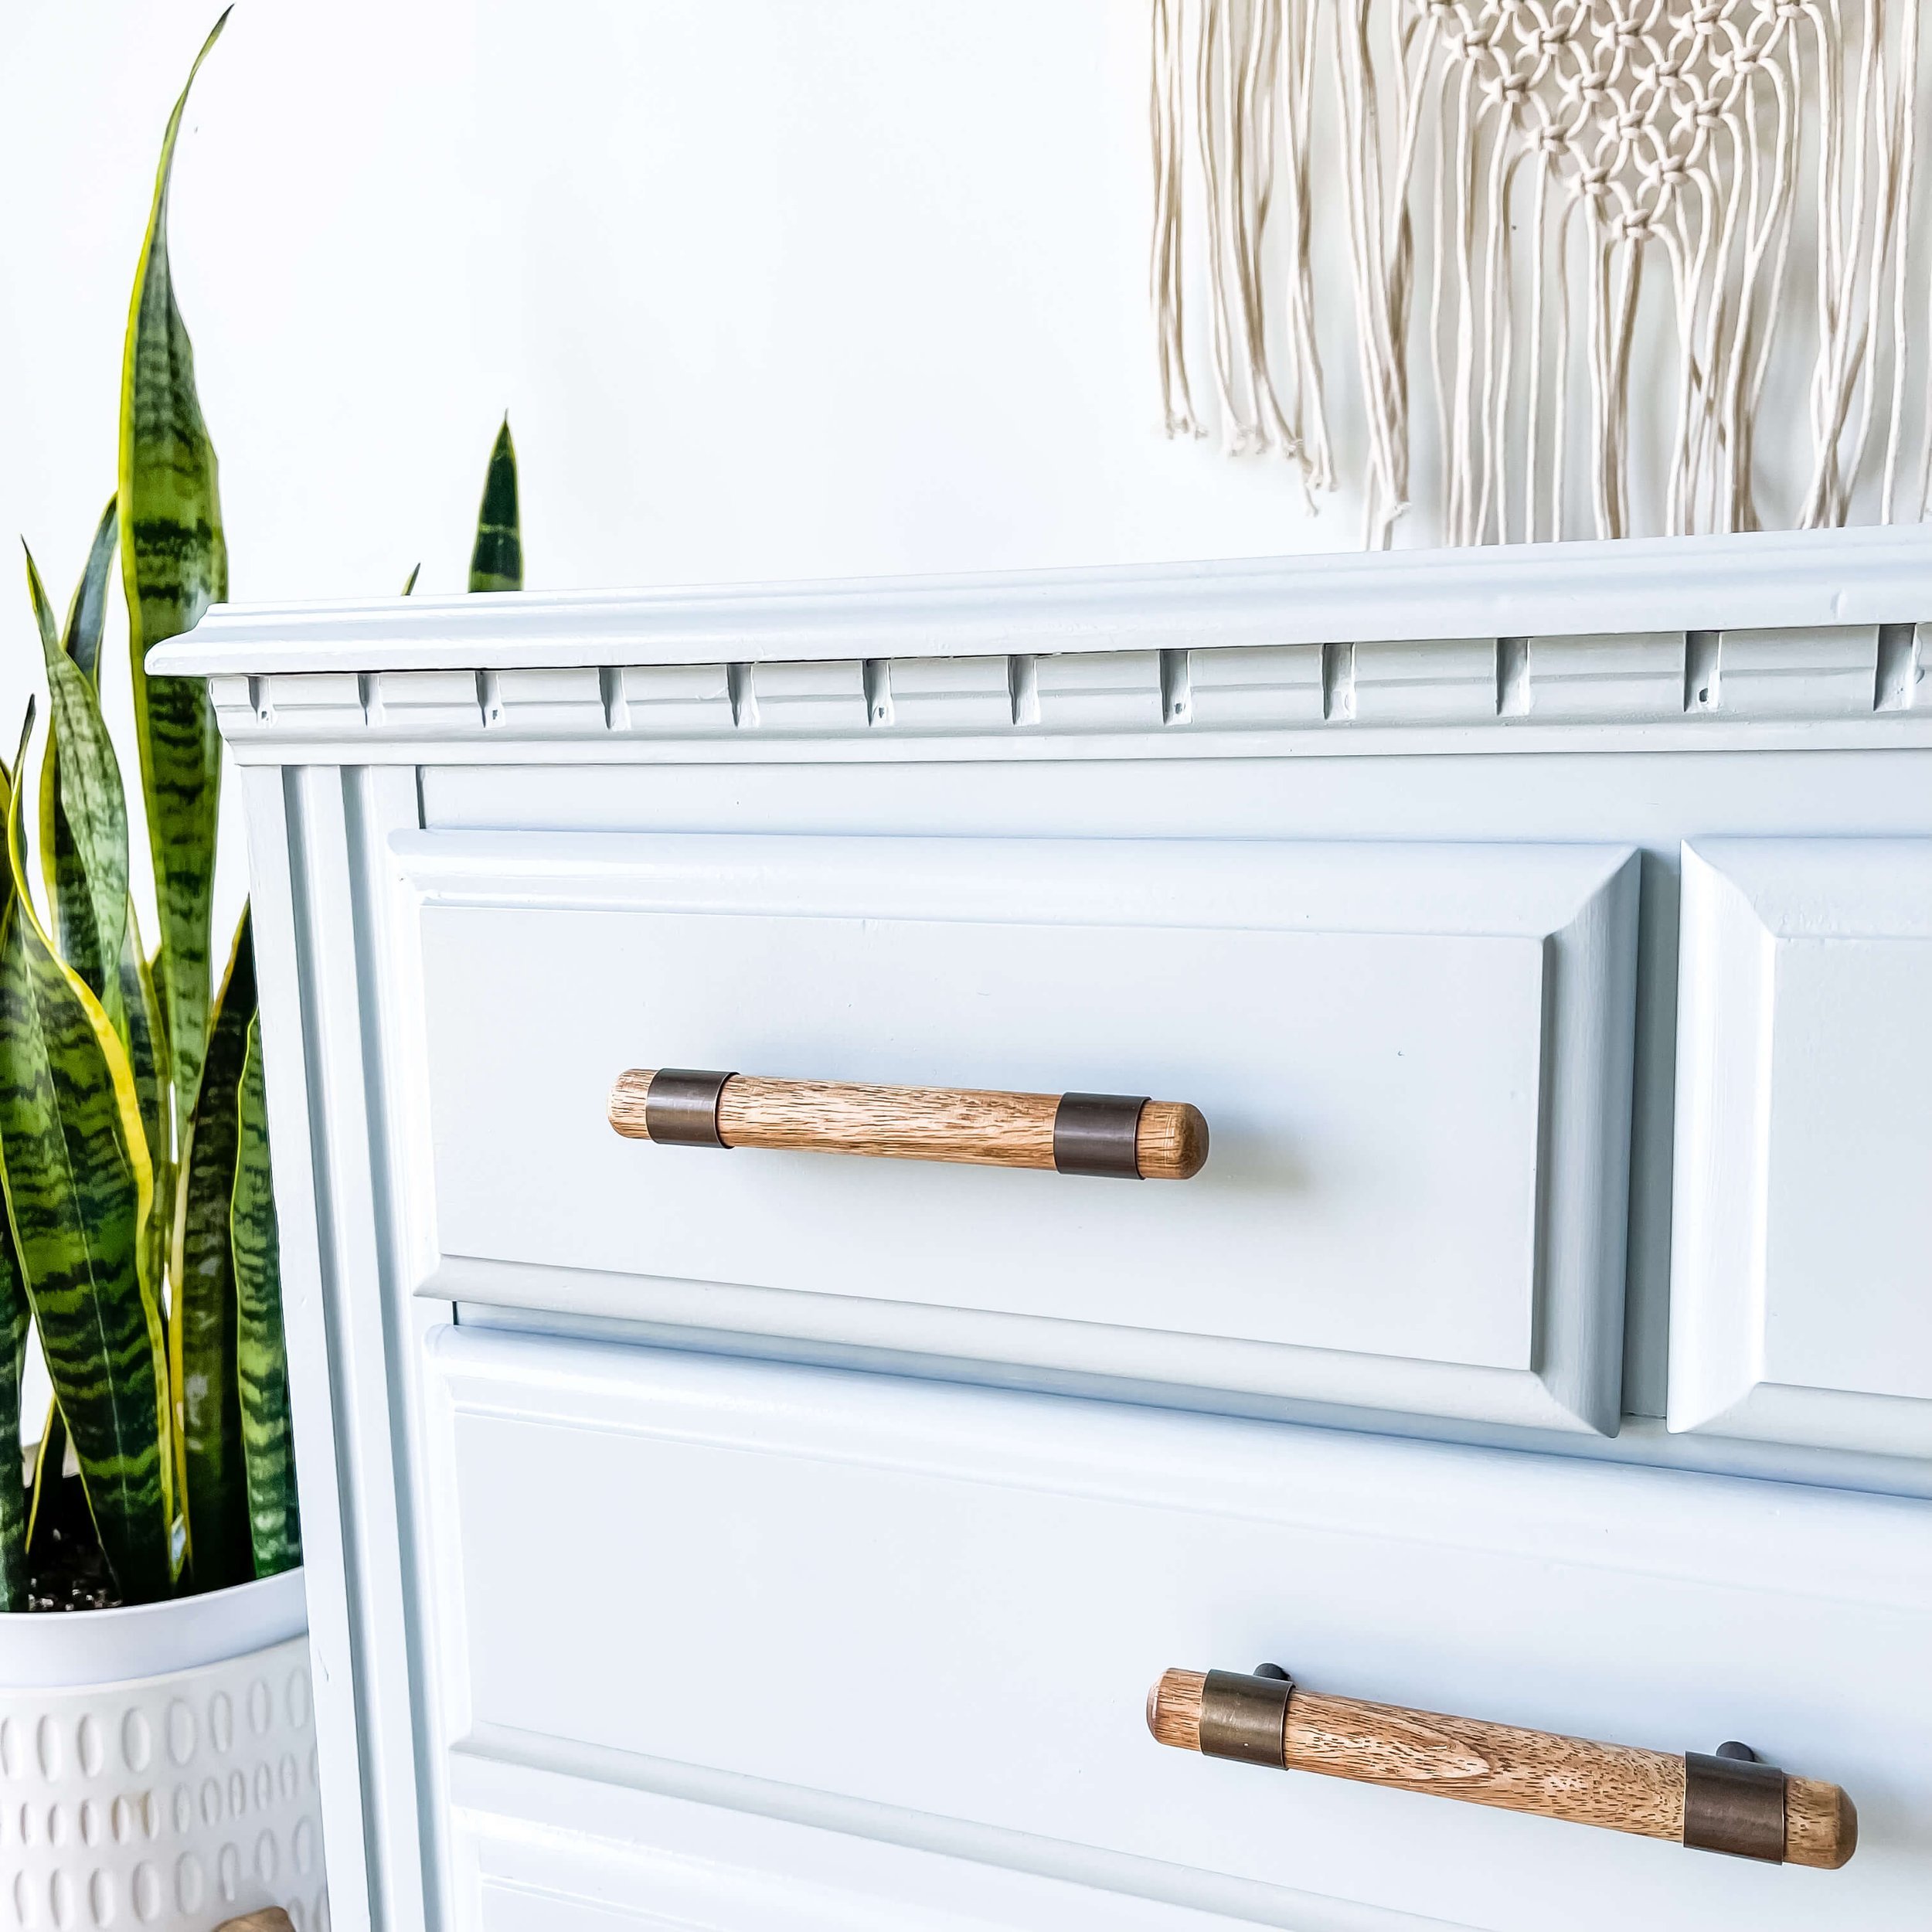
New Hardware for my Thrift Store Furniture Flip
The hardware I have is from Hobby Lobby, and I've had them forever. I've been dying to use them! They were just perfect for this piece and this base, so I love them.

I hope you're still with me! This was a lot of work on a really cheap piece, but I love the way this turned out. I got to use new paint, some new brushes, these pulls that I’ve wanted to use forever, and I got to practice on another base.
I'm still learning. I'm still growing. But I really do love the way this piece turned out. I wish it would've taken less than two weeks, but you got to learn and start somewhere! Take a look at the end result...I’d say it was worth the effort. :)