
DIY Outdoor Furniture Makeover: Patio Spring Cleaning!
Disclosure: This blog contains affiliate links. I will receive a commission for items purchased through these links at no extra cost to you. I appreciate your support. Please read all labels and follow all manufacturer safety recommendations when working with paints, stains, and other equipment.
It’s time for Spring cleaning! And I’m starting by giving my back patio a refresh in this DIY outdoor furniture makeover. While I’m doing some deep cleaning on the patio, I’ll also be repurposing two pieces of furniture. The first piece is a coffee table and the other is a metal cart that I want to give a new look. Lastly, I’ll share some fun accessories I got to tie this whole makeover together!
I want to show you what my back patio looked like before this makeover! Take a look, and then let’s get into it because we have a lot to cover today.

DIY Outdoor Furniture Makeover Products
Beyond Paint Pebble (Griege) or Mocha (Dark Brown) - ***Use code CHRISTINA for 10% off***
Beyond Paint Kit (Roller & Brush)
Outdoor Patio Coffee Table Makeover

The first DIY outdoor furniture makeover I tackled was the coffee table. My husband actually built this table back in March of 2020 (before I became proficient in power tools). This was an Ana White build—and if you’ve never built furniture before, she’s a great resource on all things DIY!
Clean and Sand

Because this is an outdoor piece of furniture, it was in pretty rough shape in the cleaning department. So for some prep work, I power washed the whole thing and scrubbed it with some dawn dish soap.
There was also some damage, so I used wood filler (making sure to use one rated for exterior use) to remedy those and sanded down the whole piece with my battery powered orbital sander. I started with a 120-grit sandpaper and smoothed it out with a 220.
This whole process was simply to repair the condition of the table. None of it was necessary to prep for my primer or paint that I used for this project.
Once I got everything sanded, I used a tack cloth to remove all that dust because there was a ton of dust from all that wood filler.
Prime with Zinsser BIN

Normally I don’t have to prime with my Beyond Paint All-in-One Paint, but this pine had a lot of knots in it and was seeping through the wood filler. This was an indication to me that the tannins would bleed through my paint, so I wanted to be safe.
So for insurance, so that my paint looks really good, I used Zinsser BIN’s stain blocking primer. This a shellac based primer, and it will block in the tannins and keep my paint protected and smooth.
If you’re using this primer, I suggest lining your tray with foil because it doesn’t clean with soap and water. You actually have to use ammonia to clean it up, so keep that in mind!
I used a microfiber roller because it works really well for applying this specific primer. One great thing about it is that it only takes 30 minutes to dry, so you can apply your paint pretty quickly after getting your primer on.
Lastly, be sure to wear a vapor mask and work outside if you can because this primer’s odor is really strong. Safety first!
Beyond Paint: All-in-One Paint

If you've been around here for a while, you've definitely seen me use Beyond Paint before. Here are just a few other projects so you can see the versatility of this All-in-One paint:
Spray Painting vs Rolling Beyond Paint
One Step Paint MCM Makeover: Beyond Paint Review
All-in-One Paint: One Day Makeover
One Step Paint Dresser Makeover: Furniture Painting For Beginners

Beyond Paint is such a great paint to use for any DIYer (especially beginners) because it has primer, paint, and sealer all-in-one!
For the coffee table, I picked a beige color called Pebble. It’s very neutral which is the exact look I’m going for. It honestly has the perfect about of gray and beige, so it goes with everything!
Beyond Paint has a great kit that they have on their website that comes with a ⅜ inch nap roller and a chip brush. Two coats are recommended with this paint and you’ll want to let it dry for 2-4 hours in between coats.
One of the best features of this paint is that you can clean up with soap and water due to their nanotechnology. It sticks really well and is going to cure down hard and be super durable.

Metal Utility Cart Makeover
Now it’s time to hop on over and start working on my metal cart. I’ll also be busing Beyond Paint for this project in the color mocha. What I love about Beyond Paint is that you can use it on so many types of surfaces, so it will stick perfectly on this metal.
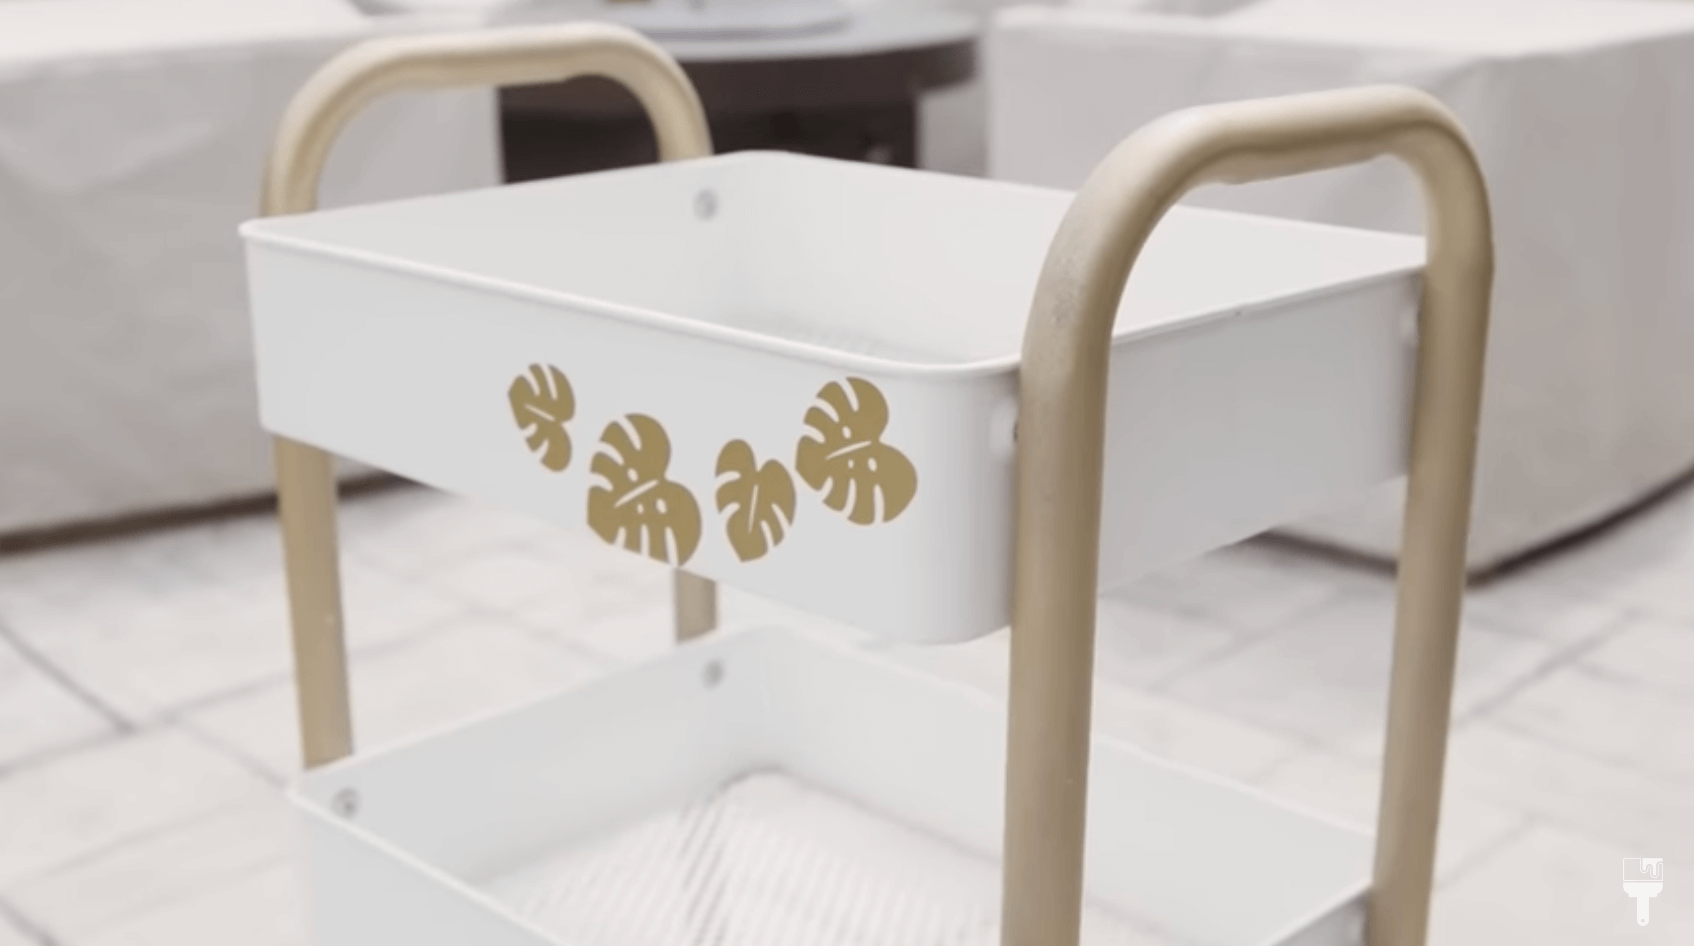
I DIYed this bar cart a couple of years ago with a tropical vibe. Now that I’m going for a more coastal theme, I’m giving it a whole new look.
Prep and Clean

There’s not too much to the prep for this project. The first order of business is to remove the tropical leaves. I cut this vinyl with my Cricut, and when I started to remove it, I was pretty surprised at how easily they came off. That saved me a lot of time!
After removing those, I used Simple Green to clean the whole cart. When prepping your piece for Beyond Paint, you don’t want to use a TSP cleaner, but rather, an all-purpose degreaser.
Also, when you're painting furniture that is already sealed, this is all the cleaning that you need to do. Super simple!
Before I started painting, I rinsed all of the cleaner off with some clean warm water. Now we're ready to go!
Paint With Beyond Paint

Typically, you’d see me do some scuff sanding before I begin to paint, but because Beyond Paint has a bonder and primer built in, I can go ahead and start painting!
I used the roller from the kit to get most of the paint on for the first coat using the chip brush to get in the tiny areas that the roller couldn’t reach. When you use a chip brush for this paint, you don’t want to do normal paintbrush strokes. Instead, you’ll do a bouncing and stippling motion which will create some texture, but it will dry down and level out a lot. It will be a smooth textured finish.
Again, I wanted 2-4 hours before applying the second coat in the same way. Remember, the dryer the better when going in on your second coat!
I ended up doing a third coat on the cart because I was going from white to dark. You'll likely only need two coats when using Beyond Paint for your projects.
Spring Cleaning for this DIY Outdoor Furniture Makeover!

It's cleaning day! I have my two DIY outdoor furniture projects completed, so it’s time to piece it all together. But not before doing some Spring Cleaning!
I started by removing everything from the patio. Thank goodness my friend Meggie was there to help!

There were so many leaves and cobwebs on the patio, so I decided to get out the blower to blow everything off before using a power washer that I got from Costco for the first time!
It was really easy to set up and use, so I think I’ll be using this more often for my outdoor cleaning! I did use it to clean off the table at the beginning because it has a wood tip on it. But for the patio, I used the ultra tip, and that is powerful!

After the power wash, I used a squeegee to brush off the excess water to help it dry a little faster.
The next bit of cleaning was to freshen up the upholstery on my outdoor patio furniture. I have a little upholstery cleaner (which is one of my favorite household items), and was able to make the cushions look almost brand new.

And the last bit is cleaning the ceiling fan. I got up on a ladder and used Simple Green to clean the dusty blades and globe. Easy peasy!
DIY Outdoor Furniture Makeover Accessories
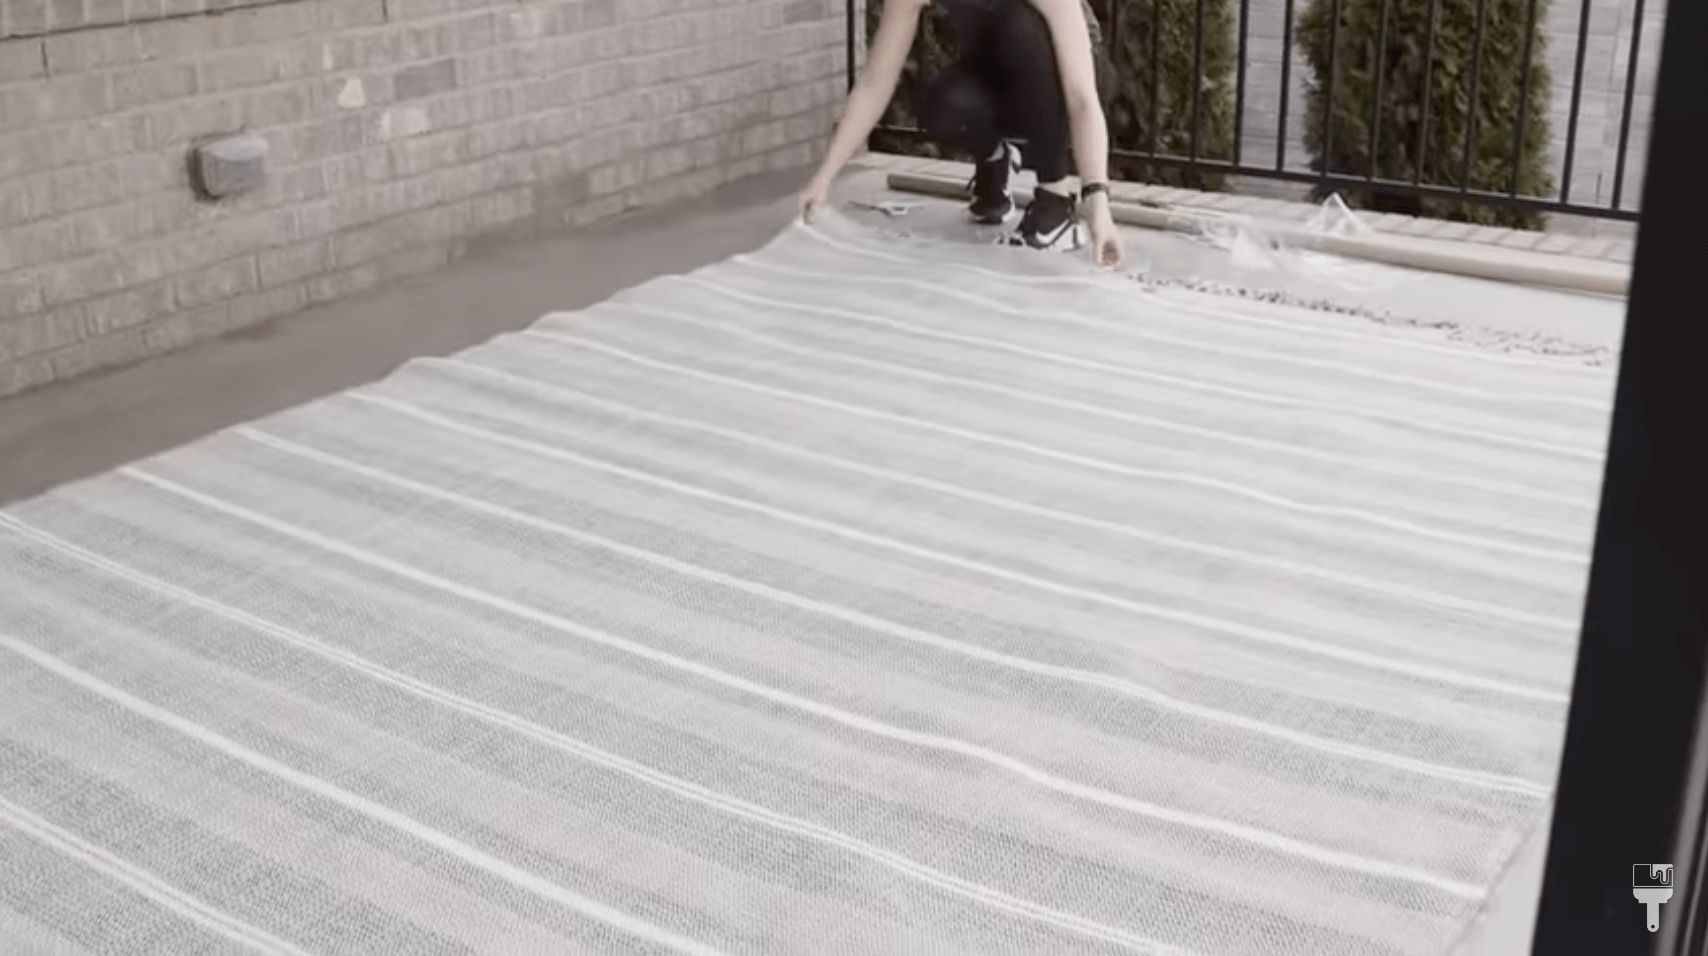
Now because I saved so much money on making over my furniture pieces, I was able to splurge on some outdoor decor items. I got some accent pillows on sale at Target and a brand new rug from the Studio McGee line. This rug is much bigger than the one I had out here and fits the space so much better.
I also bought some live plants from Home Depot that I’m going to attempt to keep alive. Haha. I placed other small succulent plants on the cart and other decor on the table. It’s all coming together!

DIY Outdoor Furniture Makeover Reveal
Now this is what I call a patio refresh! By doing a couple of DIY outdoor furniture projects, some spring cleaning, and getting some new decor, I’ve completely transformed our backyard patio! And I couldn’t be happier with the results.
We can’t wait to sit outside with our morning coffee and enjoy this space during the warm summer months.
