Faux Linen Finish Furniture Makeover
Disclosure: This blog contains affiliate links. I will receive a commission for items purchased through these links at no extra cost to you. I appreciate your support. Please read all labels and follow all manufacturer safety recommendations when working with paints, stains, and other equipment.

Today is all about texture, and you know I’m always down to try a new technique. If you follow me on Instagram, you’ll recognize this piece as one of my Furniture Flip Challenge pieces that I did in conjunction with the Maker’s Challenge and Do It Yourself Magazine.
This year’s theme was TEXTURE, so before going for it with this piece, I reached out to the queen of texture, Courtney at Steel Birch Studios. She has perfected this faux linen finish look that I will be doing today. And the best part is that she has a new YouTube channel and will be sharing this technique there soon!
I love the shape and style of the dresser that I made over for this challenge, but it is in pretty rough condition. The finish is failing and there are some gouges, so I’m not going to feel bad about painting this one. I get some flack sometimes for painting furniture, like this Mid Century Modern Makeover. Either way, I love giving new life to furniture, and this texture faux linen finish was so much fun to do.
Check out the piece that I started with, and then let’s get into it!

Products Use in this Faux Linen Painting Makeover
HomeRight Super Finish Max Sprayer
Wise Owl One Hour Enamel Charleston Green
Flood Floetrol (glazing medium)
Zibra Palm Pro (Use Code CHRISTINA10 for 10% off)
Surf Prep 3" x 4" Electric Ray (Use Code PRETTYDISTRESSED10 for 10% off your order)
Faux Linen Makeover Prep Work
Remove Hardware & Clean

The first step, as always with any makeover, is giving it a good clean. I removed the hardware and set it aside to use for later, and then I took some White Lightning TSP soap to clean off all of the grime and dirt.
After cleaning with soap, you always want to make sure to rinse it off with some fresh water to rinse all of that residue away.
Strip & Sand

Now I'm ready to sand and I’m going to be starting with a 80-grit sanding screen on my Surf Prep 3" x 4" Electric Ray sander because I want to strip the finish off the base of the piece. I want to show the natural wood, so let’s strip back all of the finish
After I got the base stripped, I grabbed a 120-grit sandpaper to smooth them out.
Lastly, I got one of my fine foam abrasives and scuff-sanded the entire body of the piece to help with the adhesion of my primer and my paint.
After sanding your piece, remember to wipe back all of the dust that kicked up before moving on to the painting!
Repair
Structurally this piece was in pretty good shape. As I mentioned before, there were just a few gouges, so I repaired those with some Dap Plastic Wood Filler. This professional strength wood filler is becoming one of my favorites because it dries and is ready to sand in 15 minutes.

Spray Gun Primer
To save some time, I decided to spray my primer with my spray gun. I set up my Wagner popup tent in my studio to protect the space from overspray. I also taped the base of my piece because I want to keep that raw wood look. A part of this faux linen process is making sure you have a light or white color underneath your paint to contrast it. I’m killing one bird with two stones and using my primer as my contrast paint.
To spray my primer I’m using the Homeright Super Max Sprayer that I highlighted in a blog post a few weeks ago. To prime, I used the Zinsser Bullseye 123 primer. I ended up to 3 coats. This is really going to help my paint adhere to the piece, so priming is definitely worth it.

How to Get Faux Linen Look

Before we get into creating this faux linen look, I’ll let you know what products you need!
Enamel Paint - I used my Wise Owl One Hour Enamel in Charleston Green. This is one of the paints that Courtney recommends, and I just happened to have it in stock!
Glazing Medium - Flood Floetrol did the trick!
Wire Nylon Brush - This is the brush that will be used to actually create that faux linen texture.
Paint Roller - We kind of want a “stubbly” finish when painting on our enamel paint, so the paint roller will help us with that rather than using a paintbrush.
Add glazing medium to paint
As I mentioned, I used my Wise Owl Paint, and part of this faux linen process is to add a glazing medium (Flood Floetrol) to get a little bit of a glossy look. When mixing your glazing medium, you’re going to do a 1:1 ratio. Courtney mentioned to me that she likes to add just a tad more of the glazing medium, so that’s what I did.
Mix it up really well!
Roll on paint in small sections
When you do this technique, you want to work in small sections at a time because the paint will dry pretty quickly on you. So I started out by doing each of the individual drawers. Before using my roller, I actually grabbed my Zibra Palm Pro to get in the little hard-to-reach places.
After getting into the nooks, I used the roller to paint on the flat surfaces. You ant to try to get this on as evenly as possible, so I found it was best not to put a ton of paint on the roller. I did do a couple of practice boards before starting and noticed that the more you glob it up with paint, the harder it was to get that linen look with the brush.
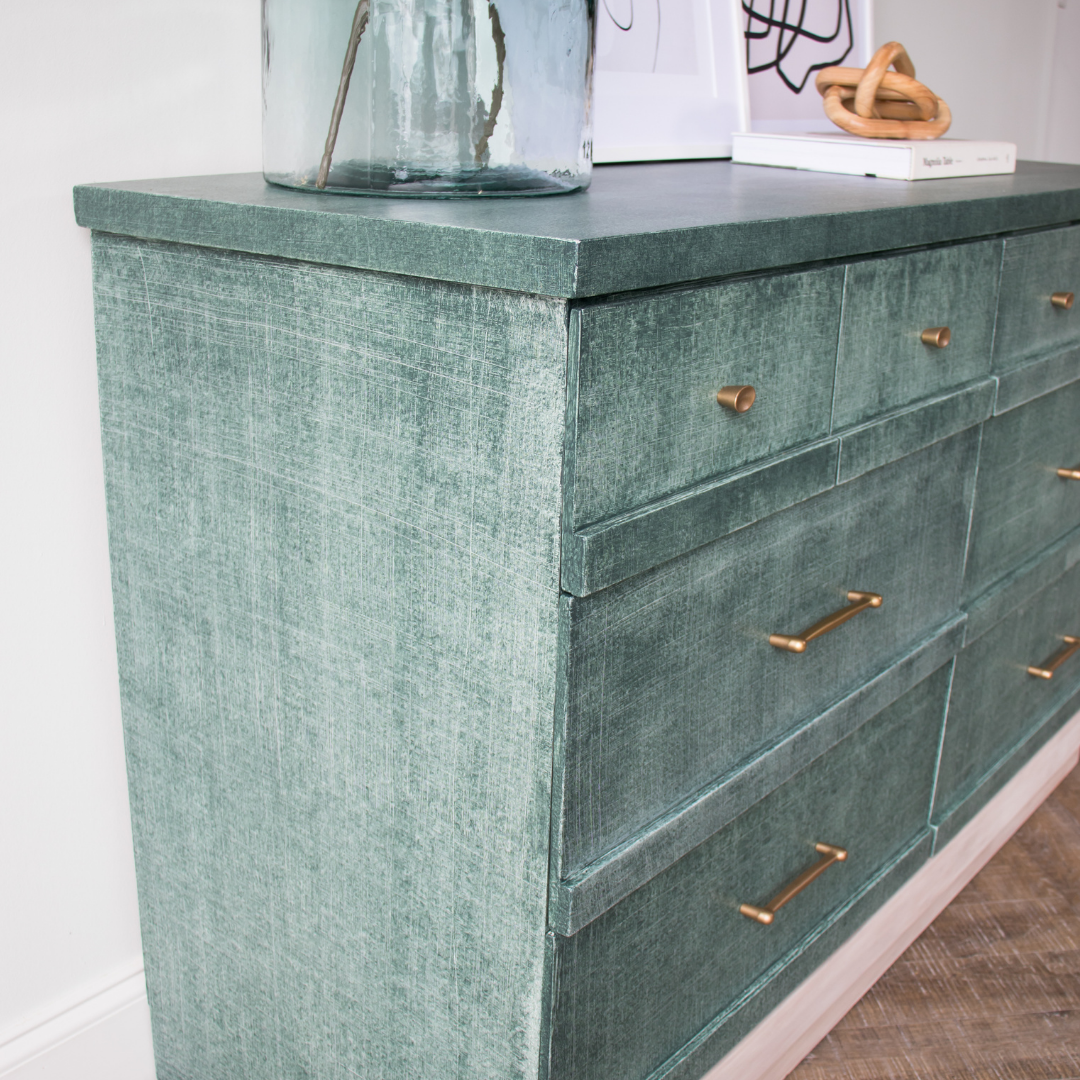
Use a wire nylon brush to get a faux linen finish
Once you get your paint on, you're going to grab your Nylon Brush and start making these vertical lines on there, keep a t-shirt or cloth nearby and keep wiping that paint off your brush.
After you’ve gone through with vertical lines, you’re going to make long horizontal strokes… and this is where you start seeing the magic come to life. After the horizontal lines, you’ll go through with the vertical again.
And after this, you can repeat that vertical/horizontal process as many times as you want until you get the look you want as long as your paint is wet.
Check out my Instagram reel right here to get a glimpse into this technique!
This process actually goes really fast and because I'm using that one-hour enamel, I'm not going to have to seal this because this paint dries to a really hard and durable finish.
I also quickly painted the inside of my frame because it’s going to be visible when I put the drawers back in.

My Advice
My best advice coming from a first-timer here is to try to be consistent, but don't try to be a perfectionist. It's going to have some irregularities, so just go with the flow and try to tame that inner-perfectionist.
Things I Wished I Would Have Done Better
As you know, I’m not perfect…not even close. LOL. So this is just a little reminder to have grace with yourself, especially if you’re trying a new technique.
So a couple of the things that went wrong in this project is that on the top larger surface, I freaked out a bit in getting the paint on the top without it drying on me, so I moved a little too quickly and didn’t get an even finish. It was pretty streaky. Next time, I’ll take my time a bit more.
Secondly, when I thought I was done, I (for some weird reason) thought that one of the drawers looked lighter than the others. So I painted over it and the technique on it again. BIG MISTAKE. LOL. It looked so much darker after and I actually had to strip that drawer completely and start over. Oops. Lesson learned because watching it back, it totally looked fine before I started messing with it.

Refinish Hardware
I really love the style of the original hardware because it really matches the piece well. The finish was failing though, so I went ahead and prepped it to spray paint.
I sanded off the finish, cleaned it up, and used my Krylon Fusion Metallic Gold spray paint to refinish the hardware.

Once they were dry, I installed them back on the piece and included all new screws.
Whitewash Base
The end is almost near! After I removed the tape from the base, I realized I wanted a less orangey look to the natural wood. So I decided to give it a good whitewash.
I grabbed my Country Chic in the color Pop The Bubbly and watered it down to create my whitewash. This is a really easy technique, and it turned out great on this base.
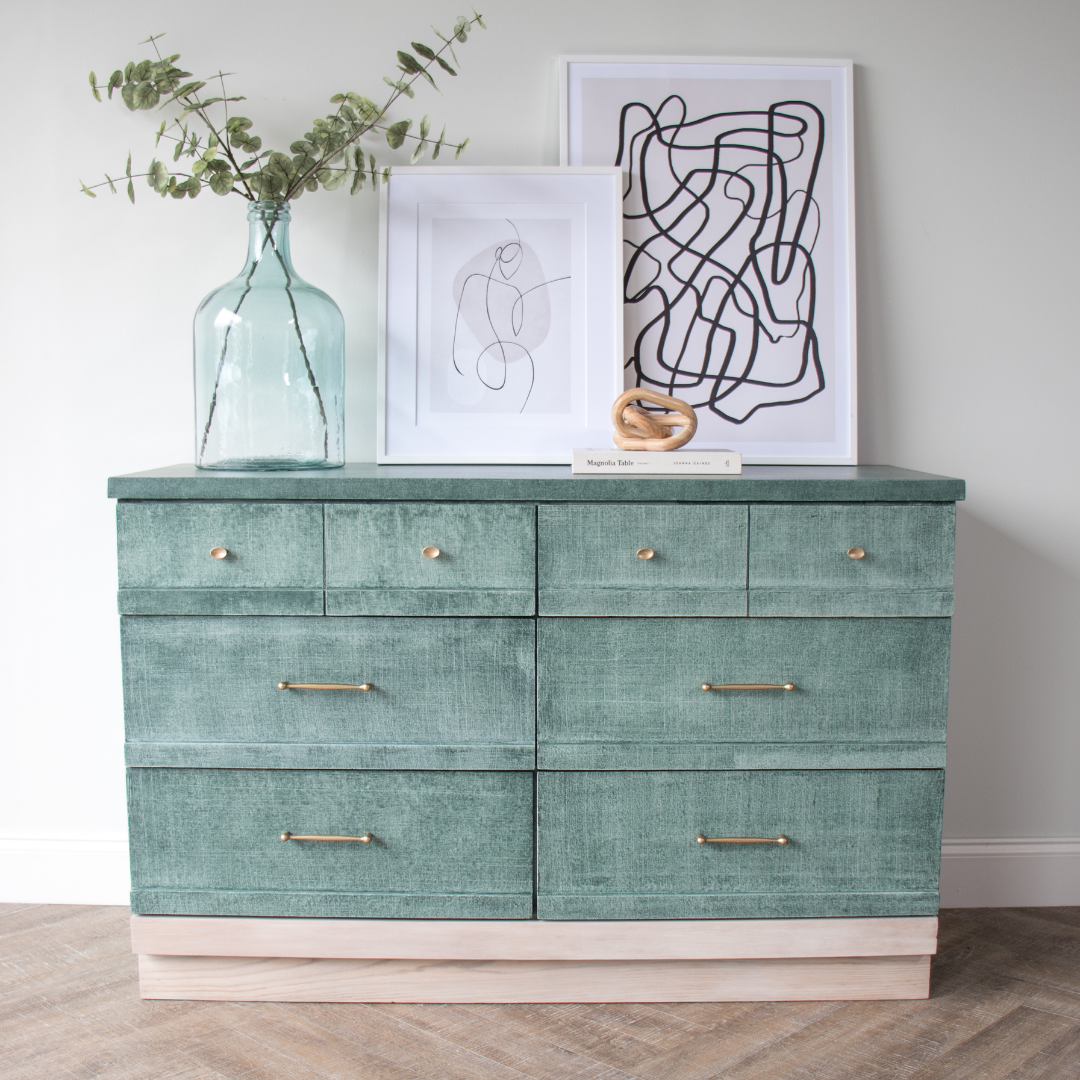
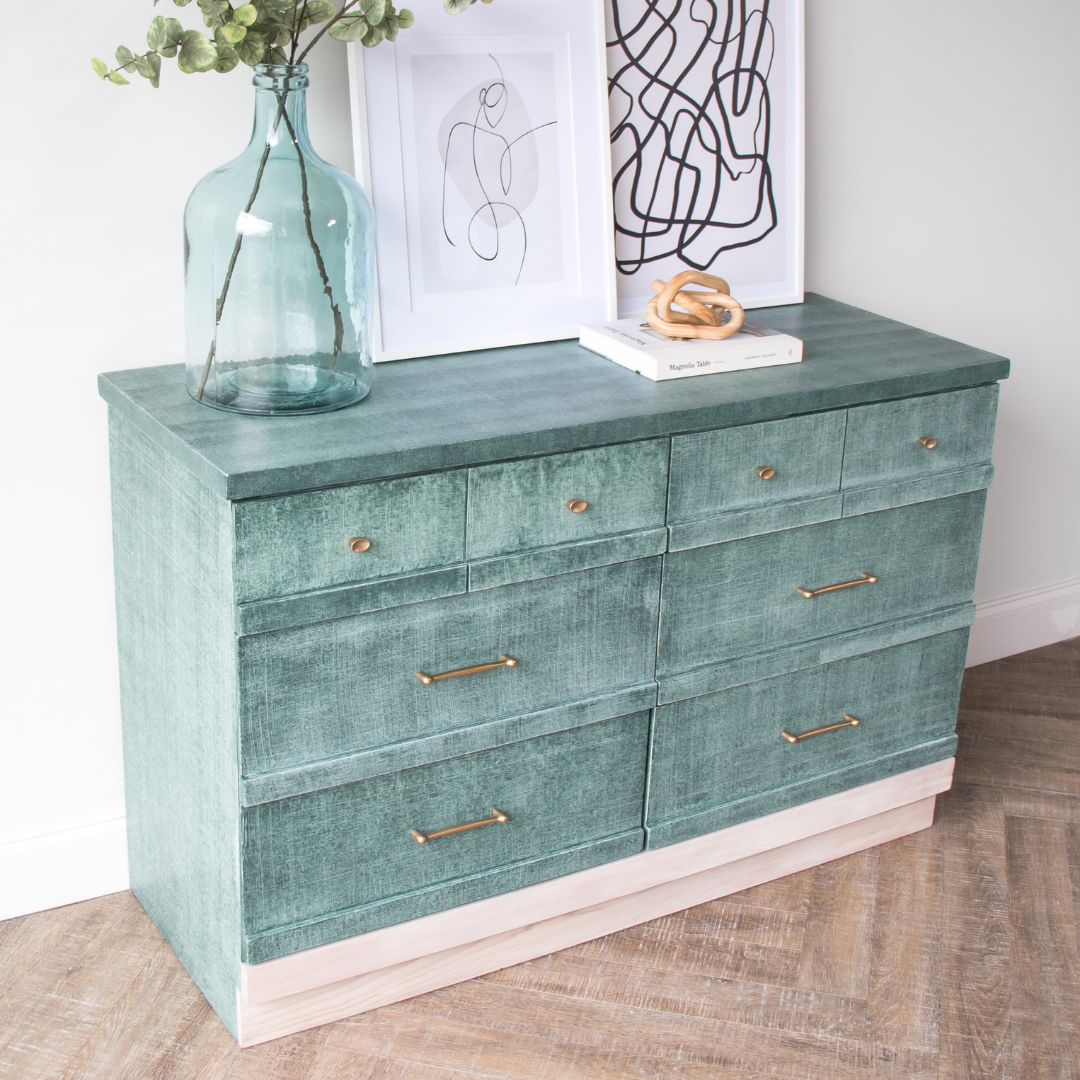
Faux Linen Makeover Reveal
So much fun you guys! I just love trying new techniques, and this texture challenge was the perfect way to step out of my comfort zone and have some fun. Another special thanks to Courtney and her faux linen tutorial that helped me accomplish this piece.
So here it is friends! Let me know in the comments what you think. And remember, if you want to see a detailed tutorial on this piece, you can always check it out on my YouTube channel.
Until next time!