Safe Paint Stripper for Wood: The Real Milk Paint Co Makeover
Disclosure: This blog contains affiliate links. I will receive a commission for items purchased through these links at no extra cost to you. I appreciate your support. Please read all labels and follow all manufacturer safety recommendations when working with paints, stains, and other equipment.
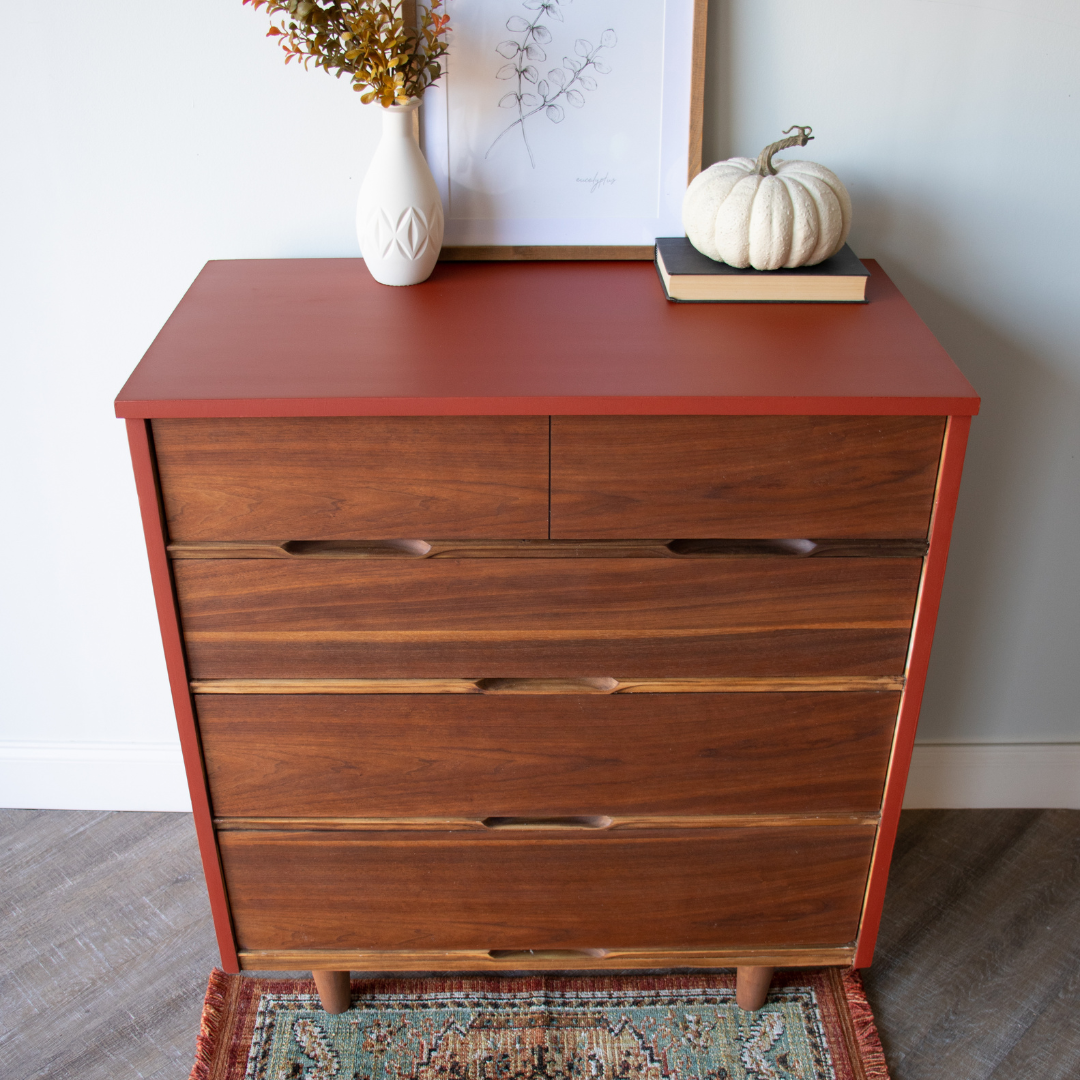
It’s always fun when I get to a true trash-to-treasure project. This Mid-Century Modern piece is in pretty bad shape, but I’m going to get it some new life today! And bonus, I’ll be using a safe paint stripper for wood in this project to get the horrible latex paint off this beautiful piece.
Not only that, but I’ll be using mostly Real Milk Paint Co. products today including the paint stripper, milk paint, and hemp oil seal. I love The Real Milk Paint Co. because their products are safe, environmentally friendly, and perform well!
I can’t wait to show you how this MCM piece turns out, but first, you have to take a look at what we are starting with.

Products Used for this Safe Paint Stripper Project
*Use CHRISTINA10 for 10% off*
Soy Gel Professional Paint Stripper
Real Milk Paint Co Milk Paint Terra Cotta
Real Milk Paint Company Hemp Oil
Best of Zibra Paintbrush Kit *Use CHRISTINA10 for 10% off*
Water Based Gel Stain (Tennessee Whiskey) **Use code PRETTYDISTRESSED10 for 10% off
Safe Paint Stripper for Wood

As I said, the latex paint on this piece is pretty bad, so I want to strip it off as much as possible before I can do cleaning and sanding.
I love finding products that are safer for me and the environment, so I’m using a soy-based safe paint stripper. It doesn’t have that burning effect on your skin, and from my past experience with it, it works really well.

To use this safe paint stripper, you simply use a paintbrush to generously apply it to the paint. I found that it works best if you can let it sit on the surface of the paint, so I did one side/area at a time so that I could flip the furniture piece on its side.
I also love that this substance doesn’t dry out quickly, so I didn’t have to wrap it up in saran wrap in between my waiting periods.
This paint stripper worked wonderfully! So onto the next step.

Sanding Natural Wood on Drawers
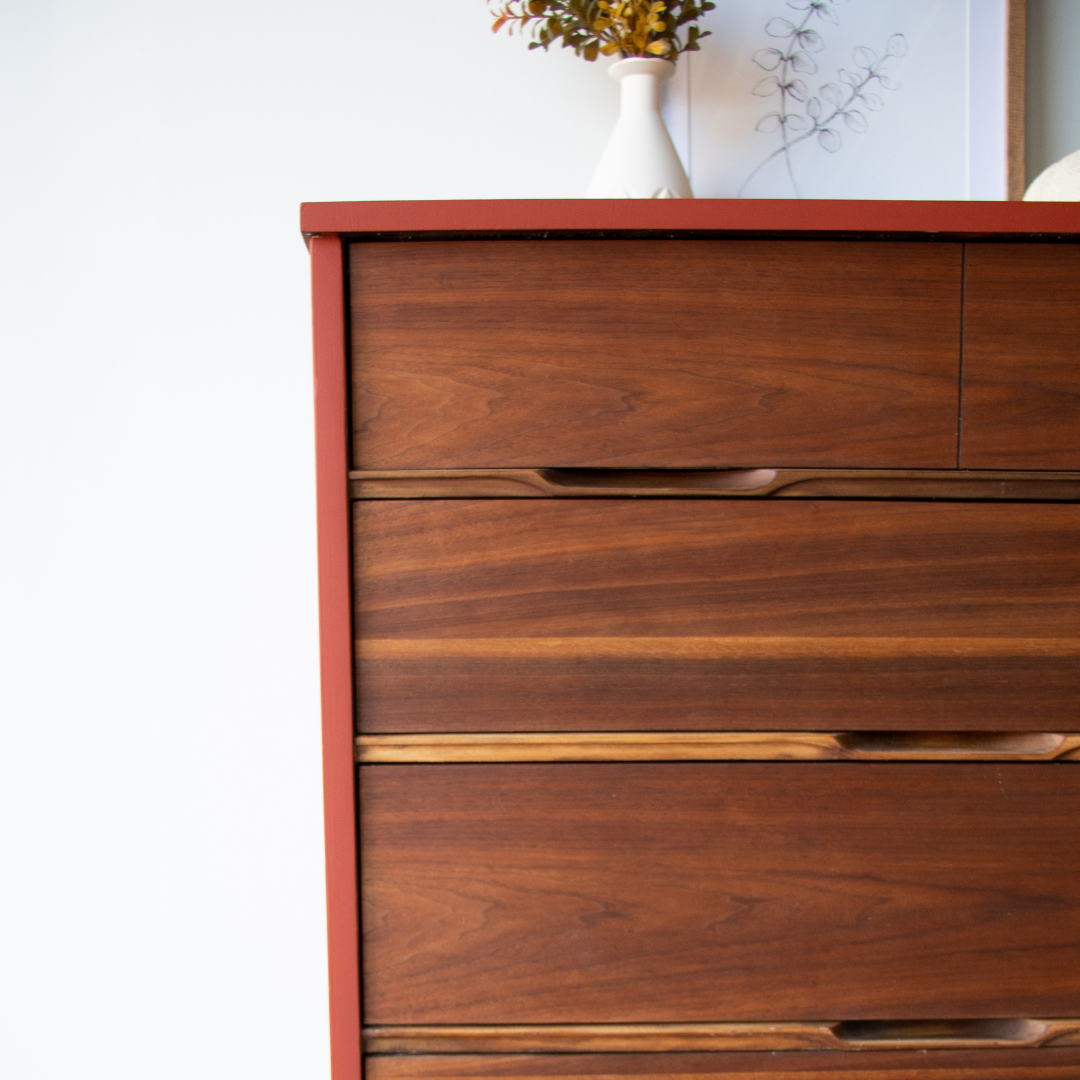
As I was stripping the paint, I was able to determine that most of this piece was real wood. But there was a lot of variation in the frame, and I knew that the top surface was fake wood. So I decided that I would be stripping back the veneer on the drawers and front side of the dresser and painting the frame with my Real Milk Paint.
Clean with Simple Green
A couple of the drawers didn’t have the latex paint on them, so I wanted to make sure to give them a good cleaning. I used Simple Green to clean it off and then rinsed with some water.

Remove varnish to get to natural wood
I couldn’t wait to get down to the natural wood on the drawers because I knew that they wouldn’t disappoint. I started with a 60 grit sandpaper to ge

Repair
Most of the pieces I get have some element of repair needed, and this piece was no different. There were quite a bit of gouges and dings, so I used two different products for my repairs. I have an all-purpose putty for the big gouges and plastic wood for the little nicks and dings.

IMPORTANT NOTE: I know you see me using the color-changing filler a lot. I love using that because it’s nice to know that it’s ready to be sanded. But you can’t use this with milk paint! I learned this the hard way. The lime in the paint will react with the color-changing putty and the purple/pinkish color will surface.
More about Real Milk Paint

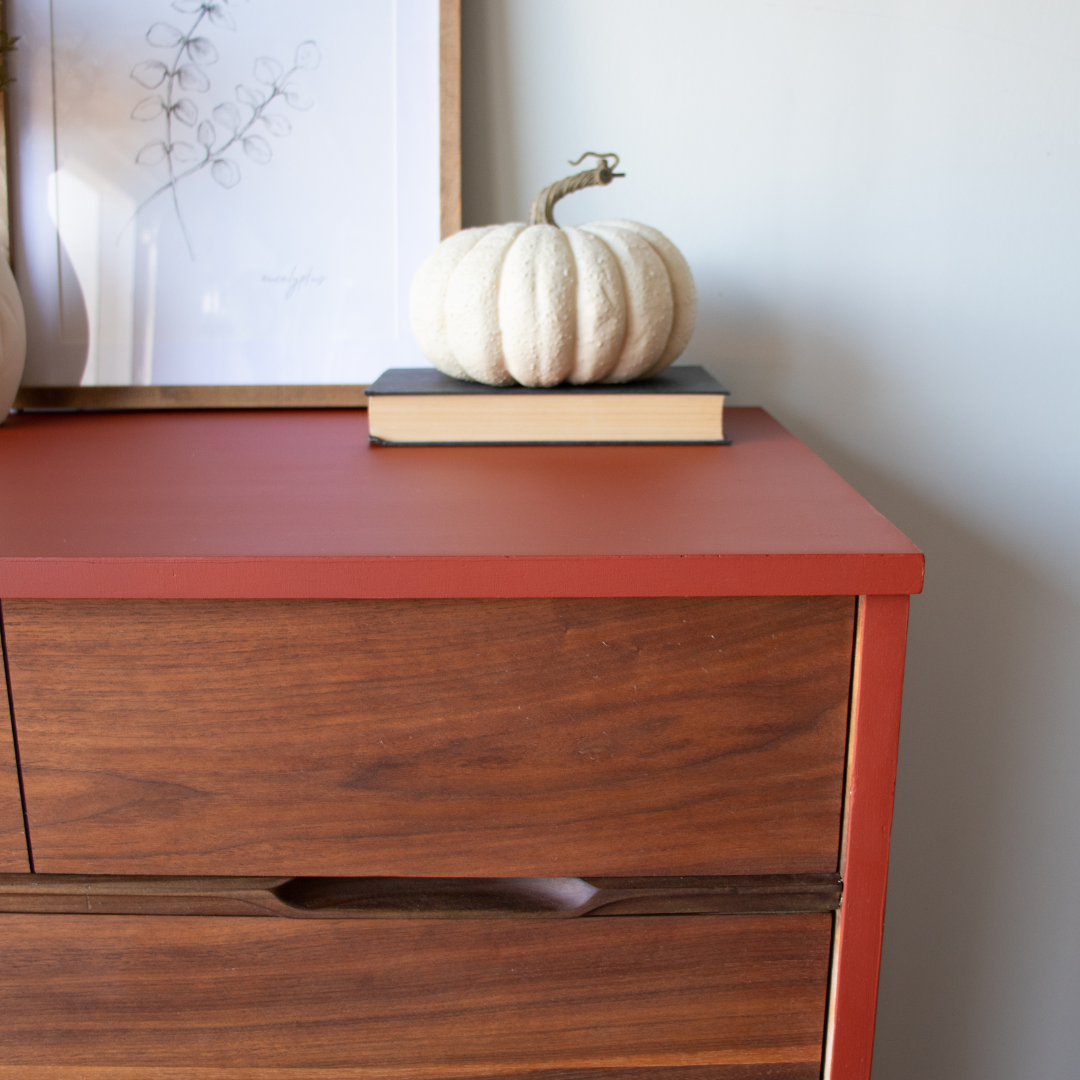
You’ve seen me use Real Milk Paint Co. before, and I really love how unique this paint company is. I’ve picked a really fall rust color called Terra Cotta, and I’m so excited to see how it turns out paired with the natural MCM wood.
Real Milk Paint comes as a powder that you mix yourself. You will use 1 part powder to one part water. It comes with a marble that you toss in and mix it up for a good 5 minutes. You’ll let it set for about 30 minutes to let all of the pigments incorporate.
I love that this paint is 100% organic and only has 4 ingredients! It’s non-toxic, food safe, and even biodegradable!

Paint Frame with Milk Paint
It’s almost time to paint! I just have one quick step to do to make sure that my paint is going to adhere really well to my laminate top surface. I scuff sanded the top a bit to prep for my milk paint.
And now I’m ready to get this beautiful Terra Cotta paint on the frame.

Paint with Real Milk Paint
Now that my mixed paint has set for 30 minutes, I’m going to add a couple of additives. The first is an Anti Foam Agent. Foam will build up in the paint as you are mixing it, so adding a couple of drops of the anti-foaming agent will help make your paint smooth again.
And because my top is laminate, I’m also adding some Ultra Bond as well. This is going to help my paint adhere and prevent chipping and flaking down the road.

Now that those are added, I’m ready to get this paint on. This paint is MADE FOR painting on raw wood, so I knew it was going to look gorgeous. As I start painting, it was exactly as I expected. Beautiful, smooth, and rich!
This color is really fun and bold, and it’s a bit different from my usual look, but I’m really loving it! The paint is definitely drying a lot darker than it looked in the paint can so be aware of that.
Milk paint dries super fast, so after 30 minutes I was already ready to put the 2nd coat on it.
Touch up Wood & Stain Feet
The paint is on the frame, and it’s looking lovely. I have a couple of touch-up items before moving on to sealing this piece.
Upon removing the paint from the feet, I noticed it was not original to the piece. So I used some Water Based Gel Stain to make it match the natural wood on the rest of the dresser.

Also, I was lucky because only one of the drawers had some chipped veneer. I repaired it with wood filler but you can see the difference. So I used a bit of that same water-based stain and a small artist brush to touch up those little areas.
Seal with Real Milk Paint Hemp Oil
Alright! My paint is dry, so I’m ready to seal. Today I’m using a Hemp Oil seal from The Real Milk Paint Co. This seal is going t seep into the porous surface and give it a beautiful sheen finish.
To apply this seal, you’ll get a lint-free cloth and rub it on the surface. Make sure to apply generously. It will absorb into the wood like a sponge absorbs water. Once it can’t absorb any more, the oil will pull to the surface. So after you have finished applying, wait 45 minutes and wipe those areas with a clean cloth.

Safe Paint Stripper Reveal
I am obsessed with the way this makeover turned out. The hemp oil really deepened the color of the natural wood, and it looks incredible with the Terra Cotta color. Take a look at this amazing reveal! And remember, you can also go to my YouTube channel to see the details of this makeover and how it all came together.